Server configuration#
架设一个主节点需要对Linux和区块链技术有基本的理解,并且需要能够严格遵循指令。主节点也需要定期的维护和谨慎的安全部署,特别是当您没有把您的达世币存储在硬件钱包上的时候。在此过程中,需要做出一些选择,并采取可选的额外步骤来提高安全性。
Commercial masternode hosting services are available if you prefer to delegate day-to-day operation of your masternode to a professional operator. When using these hosting services, you retain full control of the masternode collateral and pay an agreed percentage of your reward to the operator.
设置您的VPS#
A VPS, more commonly known as a cloud server, is fully functional installation of an operating system (usually Linux) operating within a virtual machine. The virtual machine allows the VPS provider to run multiple systems on one physical server, making it more efficient and much cheaper than having a single operating system running on the “bare metal” of each server.
A VPS is ideal for hosting a Dash masternode because they typically offer guaranteed uptime, redundancy in the case of hardware failure and a static IP address that is required to ensure you remain in the masternode payment queue. While running a masternode from home on a desktop computer is technically possible, it will most likely not work reliably because most ISPs allocate dynamic IP addresses to home users.
Before beginning, take a few minutes to review the masternode hardware requirements which may help you decide which VPS provider best suits your needs. We will use Vultr hosting as an example of a VPS, although DigitalOcean, Amazon EC2, Google Cloud, Choopa and OVH are also popular choices. First create an account and add credit. Then go to the Servers menu item on the left and click + to add a new server. Select a location for your new server on the following screen:

Vultr服务器位置选择屏幕#
Select Ubuntu 20.04 x64 as the server type. We use this LTS release of Ubuntu instead of the latest version because LTS releases are supported with security updates for 5 years, instead of the usual 9 months.
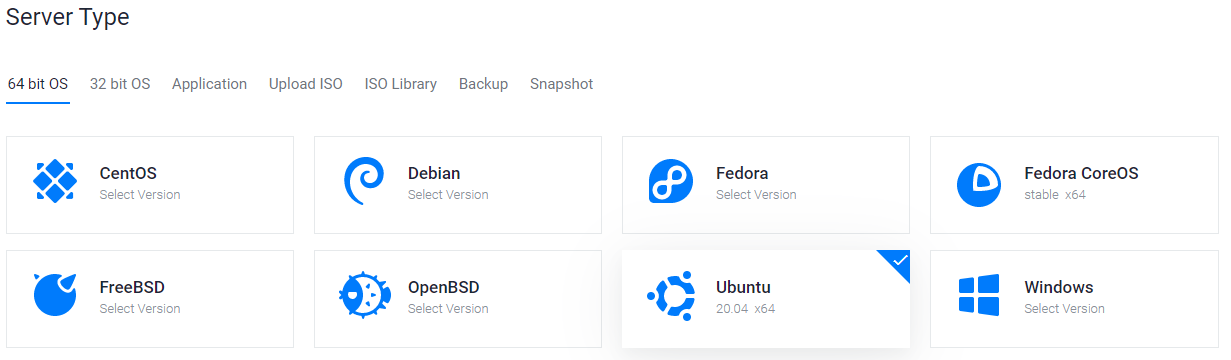
Vultr服务器类型选择屏幕#
选择至少提供2GB内存的服务器。

Vultr服务器大小选择屏幕#
为您的服务器输入主机名和标签。在本例中,我们将使用dashmn1作为主机名。

Vultr服务器主机名和标签选择屏幕#
Vultr现在将安装您的服务器。这个过程可能需要几分钟。

Vultr服务器安装屏幕#
在安装完成后,单击 Manage ,并记下IP地址、用户名和密码。
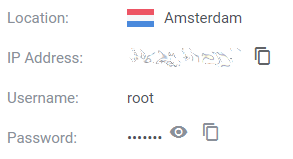
Vultr服务器管理屏幕#
设置您的操作系统#
我们将从连接到您新提供的服务器开始。在Windows上,我们将首先下载一个名为PuTTY的应用程序来连接到服务器。转到PuTTY下载页面并为您的系统选择适当的MSI安装程序。在Mac或Linux上,您可以直接从终端中 -只需键入ssh root@<server_ip> ,然后在提示时输入密码。
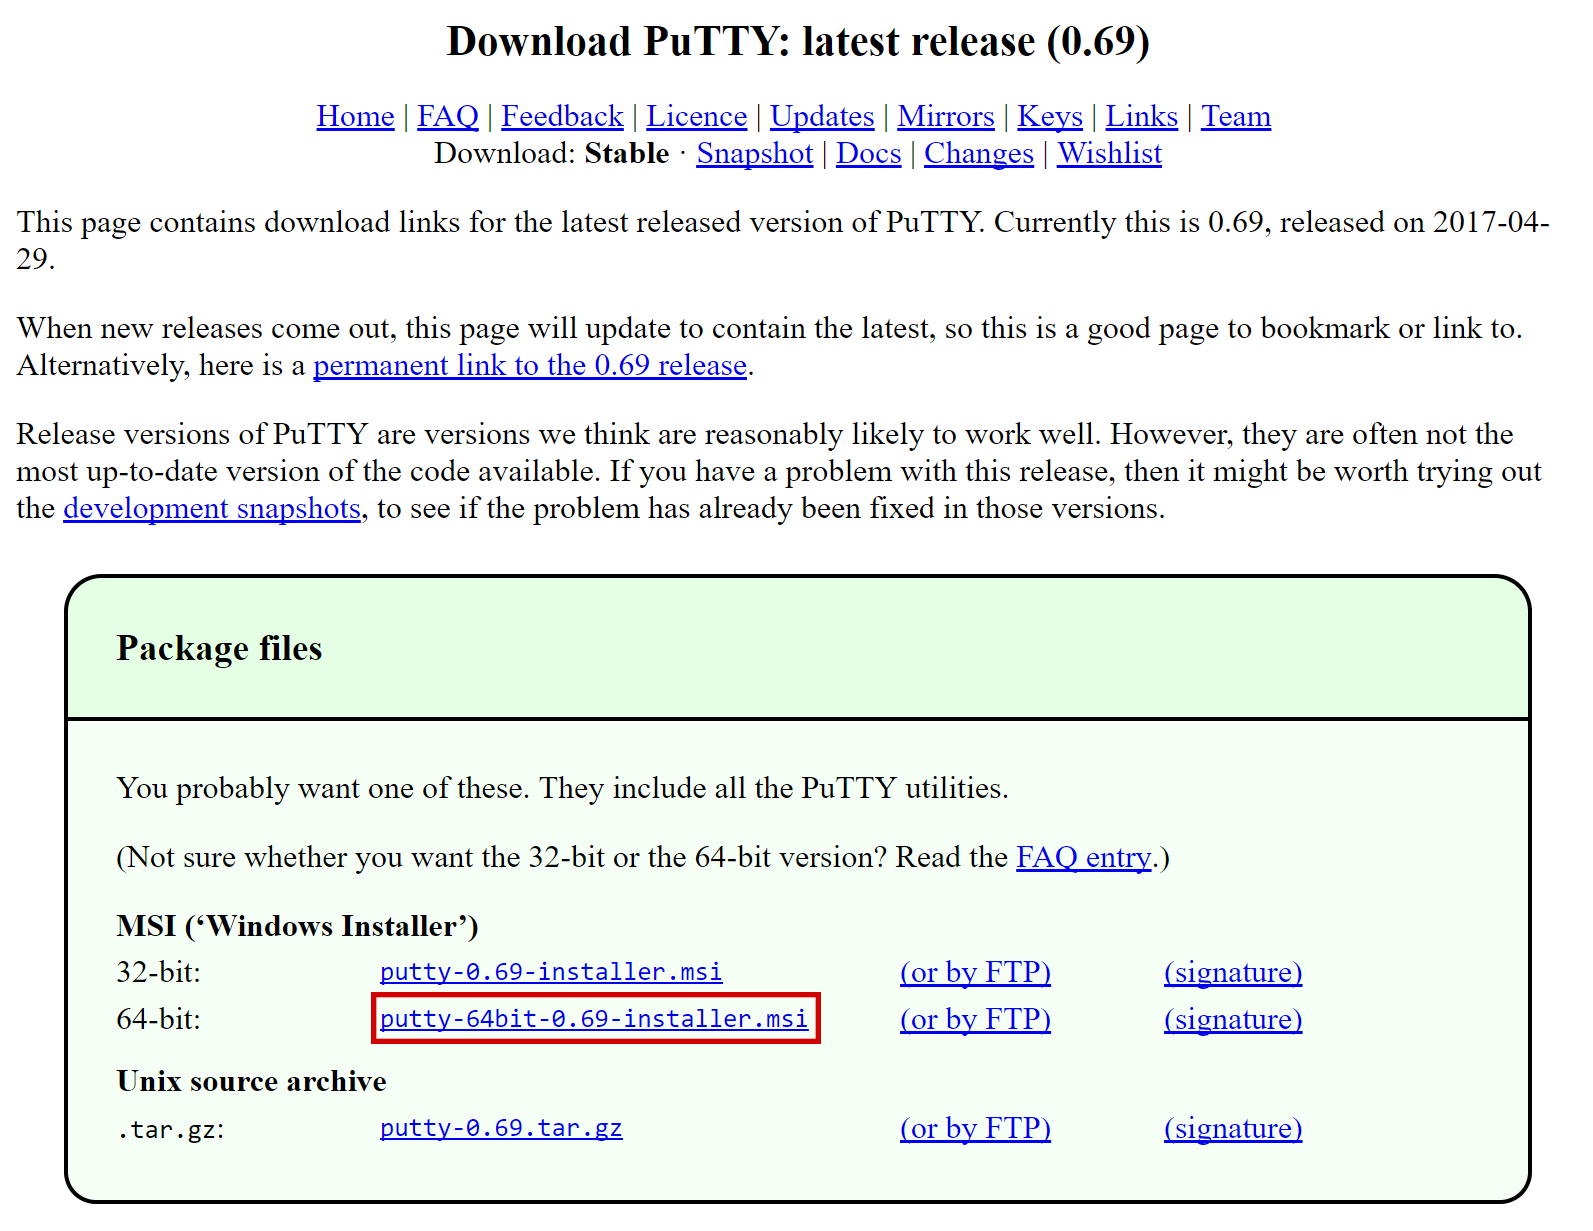
PuTTY下载页面#
双击下载的文件安装PuTTY,然后从您的开始菜单中运行该应用程序。在主机名字段中输入服务器的IP地址,然后单击打开。您可能会看到证书警告,因为这是您第一次连接到此服务器。之后您可以安全地单击是来信任服务器。
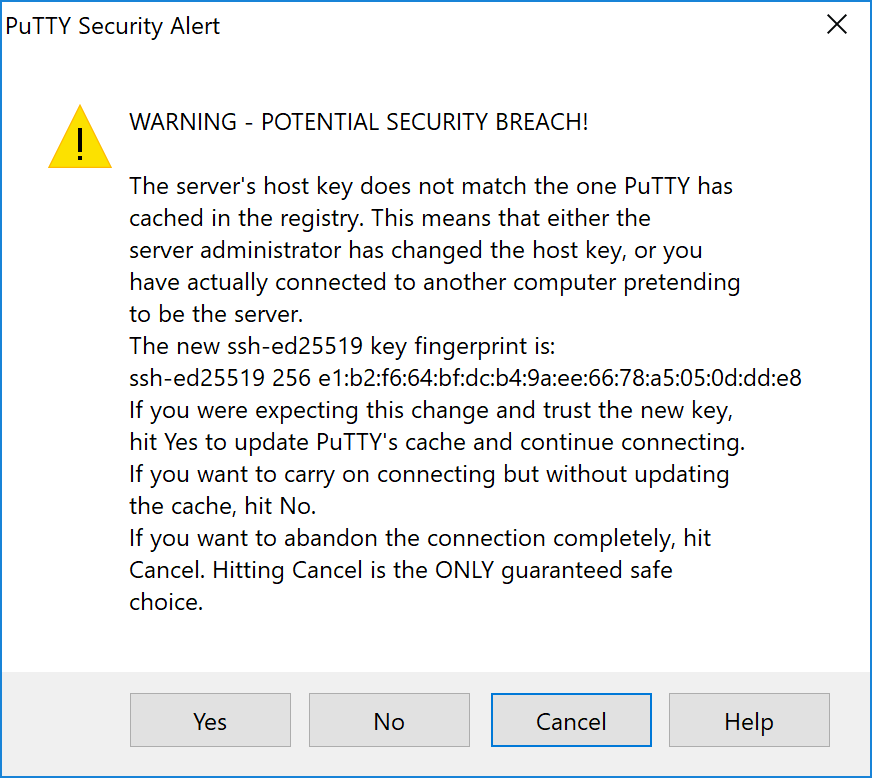
连接到新服务器时的PuTTY安全警告#
您现在已连接到您的服务器,并且应该会看到一个终端窗口。 首先,使用您的主机提供商提供的用户root和密码登录到您的服务器。

第一次连接到您的VPS时会遇到密码问题#
Set up users#
为了确保安全,您应该立即更改root密码,并将其存储在安全的地方。您可以复制和粘贴以下任何命令,方法是在您的浏览器中选择这些命令,按下Ctrl + C,然后切换到PuTTY窗口,并在窗口中右键单击。文本将粘贴在当前光标位置:
passwd root
输入并确认一个新密码(最好是长的和随机生成的)。接下来,我们将使用以下命令,将<username>替换为您喜欢的用户名来创建一个新用户:
adduser <username>
您将被提示输入密码。输入并确认使用新密码(与您的root密码不同),并将其存储在安全的地方。您还将看到有关用户信息的提示,但可以将其保留为空白。一旦创建了用户,我们将把它们添加到sudo组中,这样它们就能以root用户的身份执行命令:
usermod -aG sudo <username>
Update the system#
现在,在仍是root用户时,我们将从Ubuntu软件包存储库更新系统:
apt update
apt upgrade
The system will show a list of upgradable packages. Press Y and Enter to install the packages.
Configure the firewall#
We will now install a firewall (and some other packages we will use later):
apt install ufw python virtualenv git unzip pv
(按Y和Enter以确认)
Choose the appropriate firewall configuration below based on which network your masternode will support:
ufw allow ssh/tcp
ufw limit ssh/tcp
ufw allow 9999/tcp
ufw logging on
ufw enable
ufw allow ssh/tcp
ufw limit ssh/tcp
ufw allow 19999/tcp
ufw allow 26656/tcp
ufw allow 3000/tcp
ufw logging on
ufw enable
(按Y和Enter以确认)
Enable swap#
Next, we add will add swap memory, enable it, and set it to be enabled on subsequent reboots:
fallocate -l 4G /swapfile
chmod 600 /swapfile
mkswap /swapfile
swapon /swapfile
nano /etc/fstab
在文件末尾添加以下行(按tab键来分隔每个单词/数字),然后按Ctrl + X来关闭编辑器,再按Y和Enter保存该文件。
/swapfile none swap sw 0 0
Restrict remote access#
Finally, in order to prevent brute force password hacking attacks, we will install fail2ban and disable root login over ssh. These steps are optional, but highly recommended. Start with fail2ban:
apt install fail2ban
Create a new configuration file:
nano /etc/fail2ban/jail.local
And paste in the following configuration:
[sshd]
enabled = true
port = 22
filter = sshd
logpath = /var/log/auth.log
maxretry = 3
Then press Ctrl + X to close the editor, then Y and Enter save the file. Restart and enable the fail2ban service:
systemctl restart fail2ban
systemctl enable fail2ban
Next, open the SSH configuration file to disable root login over SSH:
nano /etc/ssh/sshd_config
Locate the line that reads PermitRootLogin yes and set it to
PermitRootLogin no. Directly below this, add a line which reads AllowUsers
<username>, replacing <username> with the username you selected above.
Then press Ctrl + X to close the editor, then Y and Enter save the
file.
Optionally install or update AppArmor (try this step if you are having problems related to AppArmor):
sudo apt install apparmor
Reboot#
Now, reboot the server to apply any necessary kernel updates:
reboot now
Your SSH client (e.g. PuTTY) will disconnect when the server reboots.
备注
While this setup includes basic steps to protect your server against attacks, much more can be done. In particular, authenticating with a public key instead of a username/password combination. Enabling automatic security updates is advisable. More tips are available here.