Bắt đầu
Dash welcomes new merchants and supports integration through a standardised onboarding process. It's easy to begin accepting payments in Dash and enjoy the following benefits:
- Settlement within seconds and clearance within minutes
- Ability to accept payments from any market around the world
- Irreversible transactions to prevent fraud
- Advanced privacy for both customers and merchants
- Lowest fees in the industry
A three-part course on why Dash is a popular choice for payments and how integration takes place is available in English and Spanish on DashAcademy.com. To get started with an integration in your sales system, simply select an online or point of sale payment solution from the lists below. If you are unsure, GoCoin is a popular choice due its support for InstantSend, while CoinPayments supports the largest range of online shop software. Anypay is an incredibly simple solution for retail stores, and also supports InstantSend. Larger integrations may require some customisation. This documentation also describes the administrative and technical steps required to integrate various Dash services.
Many major merchants accept Dash - check out Bitrefill or CheapAir for examples of what merchant integration can look like. Once you are up and running accepting Dash, consider adding your business to the directory maintained at Discover Dash for increased visibility.
Payment Processors
This section lists known payment processors supporting Dash and the business platforms they support. Please conduct thorough research before choosing a payment provider to ensure your needs will be met.
Online Stores
Due to the wide range of platforms for online stores, the following table is intended to help you select an appropriate payment processor for your existing store.
| CoinPayments | GoCoin | PayBear | Coingate | CryptoWoo | DashPayments | GoURL | CopPay | MyCryptoCheckout | CDPay | |
|---|---|---|---|---|---|---|---|---|---|---|
| aMember Pro | ✓ | |||||||||
| Arastta | ✓ | |||||||||
| bbPress | ✓ | |||||||||
| Blesta | ✓ | ✓ | ||||||||
| BoxBilling | ✓ | |||||||||
| Drupal Commerce | ✓ | |||||||||
| Easy Digital Downloads | ✓ | ✓ | ✓ | |||||||
| Ecwid | ✓ | |||||||||
| Give (Donations) | ✓ | |||||||||
| Hikashop | ✓ | |||||||||
| Jigoshop | ✓ | |||||||||
| Magento | ✓ | ✓ | ✓ | ✓ | ||||||
| MarketPress | ✓ | |||||||||
| NATS | ✓ | |||||||||
| nopCommerce | ✓ | |||||||||
| OpenCart | ✓ | ✓ | ✓ | ✓ | ✓ | |||||
| osCommerce | ✓ | ✓ | ✓ | |||||||
| PaidMembershipsPro | ✓ | |||||||||
| PrestaShop | ✓ | ✓ | ✓ | ✓ | ||||||
| Shopify | ✓ | |||||||||
| Tomato Cart | ✓ | |||||||||
| Ubercart | ✓ | ✓ | ||||||||
| VirtueMart | ✓ | ✓ | ||||||||
| WHMCS | ✓ | ✓ | ✓ | |||||||
| WooCommerce | ✓ | ✓ | ✓ | ✓ | ✓ | ✓ | ✓ | ✓ | ✓ | |
| WP eCommerce | ✓ | ✓ | ||||||||
| X-Cart | ✓ | |||||||||
| ZenCart | ✓ | ✓ | ✓ |
Point of Sale
A range of Point of Sale systems are available. Many function as an app or simple website serving a checkout interface and QR code generator, while others support custom features such as NFC or a rewards scheme. QR.cr, Spark Payments and Anypay are supported by the community and are particularly widespread.
| Tên | App? | Web interface? | Hardware? | NFC? | Notes |
|---|---|---|---|---|---|
| 34 Bytes | ✓ | Hardware terminal capable of printing receipts. | |||
| Alt36 | Full stack system. Supports integration of suppliers and employees. | ||||
| Anypay | ✓ | Popular solution for smartphones with web interface and backend. | |||
| CDPay | ✓ | ||||
| CoinPayments | ✓ | ✓ | |||
| CopPay | ✓ | ||||
| EletroPay | ✓ | POS device with ePaper display for unique QR codes and built-in receipt printer. | |||
| Festy | ✓ | NFC wristband payments for festivals. | |||
| GB CortexPay | ✓ | Professional hardware terminal with multiple payment options. | |||
| Paytomat | Token rewards for crypto payments. | ||||
| QR.cr | ✓ | ✓ | Cheap solution with many features to use a mobile phone as a POS terminal. | ||
| QuikWallet | ✓ | ✓ | India only. Also supports SMS payment. | ||
| Spark Payments | ✓ | ✓ | Available for Android, Windows, macOS, Linux. 94 exchange rates and Uphold.com supported |
Installation Examples
This section contains worked examples of how to install, configure and process your first payment using the payment processors listed in this documentation.
WooCommerce and GoCoin
If your online store is built on WooCommerce, you can simply install GoCoin as an additional payment gateway and immediately begin accepting Dash. This guide assumes you have already installed Wordpress, installed WooCommerce and created at least one product in your store.
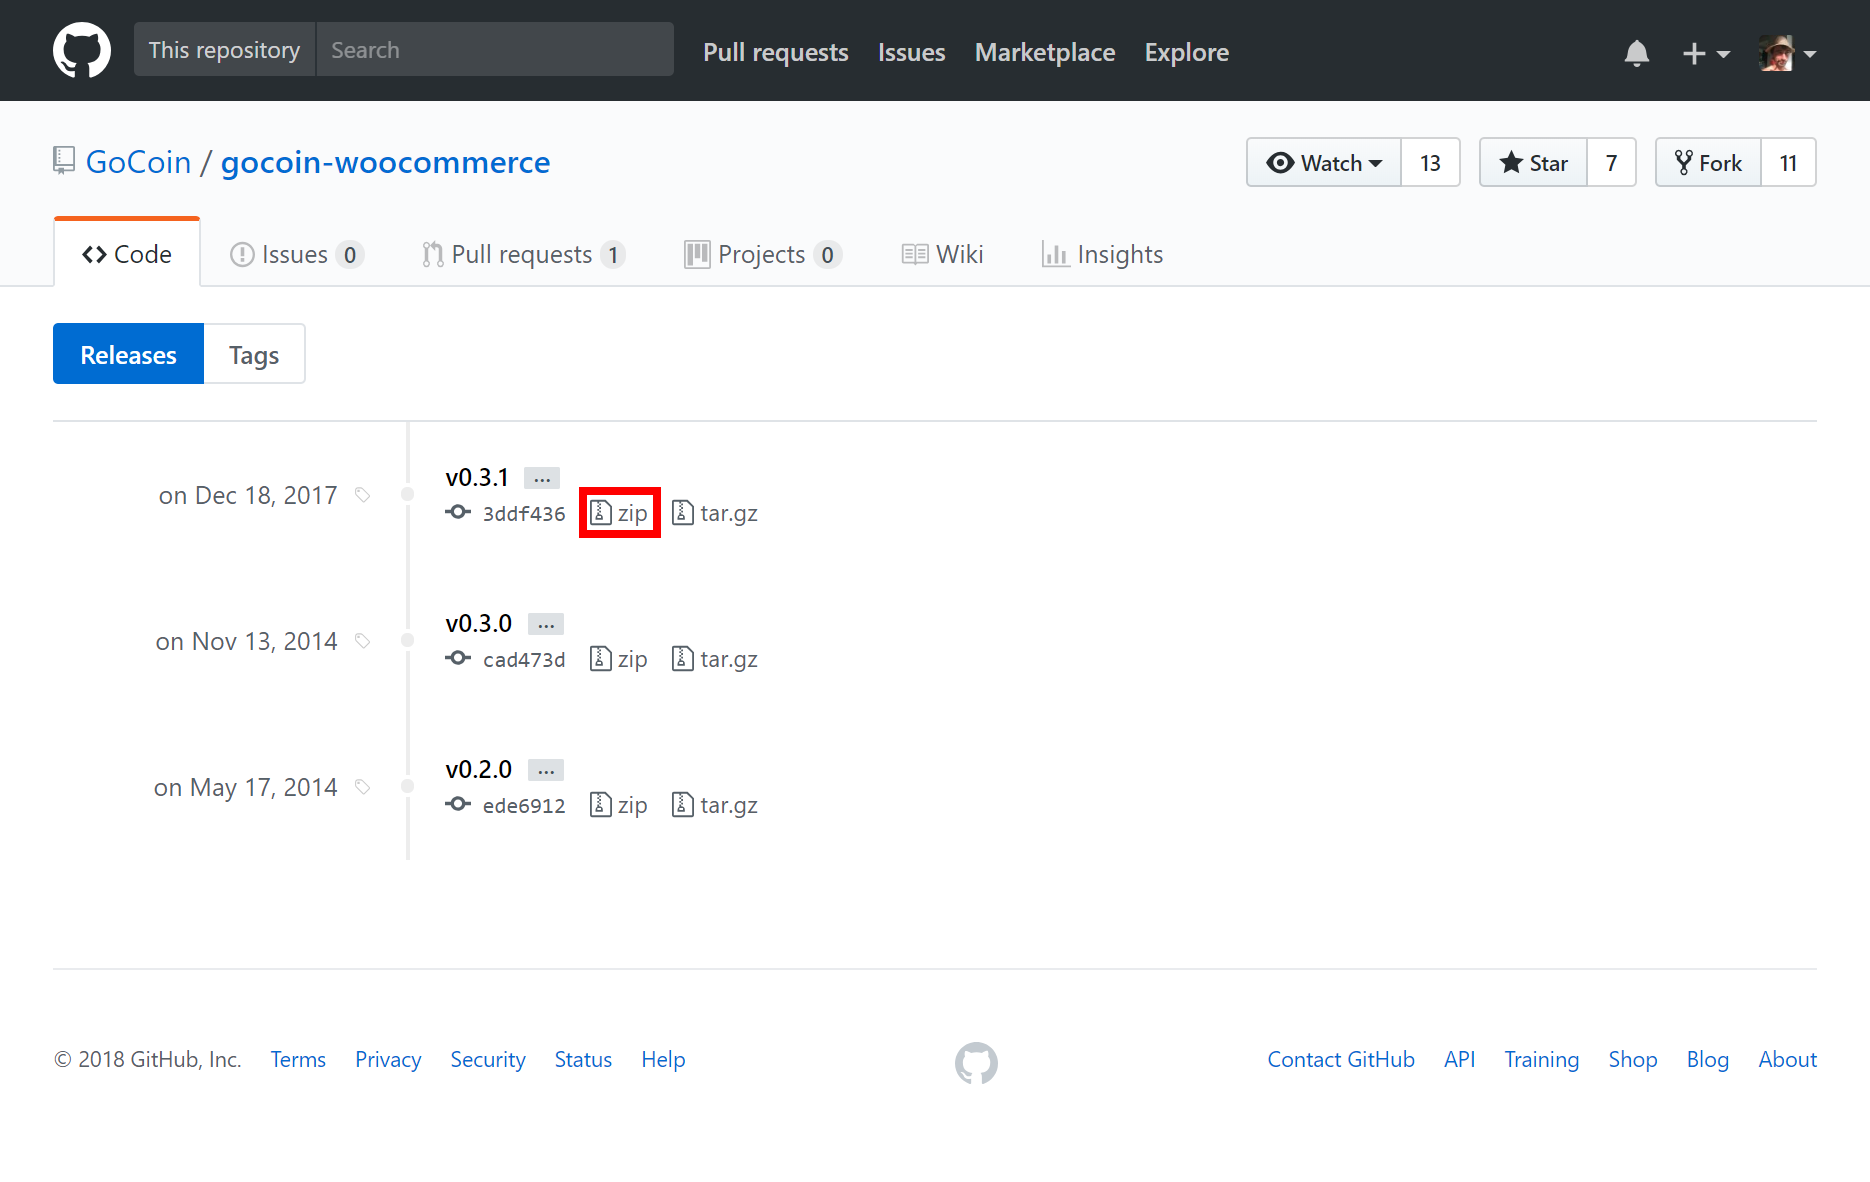
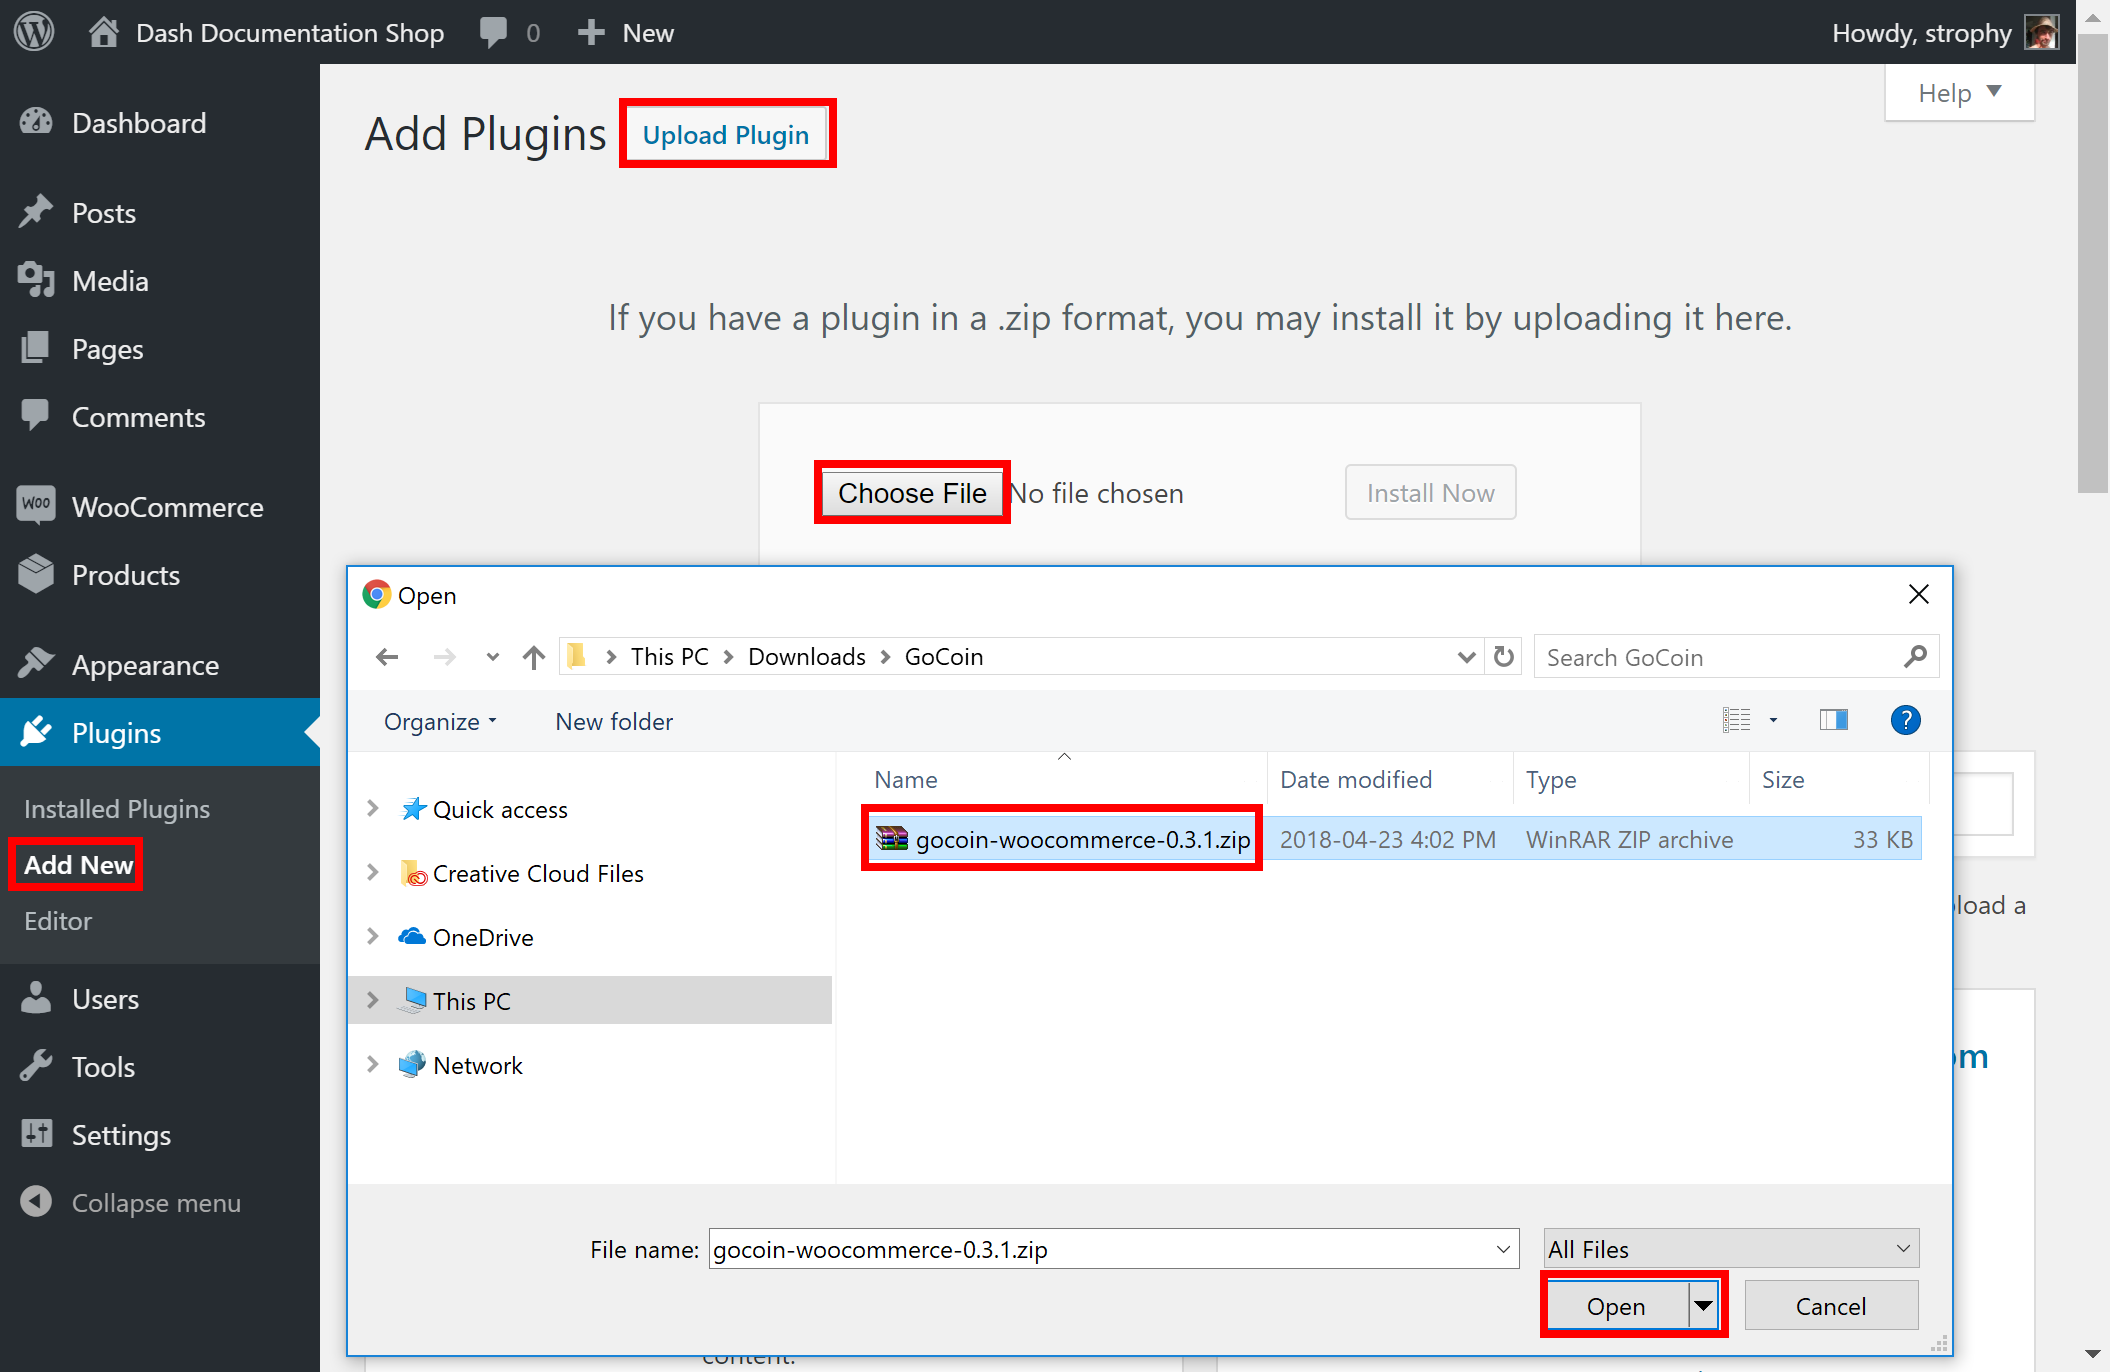
Go to the gocoin-woocommerce GitHub Releases page and download a zip file of the latest version of the plugin, as shown below. In your WordPress administration backend, select Plugins -> Add New and then click Upload Plugin. Click Choose File and select the file you just downloaded, then click Install Now and Activate Plugin.
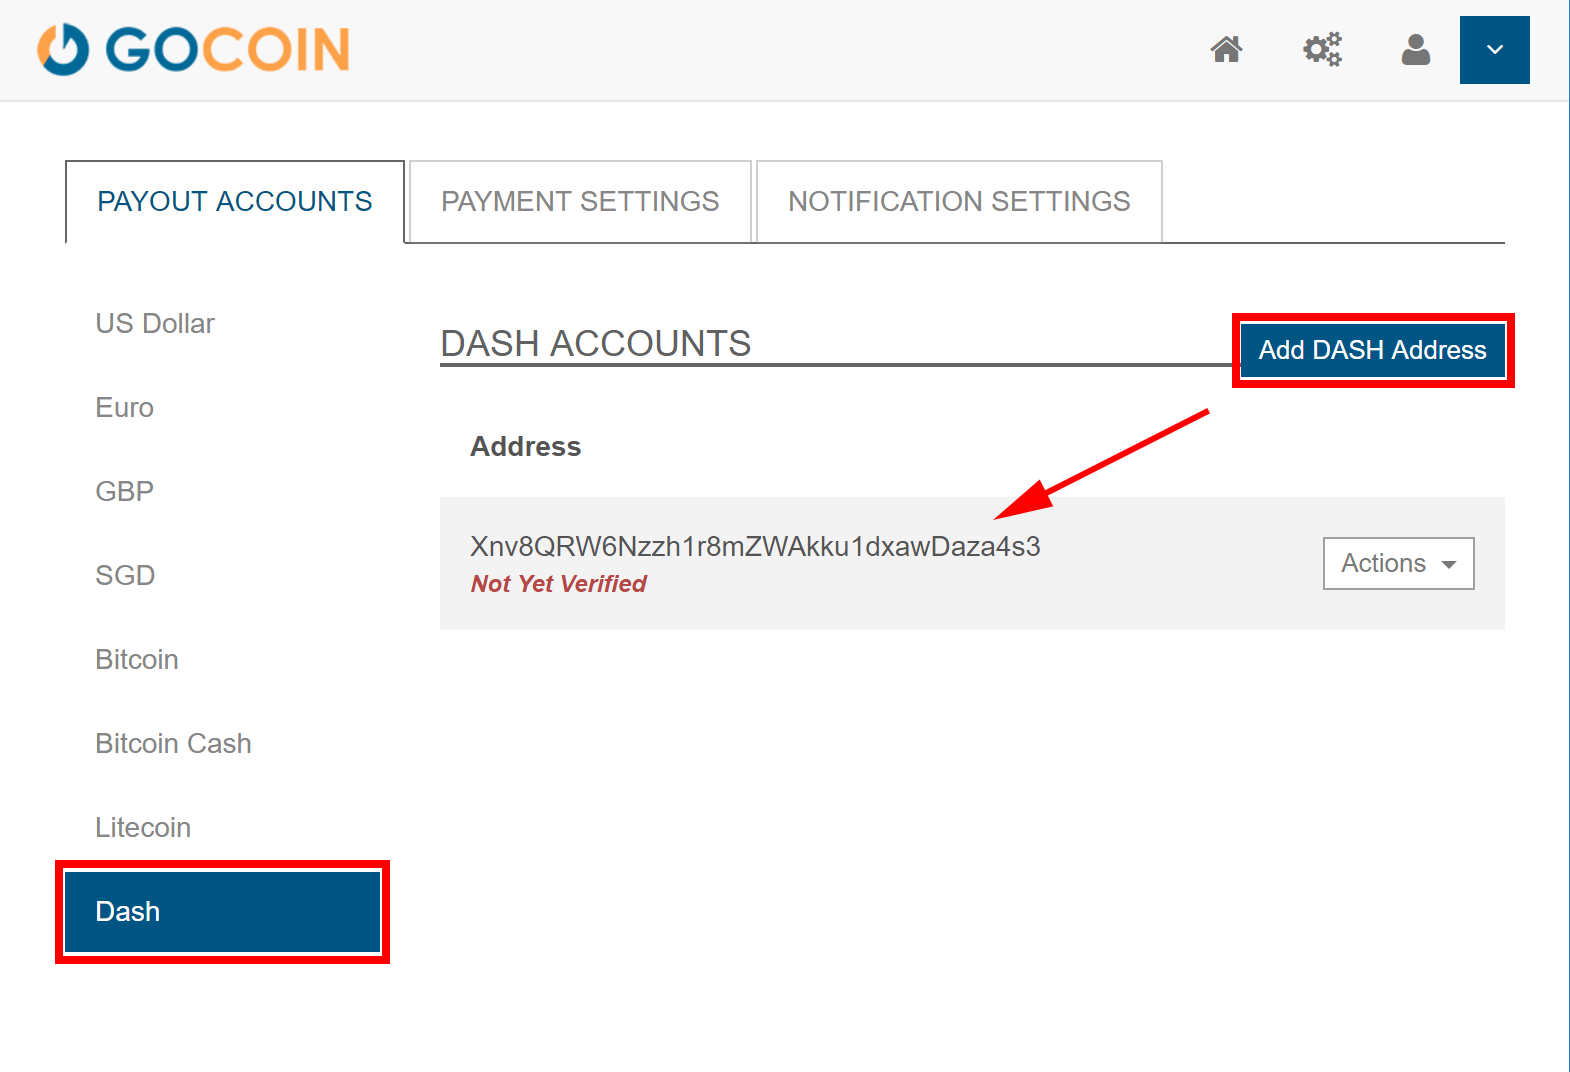
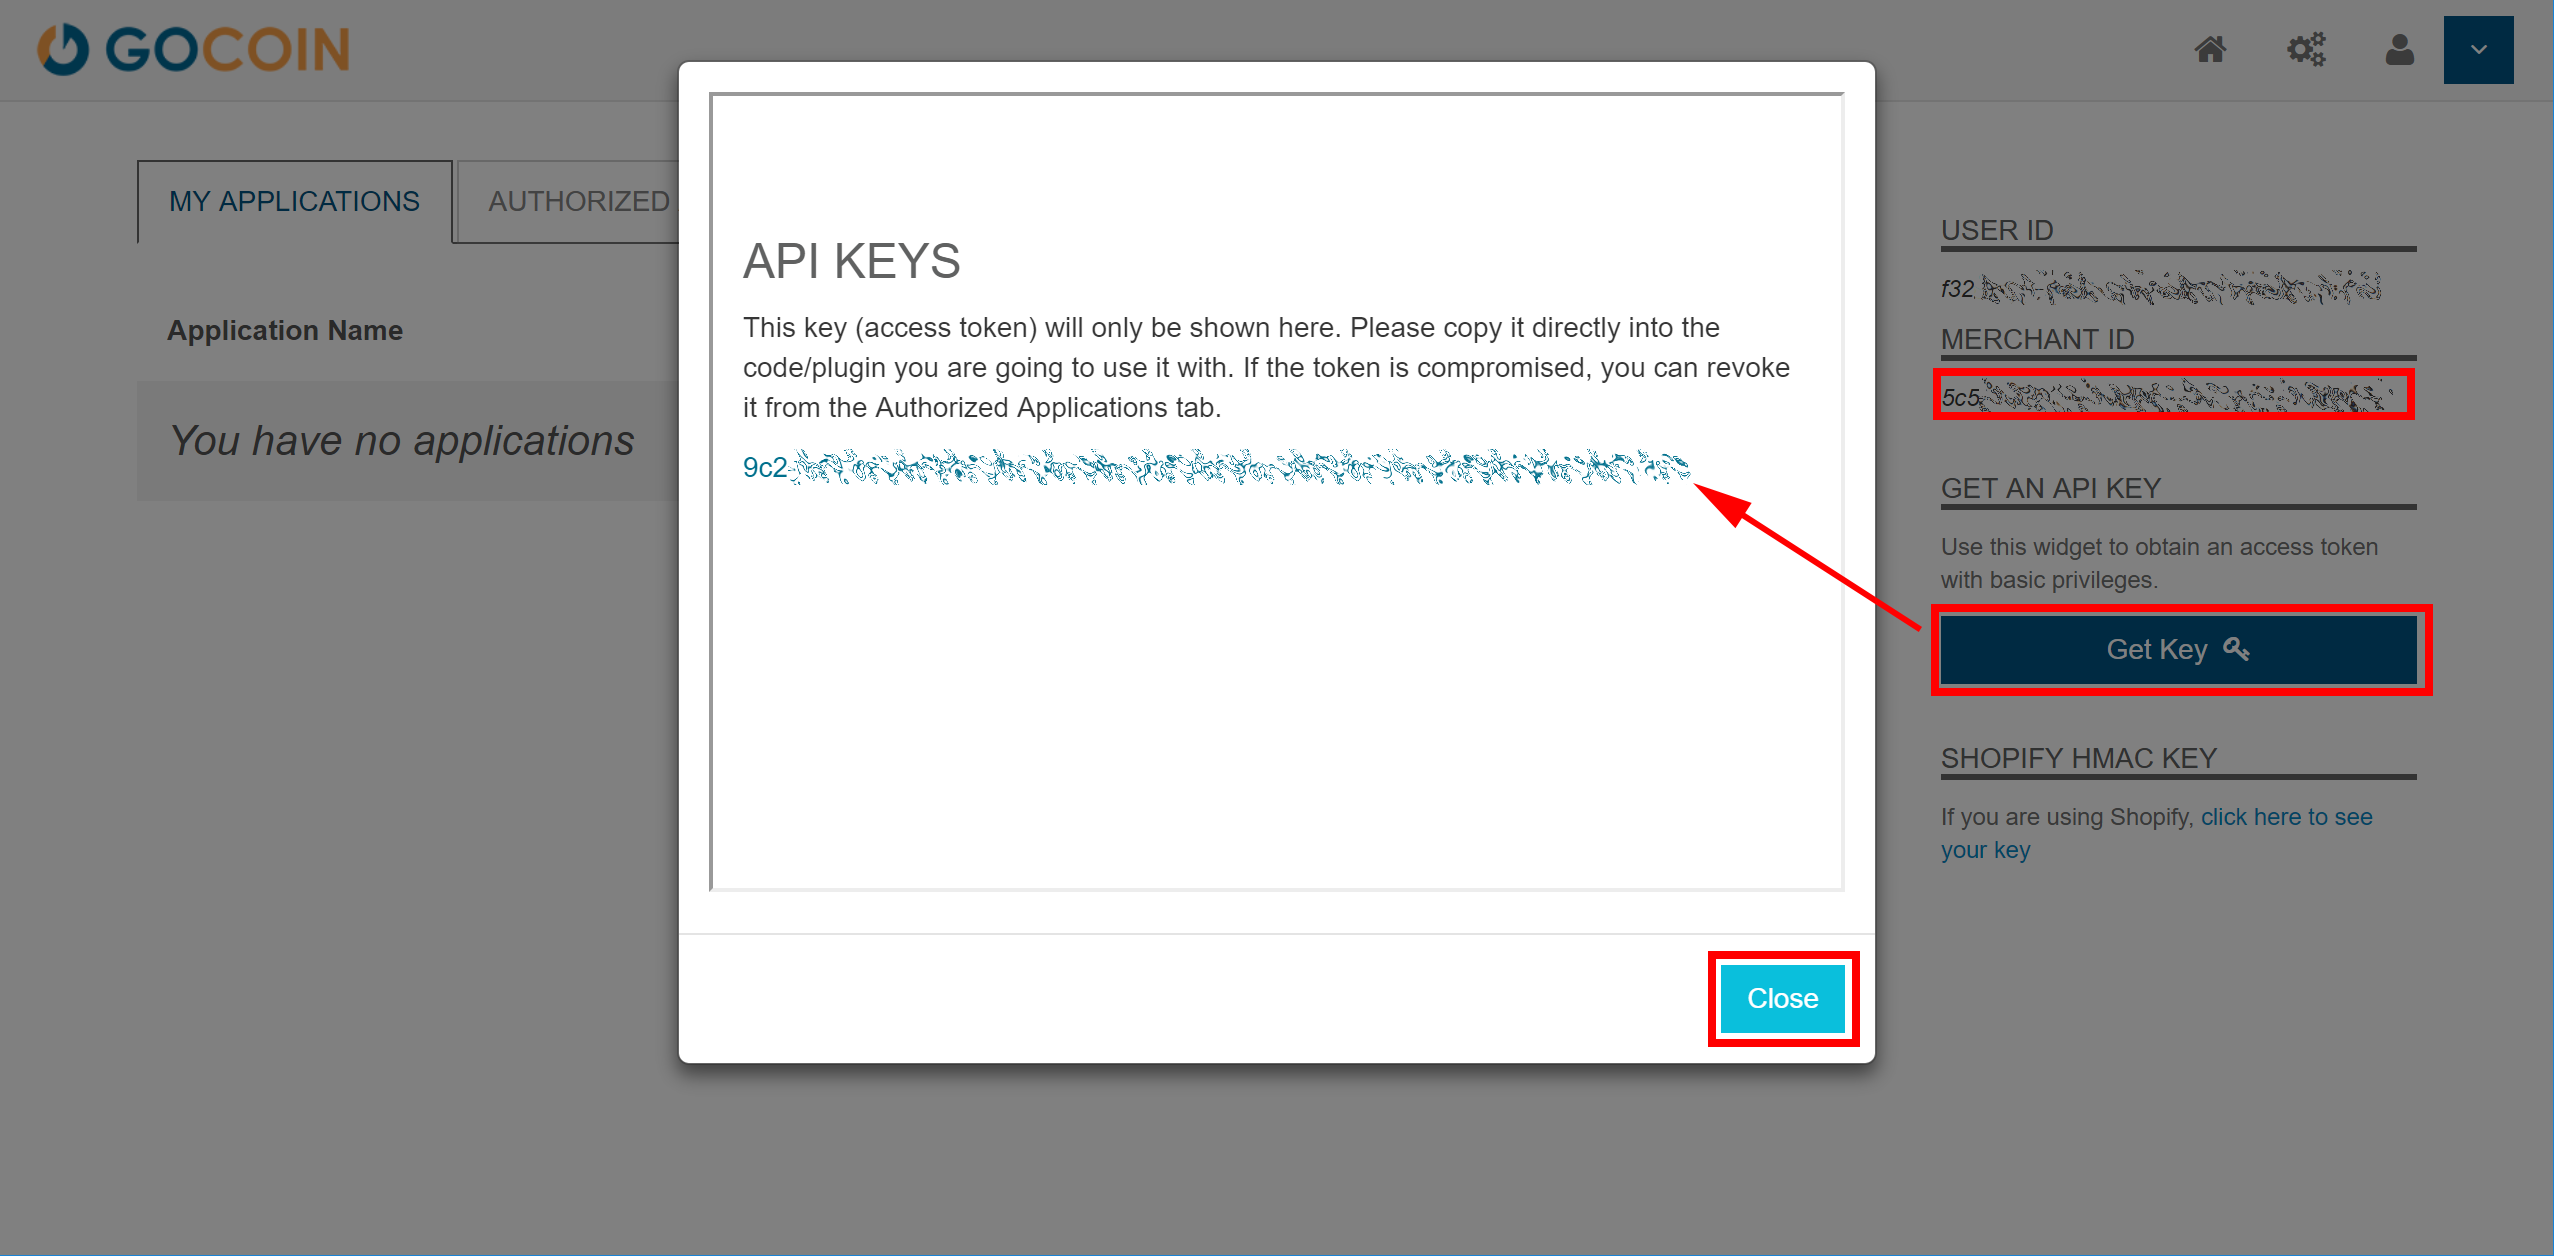
Next, go to the GoCoin merchant sign up page and create an account. Once you are logged in, go to Preferences, select Dash and click Add DASH Address to add a payment withdrawal address. You will receive an email with a link to confirm the address. Next, go to Developers and copy the Merchant ID into a temporary text file. Next, click Get Key to display a valid API key. Copy this key into your temporary text file as well. Finally, you can optionally add a Dash logo to your checkout by Profile section and clicking Logo -> Upload.
Back in the WordPress plugins section, click the Settings button for the WooCommerce plugin and navigate to Checkout -> GoCoin section. Ensure the GoCoin plugin is enabled here, then enter the Merchant ID and API Key in the appropriate fields as shown below, modifying the other fields as necessary. Click Save changes when you are ready.

Your customers will now see an option to pay with Dash when completing the checkout process for an order. The payment will be processed by GoCoin, and you will receive emails detailing each purchase procedure. You can choose how often you want to withdraw your payments, to which Dash address and various other options in the GoCoin administration section. See the GoCoin Documentation for more information.
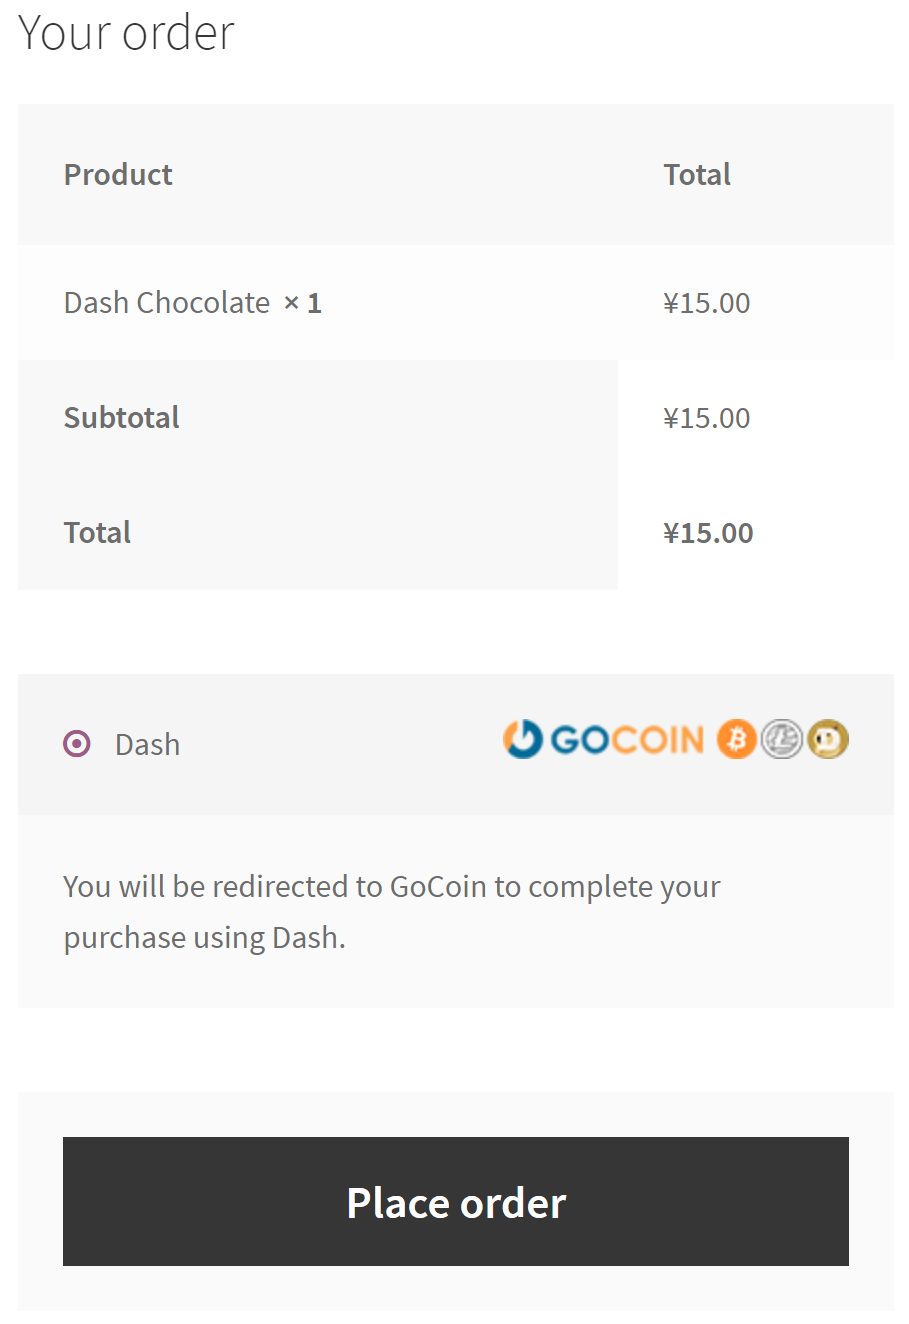
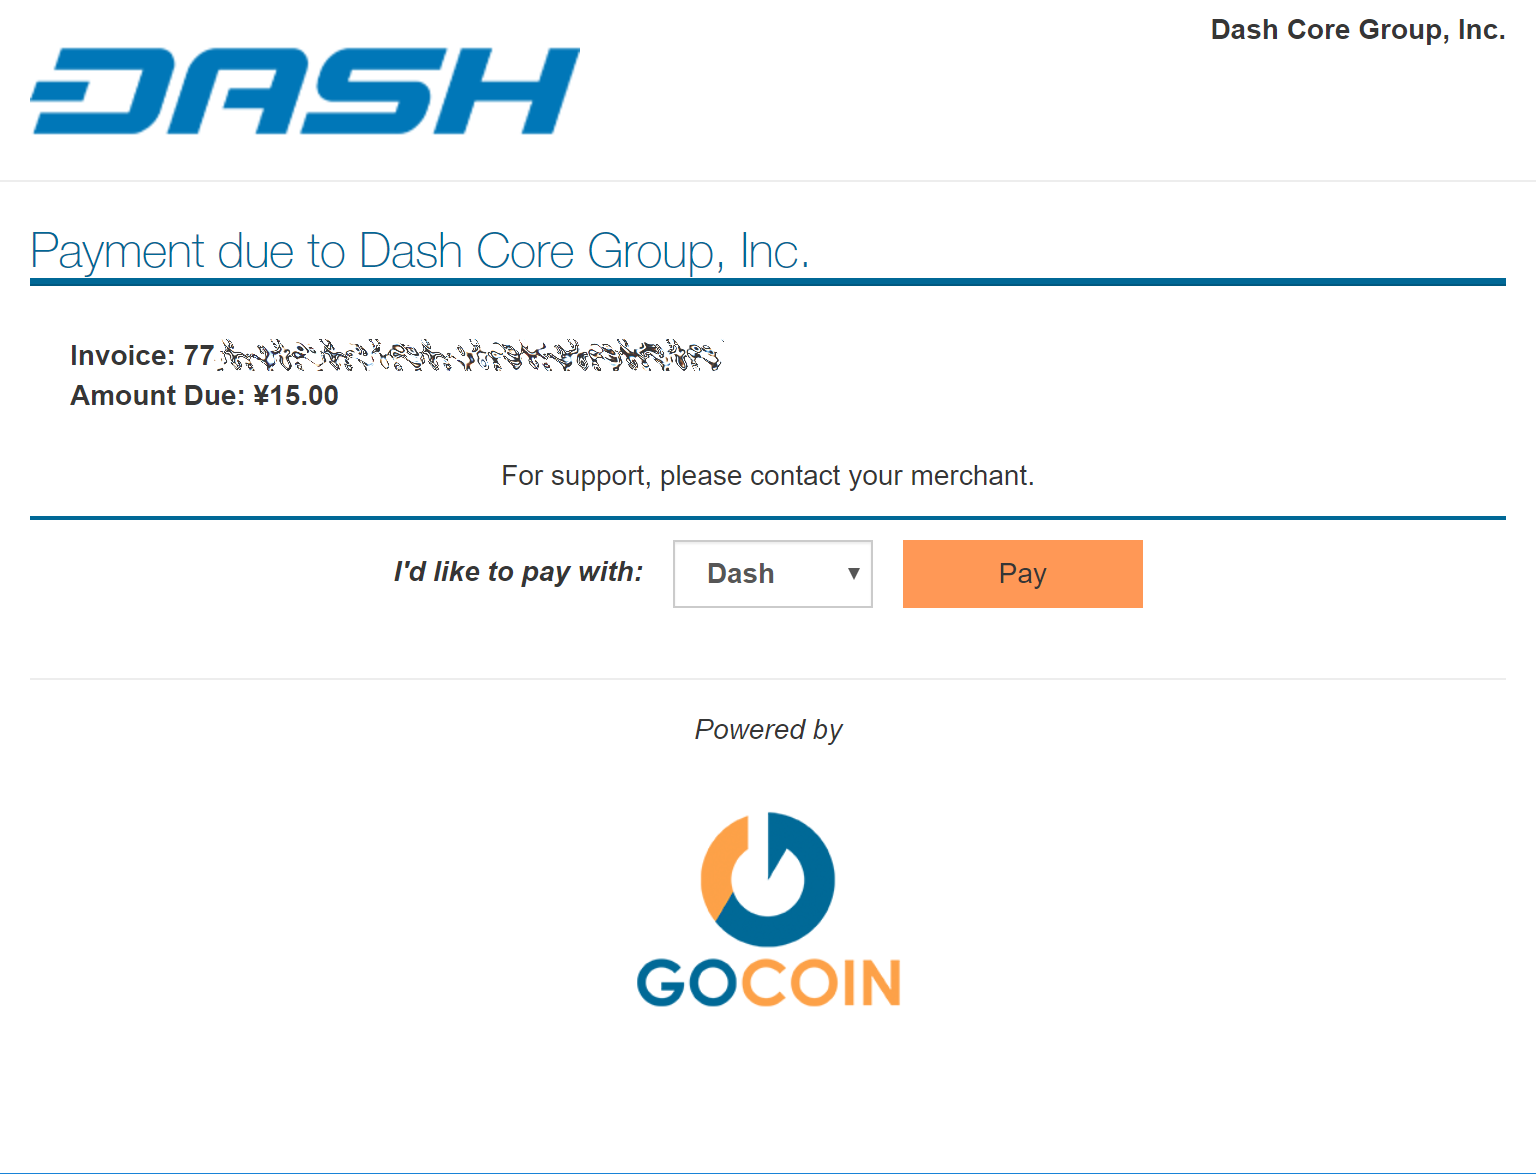
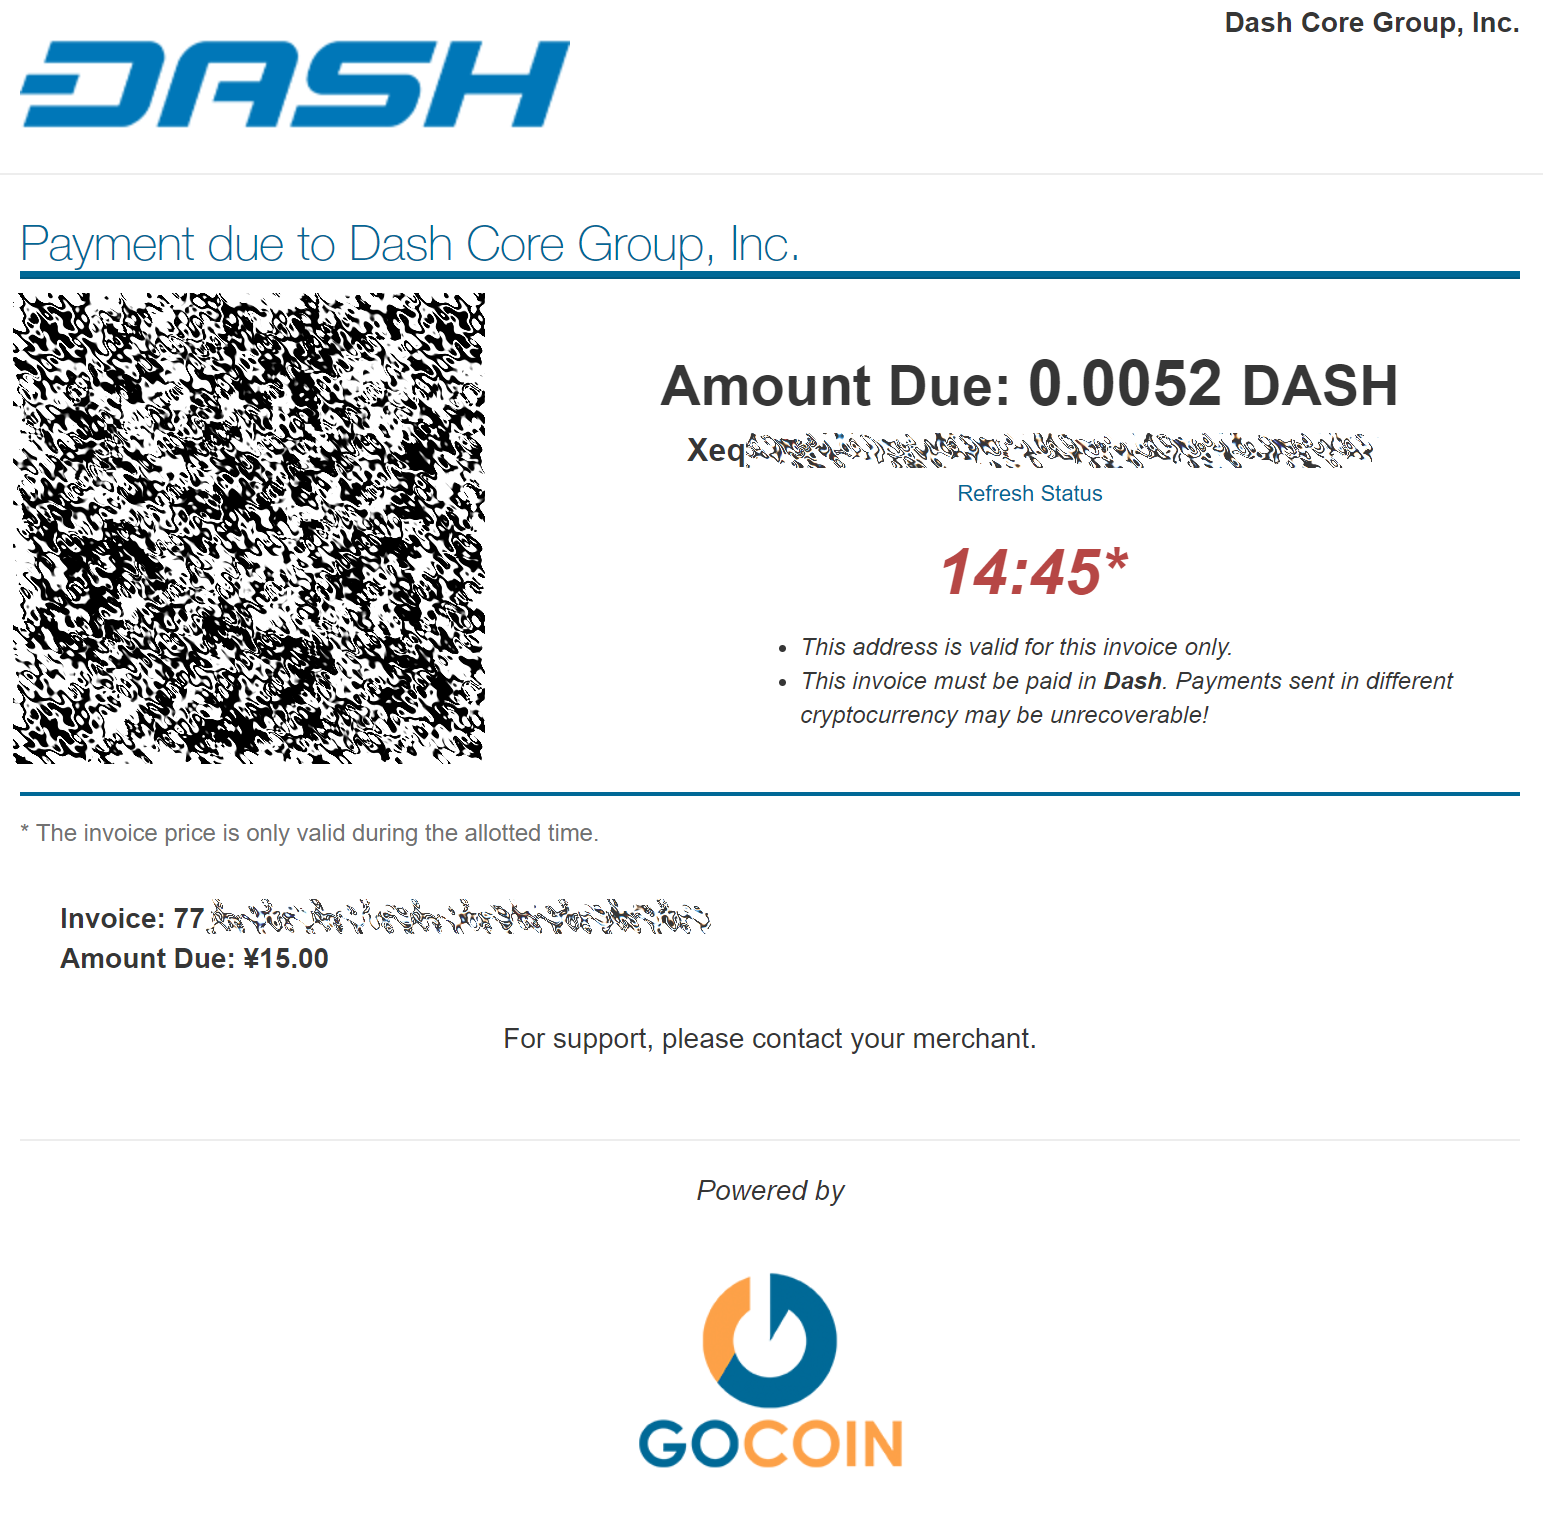
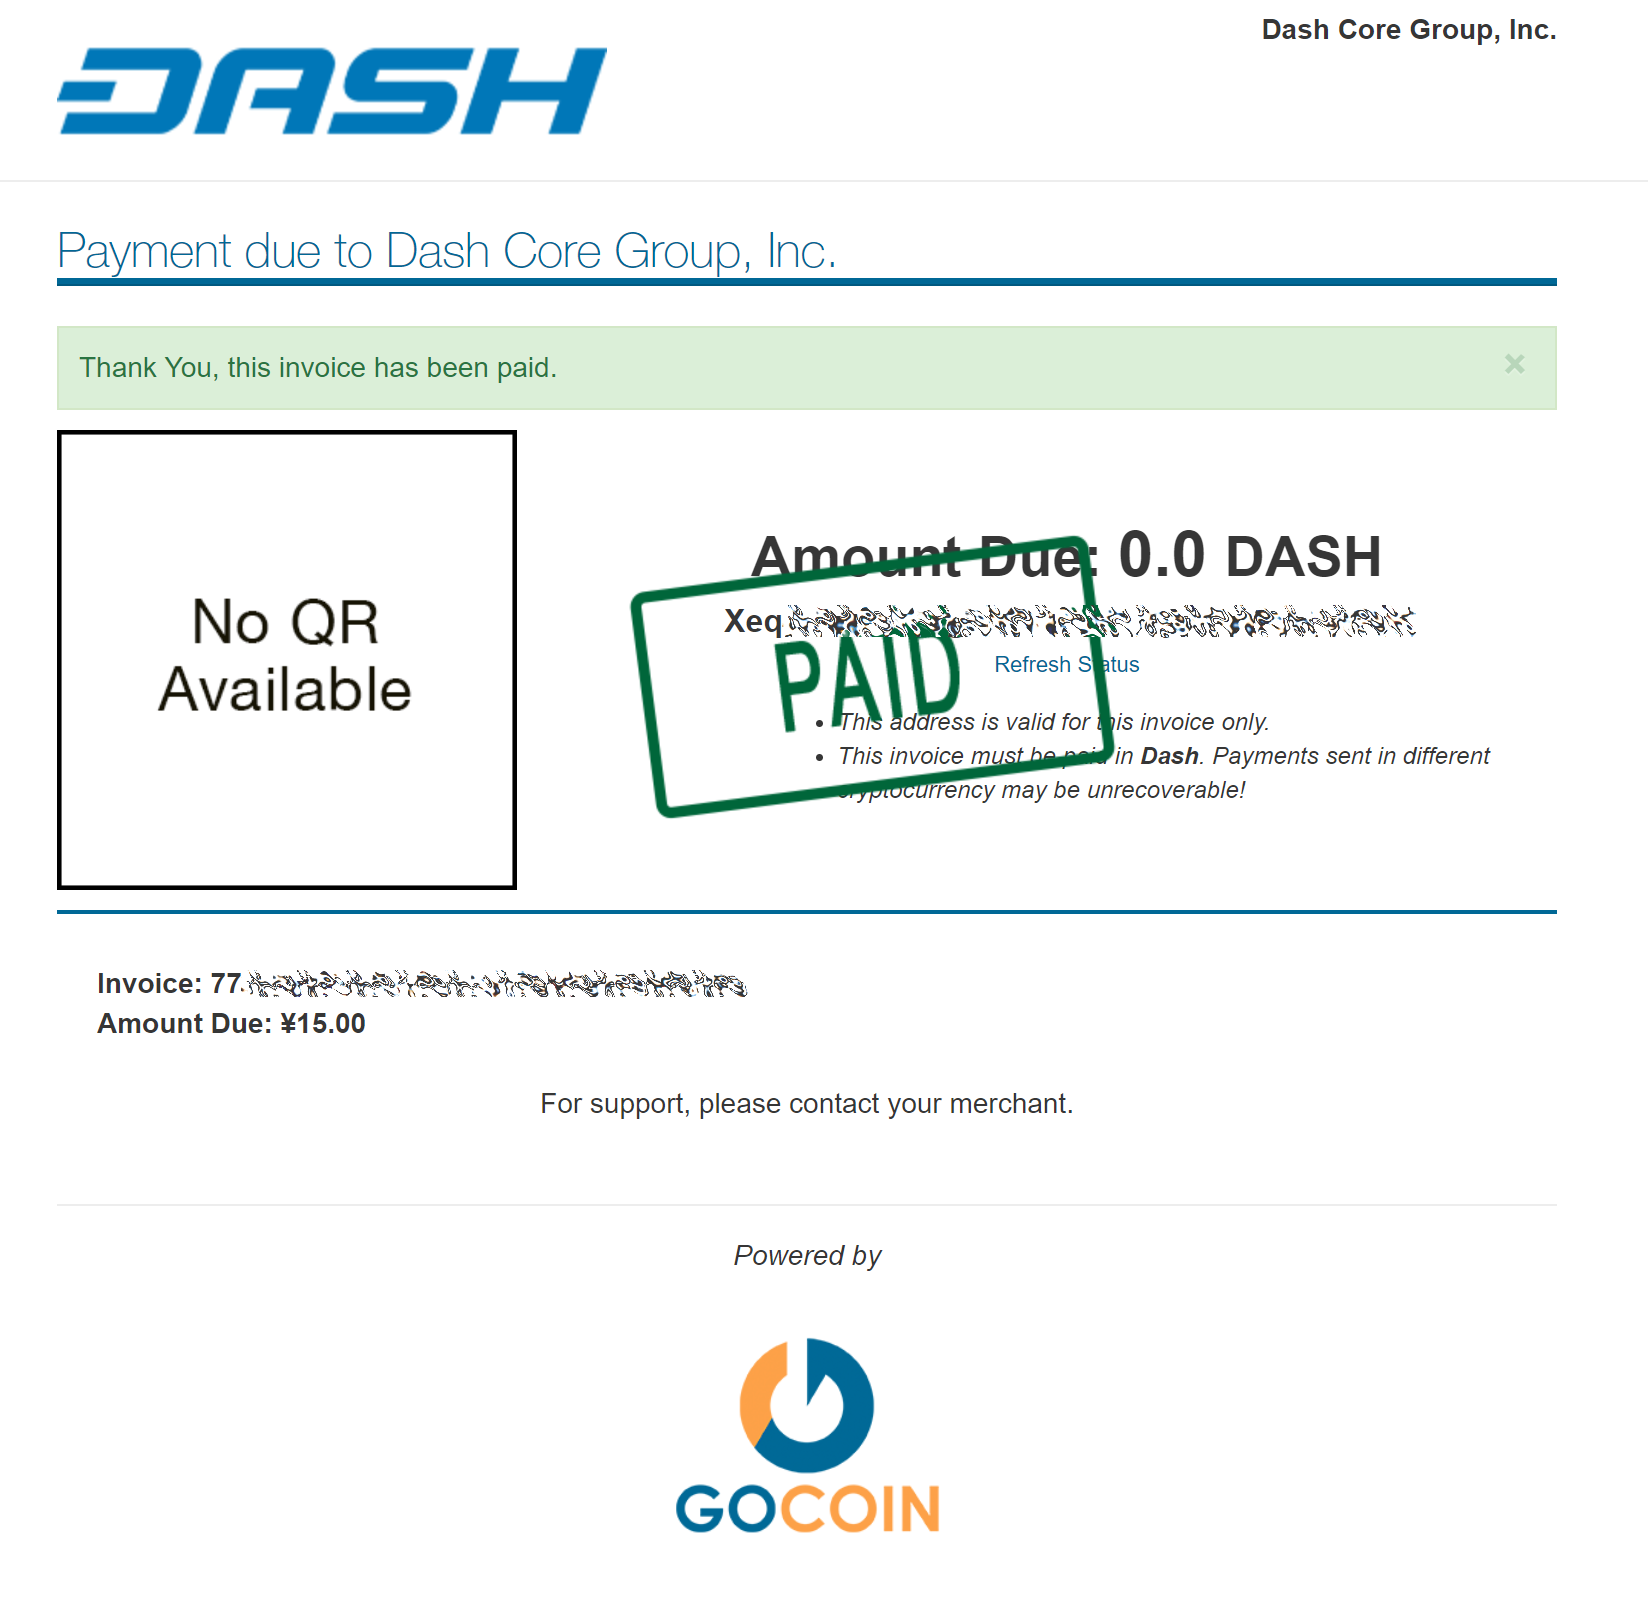
Completing payment through the GoCoin payment processor
WooCommerce and CoinPayments.net
If your online store is built on WooCommerce, you can simply install CoinPayments as an additional payment gateway and immediately begin accepting Dash. This guide assumes you have already installed Wordpress, installed WooCommerce and created at least one product in your store. A video of the process to install the CoinPayments payment processor is also available.
In your WordPress administration backend, select Plugins -> Add New and type "coinpayments.net" into the search box. A plugin named CoinPayments.net Payment Gateway for WooCommerce should appear. Click Install Now to install the plugin. Alternatively, you can download the plugin from the WordPress website as a zip file and upload it using the Upload Plugin button. Once the plugin is installed, click Activate to begin configuration.
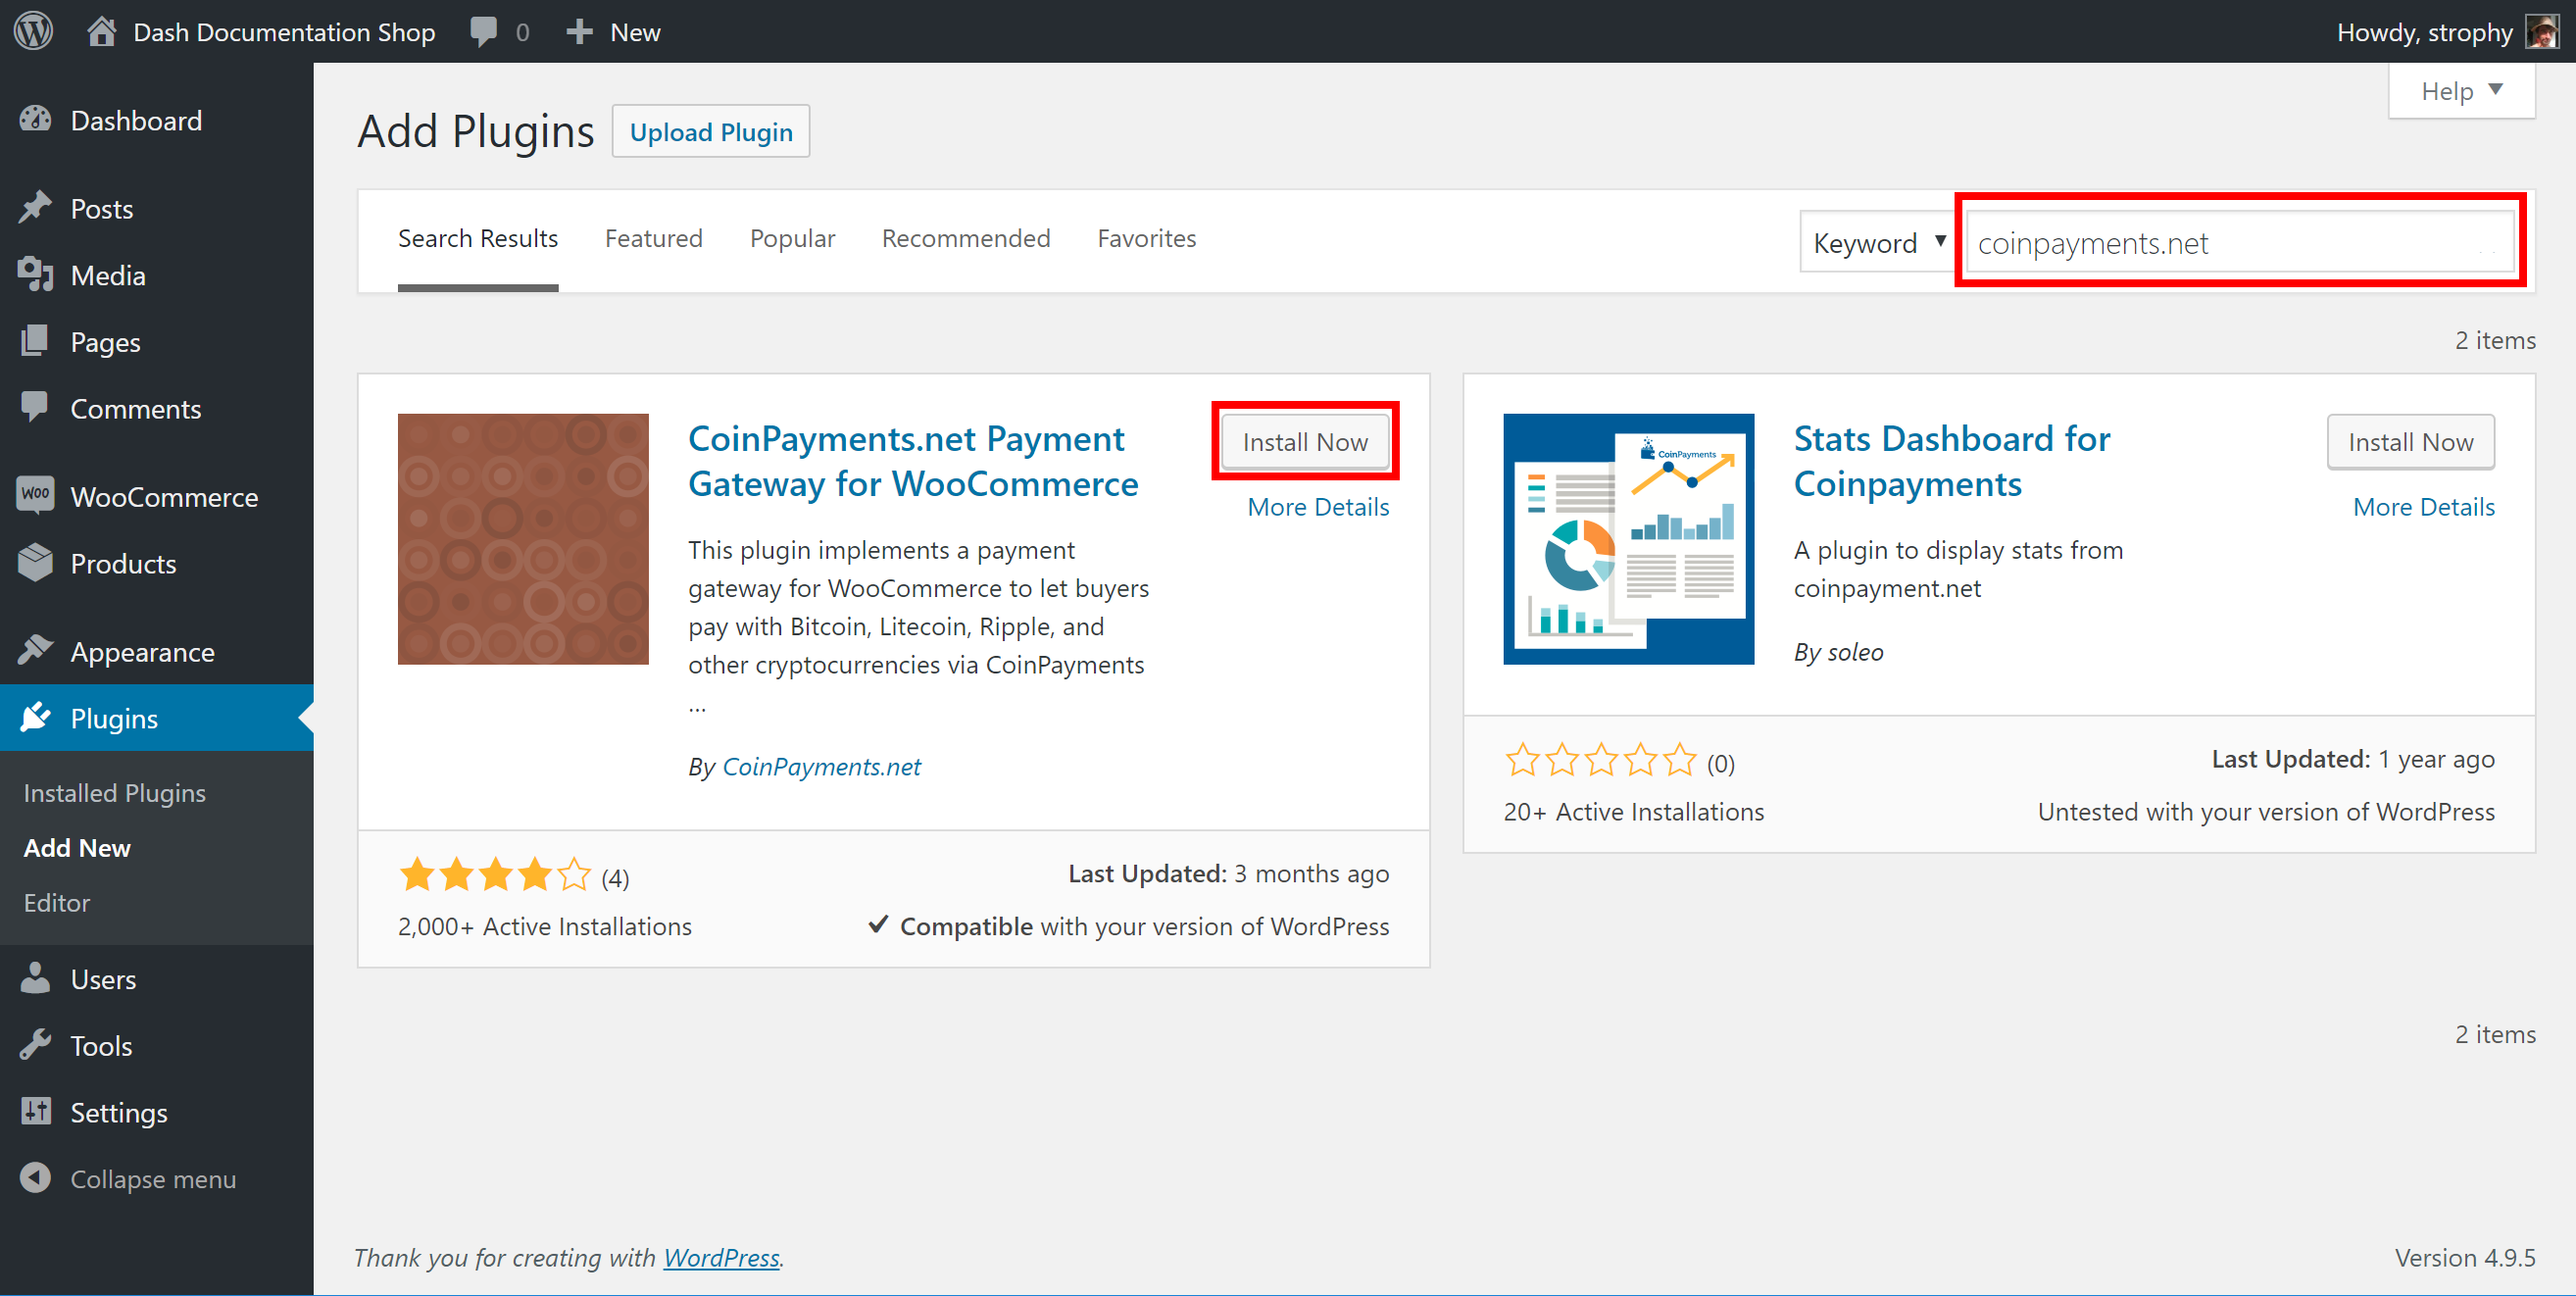
Installing the CoinPayments.net WooCommerce plugin
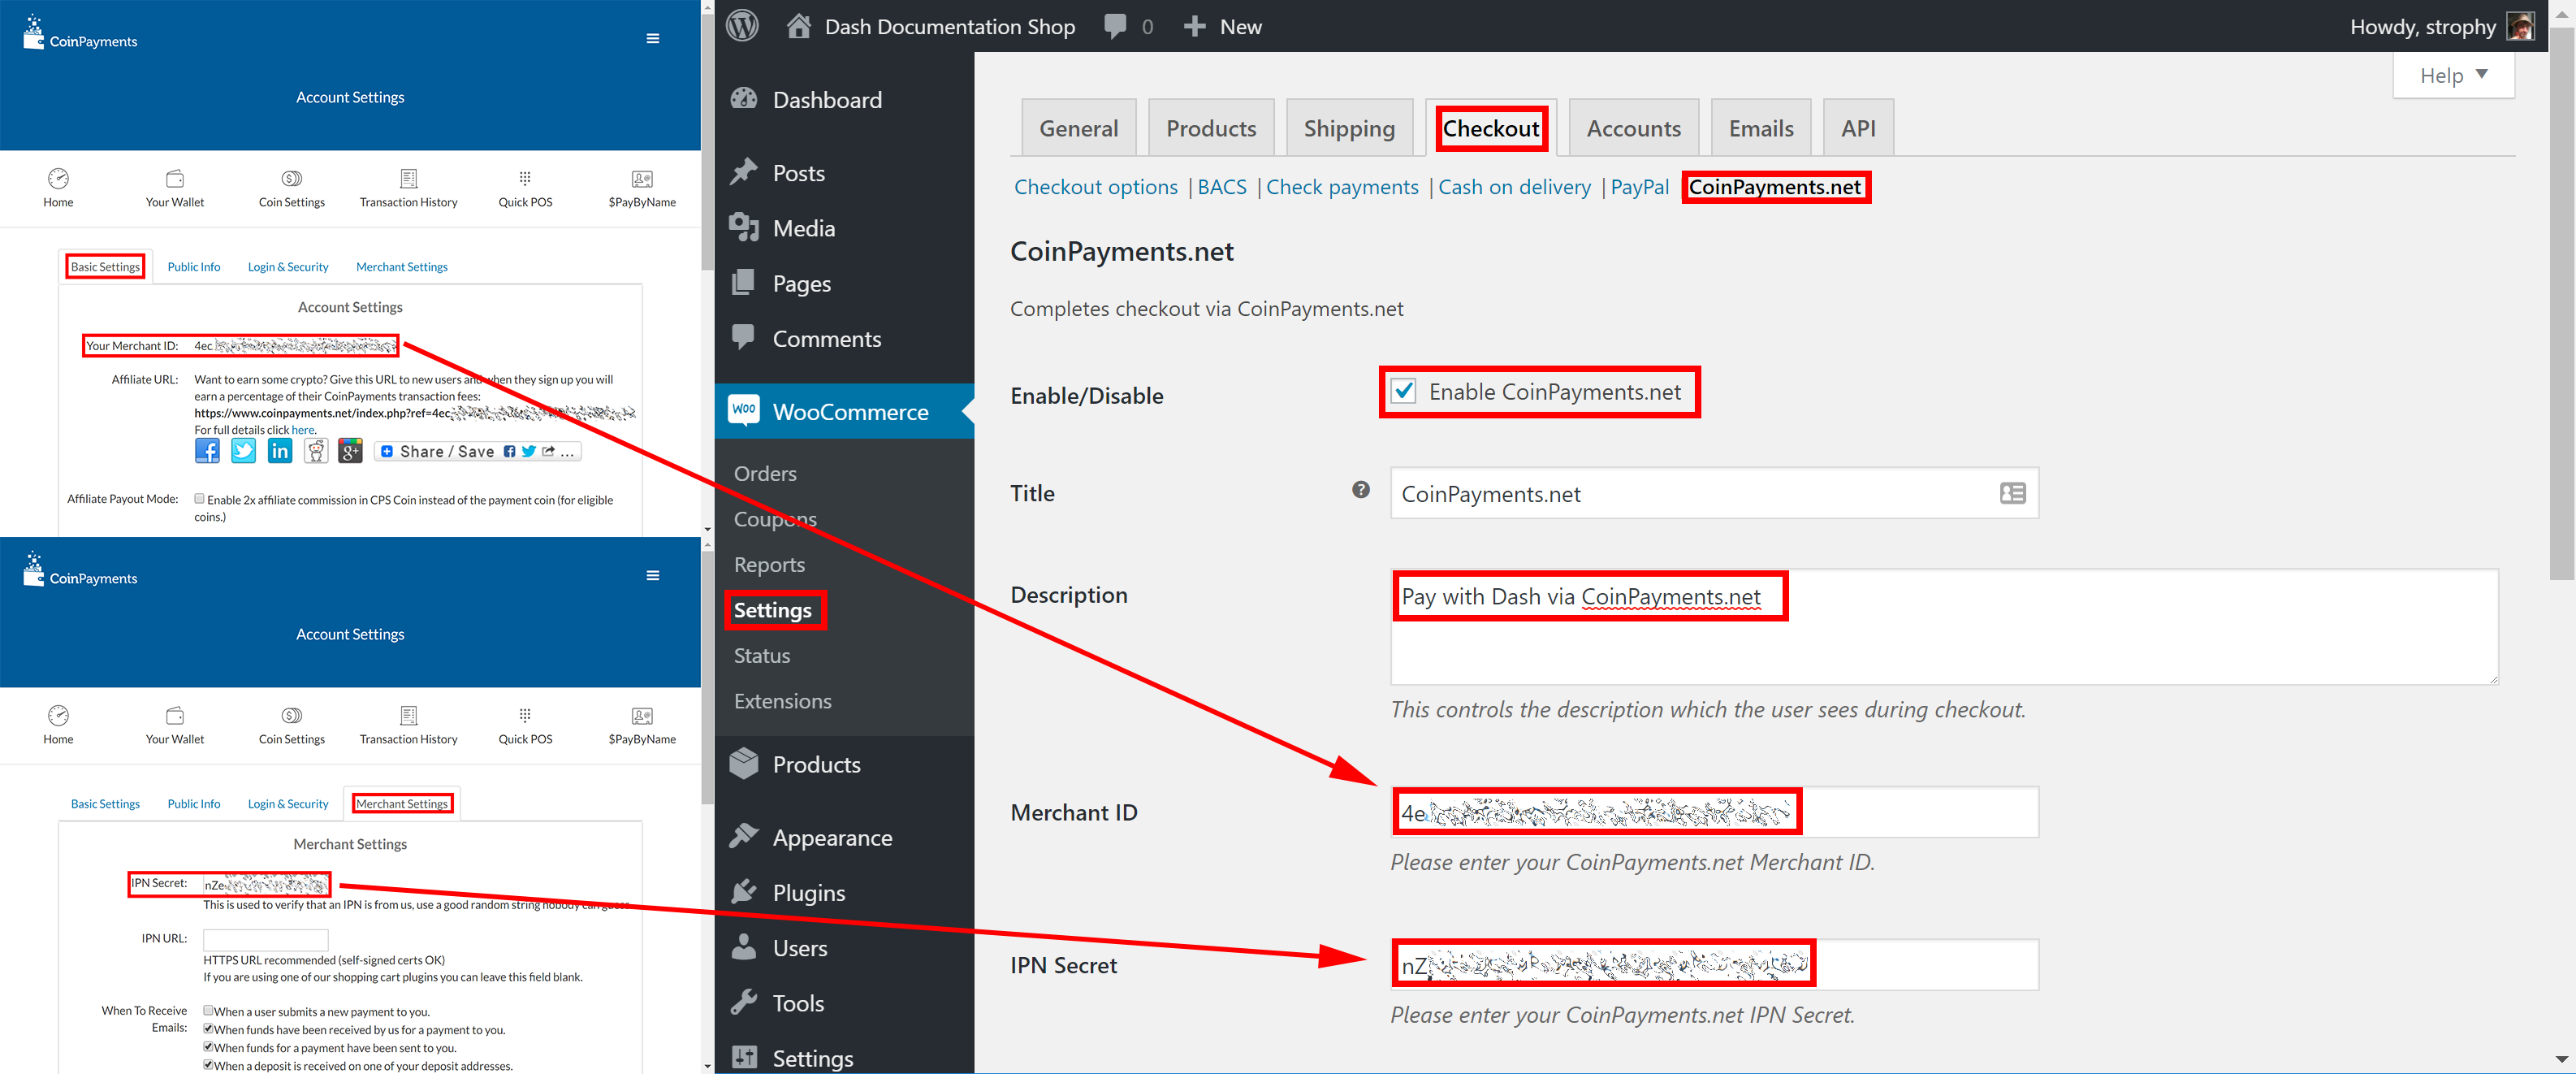
Next, go to CoinPayments.net and sign up to create an account. Once you are logged in, go to Account -> Coin Acceptance Settings and enable Dash, as well as optionally entering a withdrawal address. Next, go to Account -> Account Settings and copy Your Merchant ID from the Basic Settings area into a text file. Then navigate to the Merchant Settings section and enter a long, random series of characters for the IPN Secret. Copy this code to your temporary file as well.
Back in the WordPress plugins section, click the Settings button for the WooCommerce plugin and navigate to Checkout -> CoinPayments.net section. Ensure the CoinPayments plugin is enabled here, then enter the Merchant ID, IPN Secret and Description in the appropriate fields as shown below. Click Save Changes when you are ready.
Configuring the CoinPayments.net WooCommerce plugin
Your customers will now see an option to pay with Dash when completing the checkout process for an order. The payment will be processed by CoinPayments.net, and you will receive emails detailing each purchase procedure. You can choose how often you want to withdraw your payments, to which Dash address and various other options in the CoinPayments administration section. See the CoinPayments Documentation or Merchant Tools for more information.
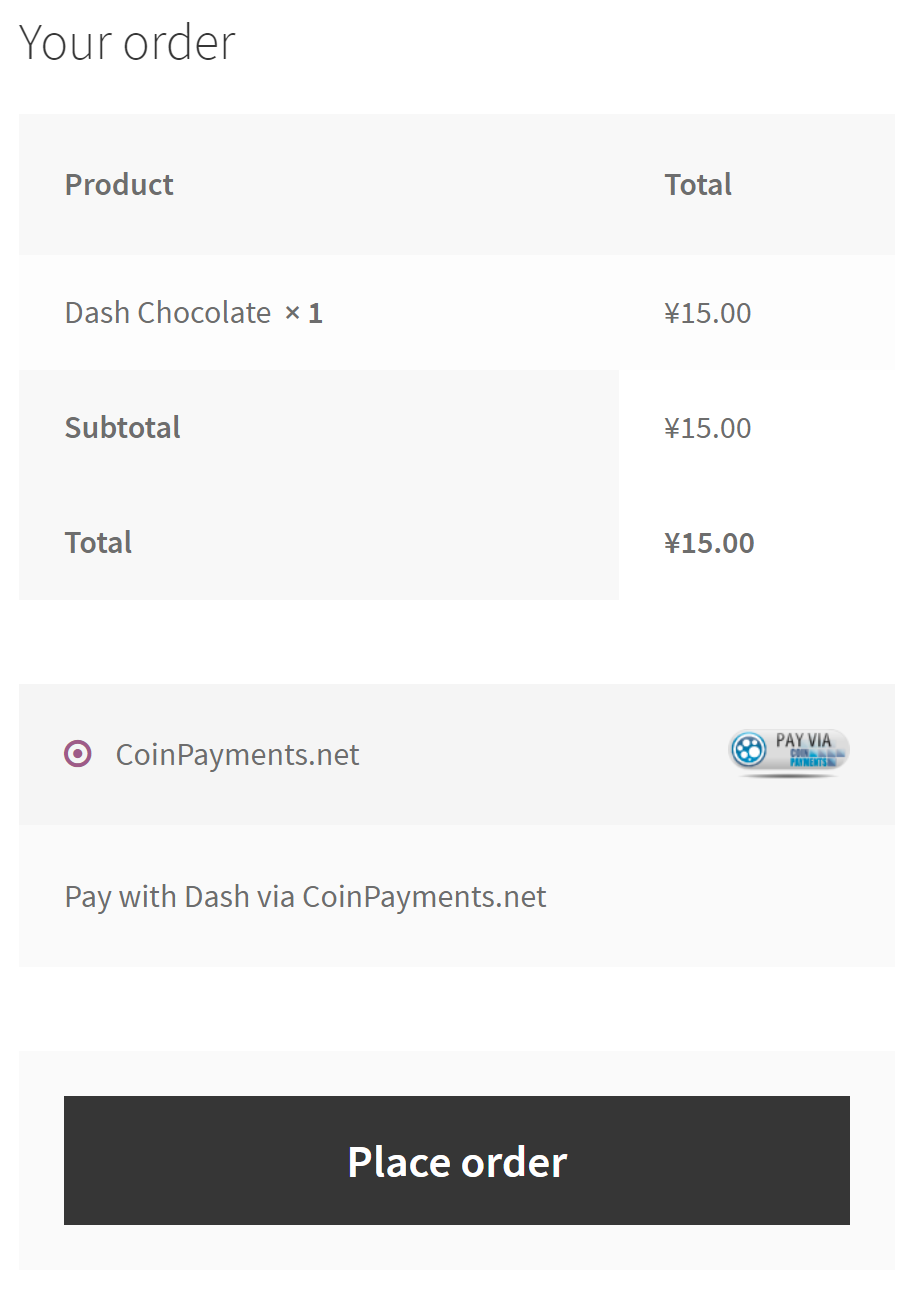
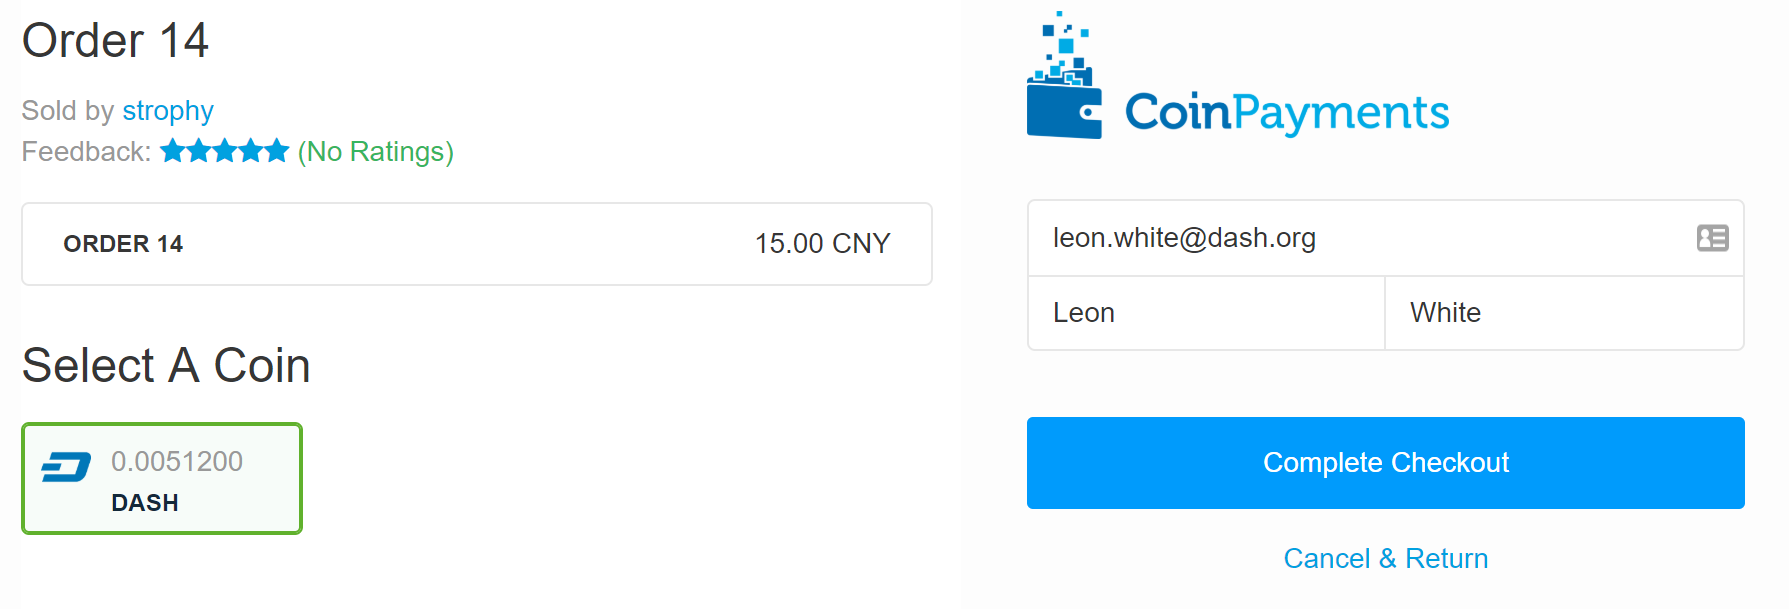
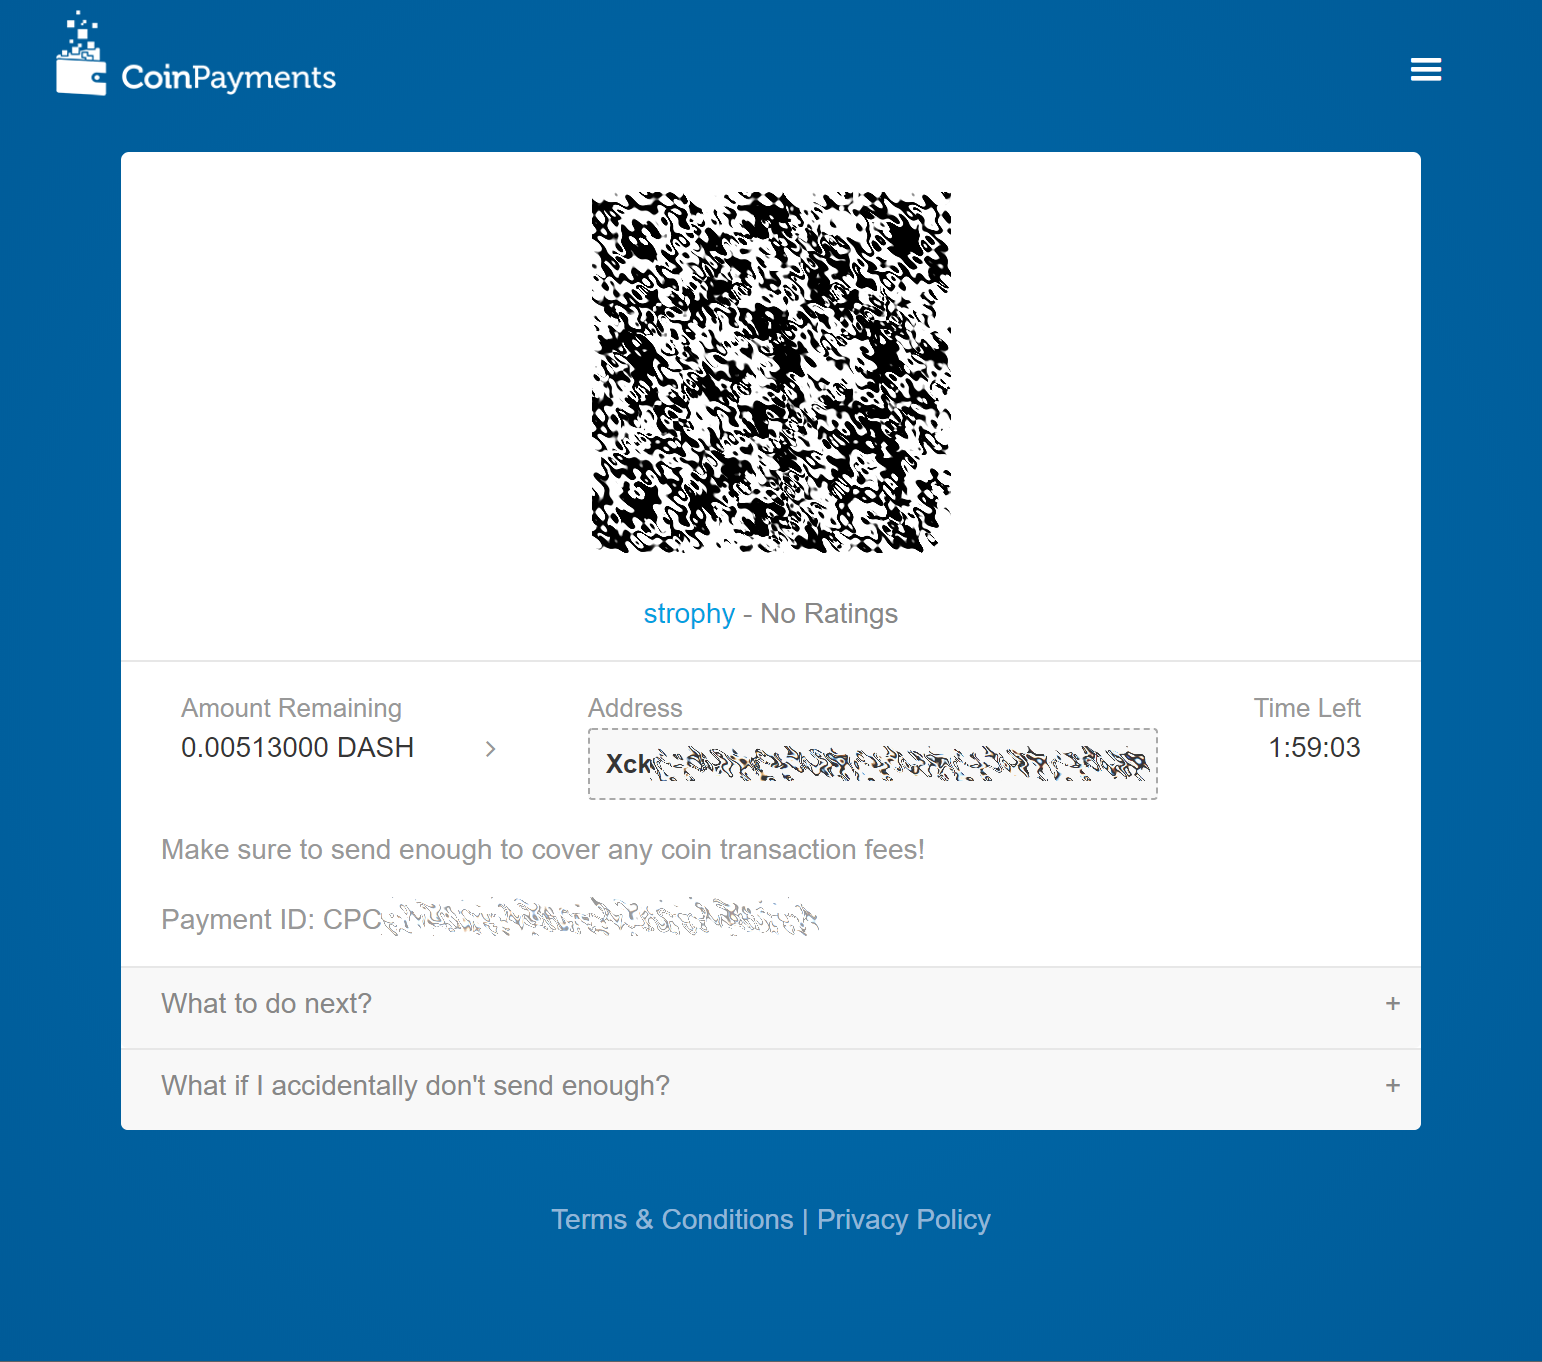

Completing payment through the CoinPayments.net payment processor
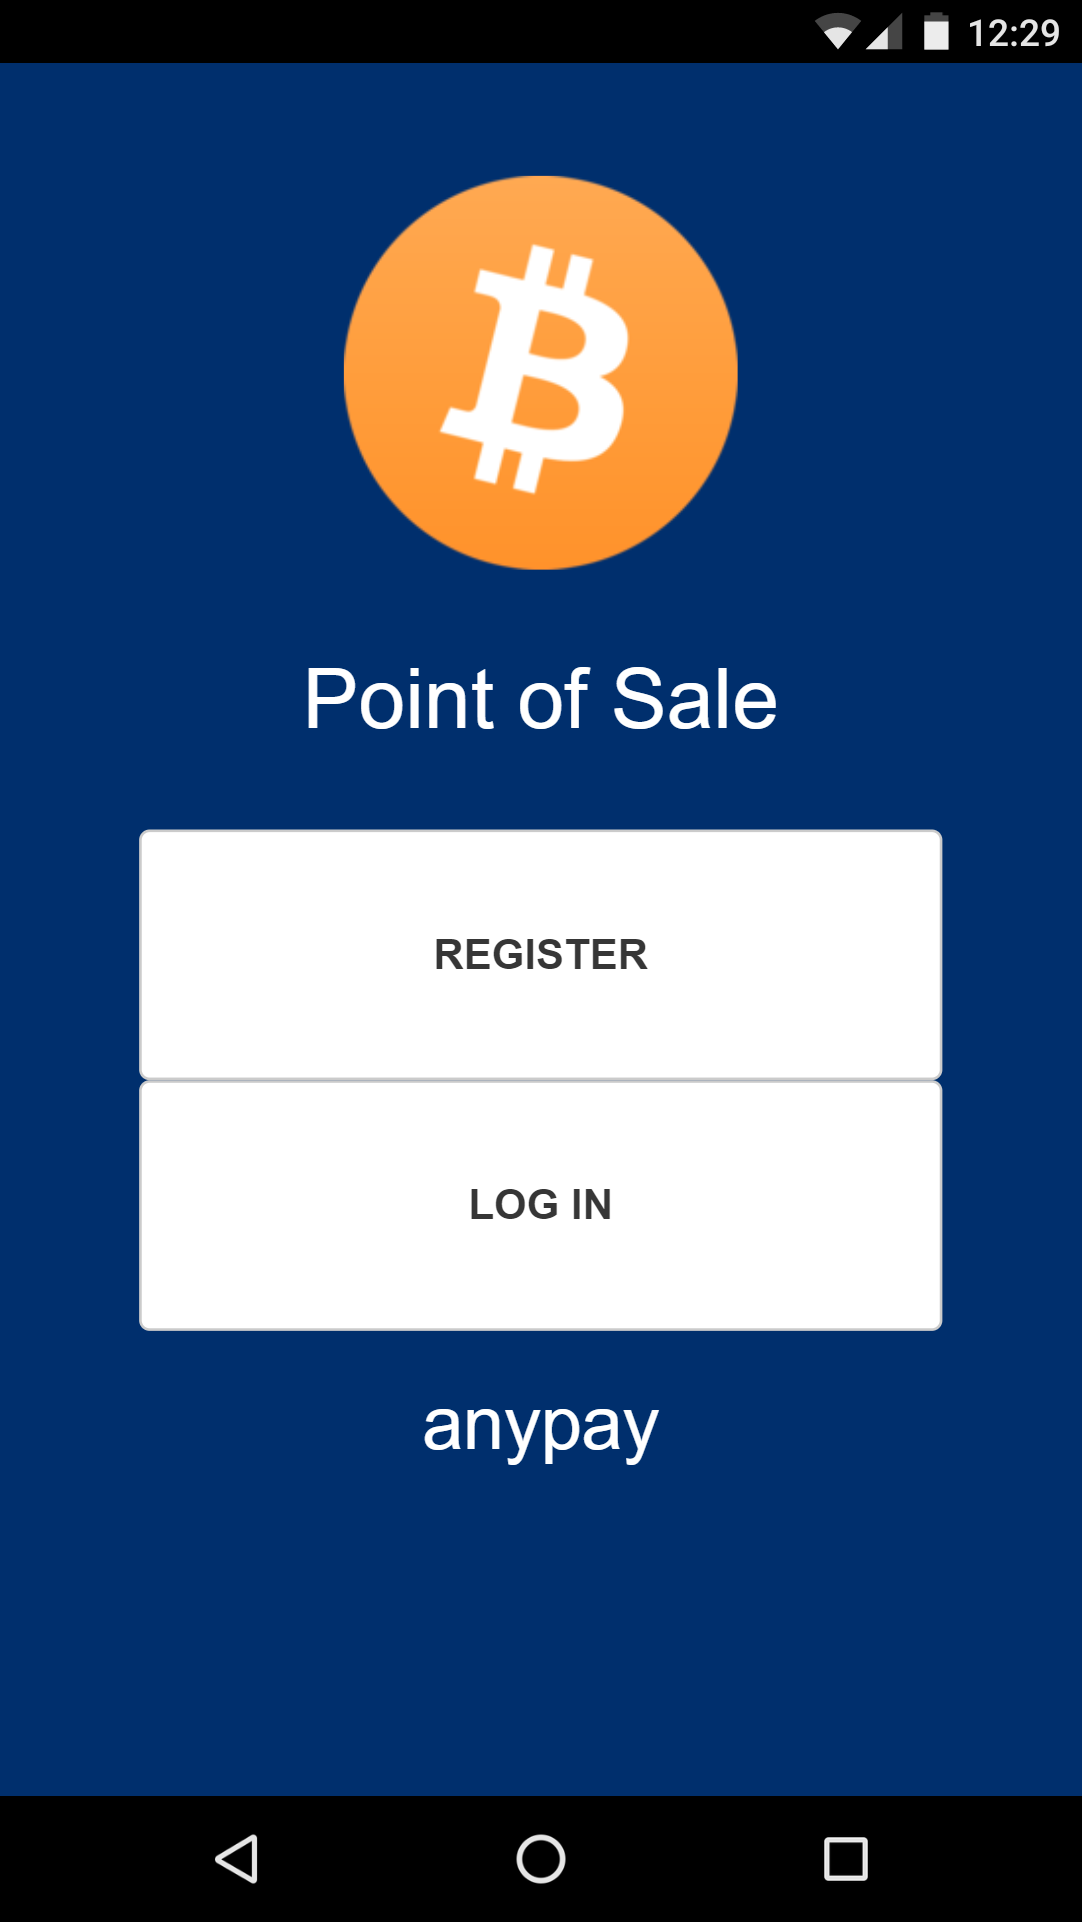
Point-of-Sale with Anypay
Anypay.global allows you to quickly start accepting point-of-sale payments in Dash at a physical store. The service functions as a simple website that you load on any internet- connected and touch-enabled device, such as a smartphone or tablet.
Begin by registering an account with Anypay. You will be asked to specify an email address and password. Once you are signed in, you must add a Dash payment withdrawal address.
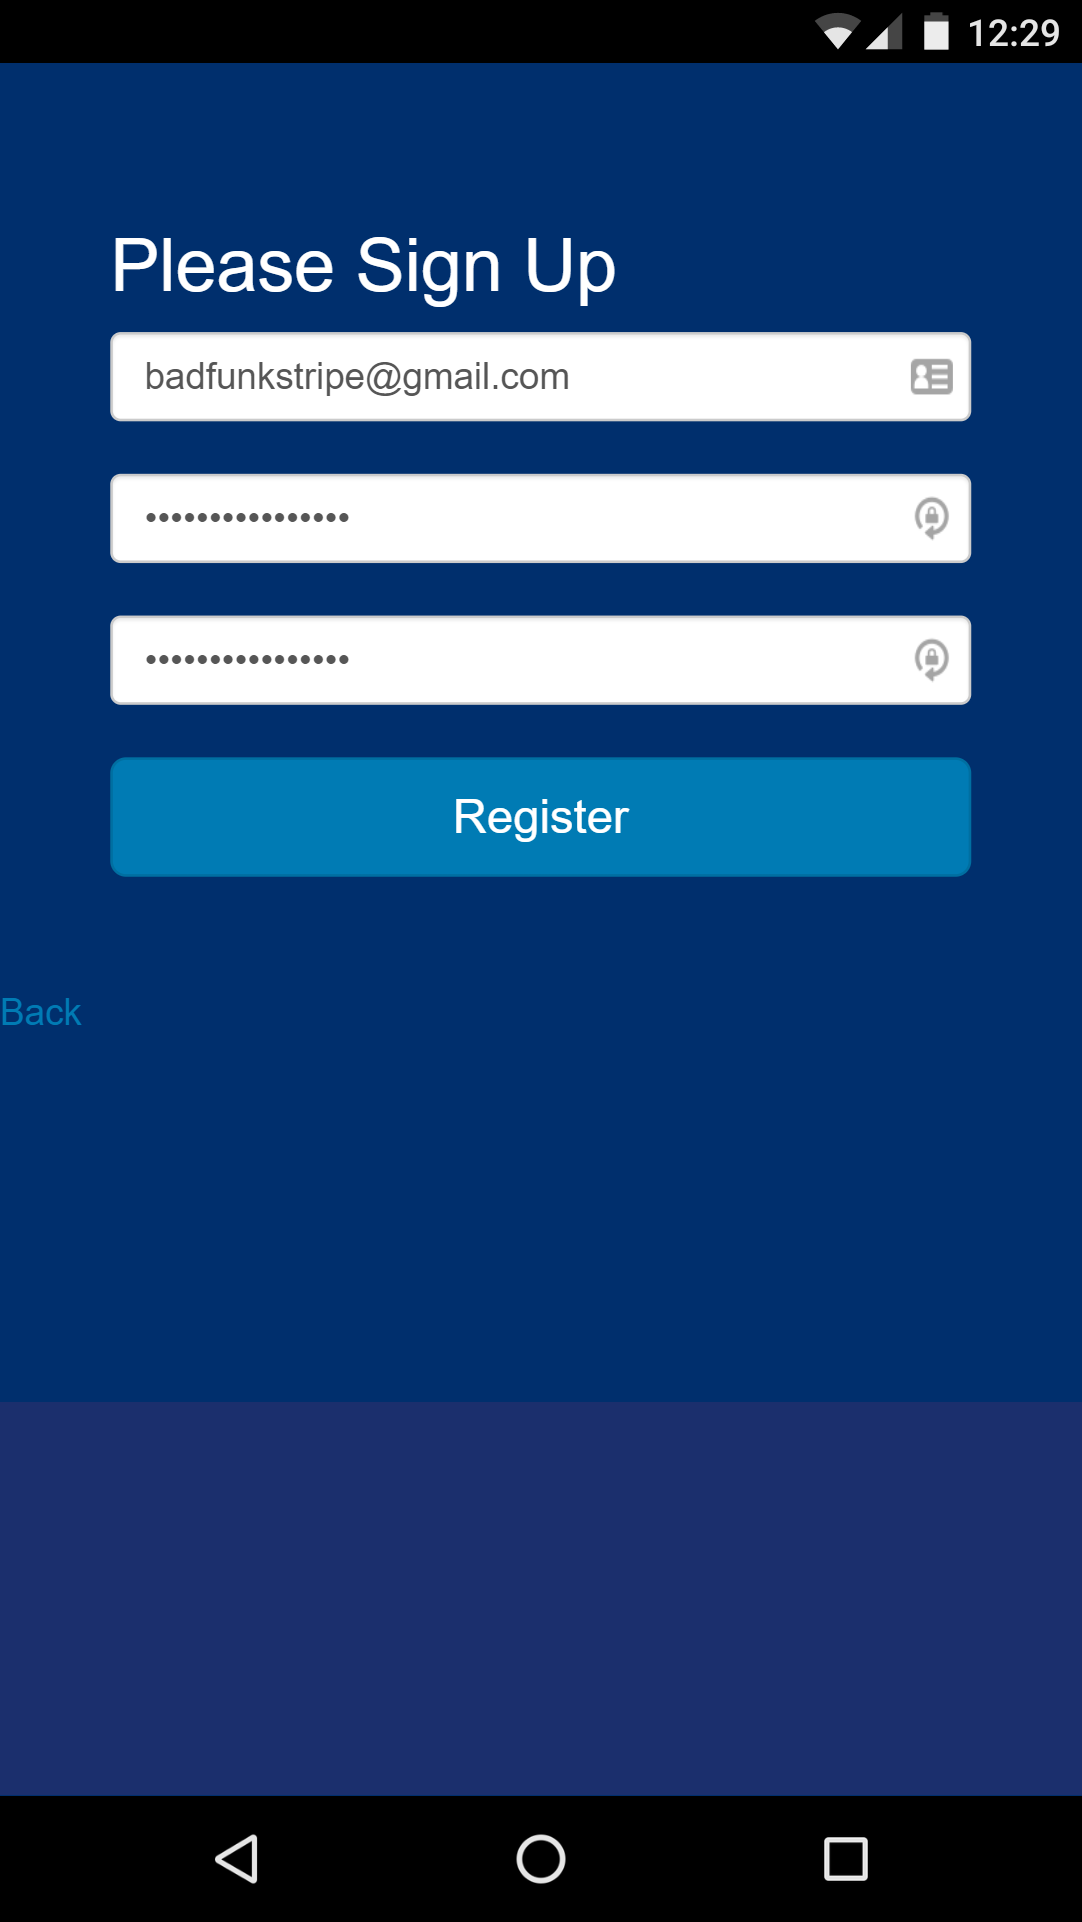
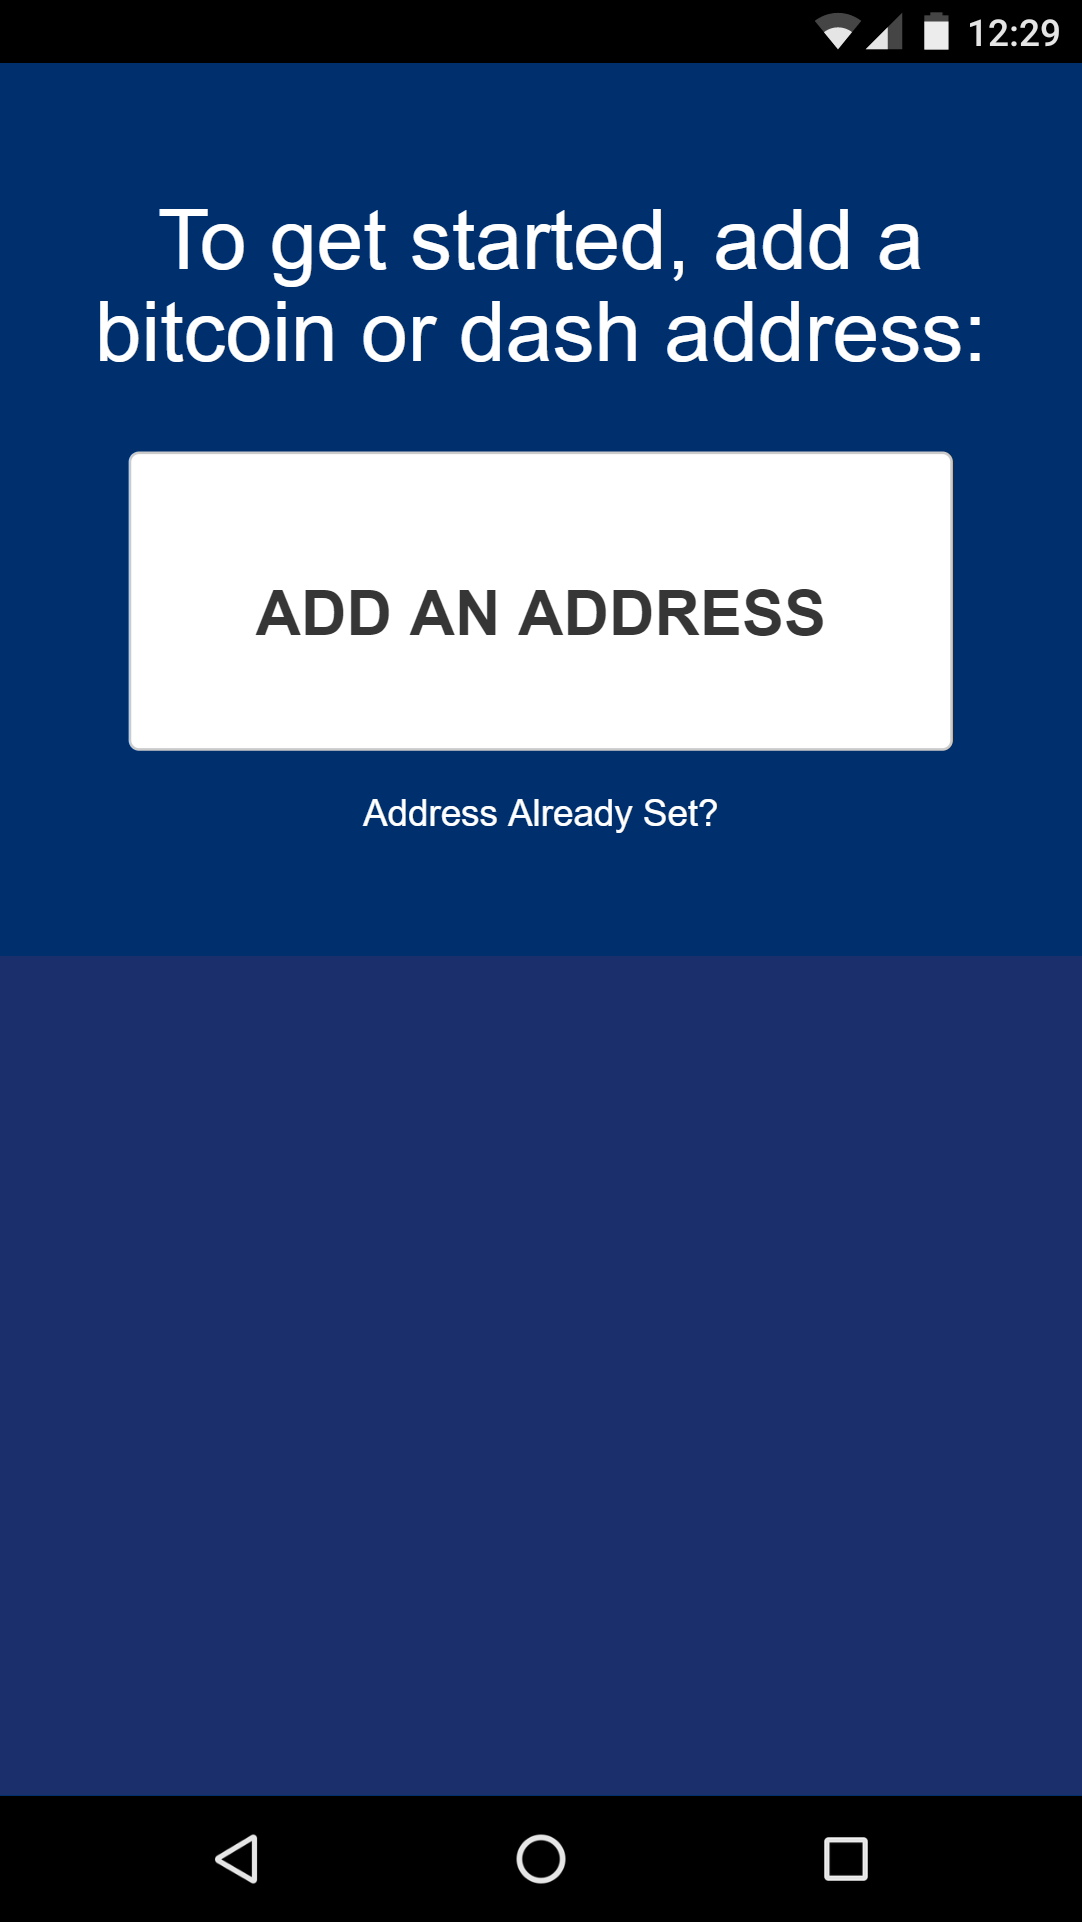
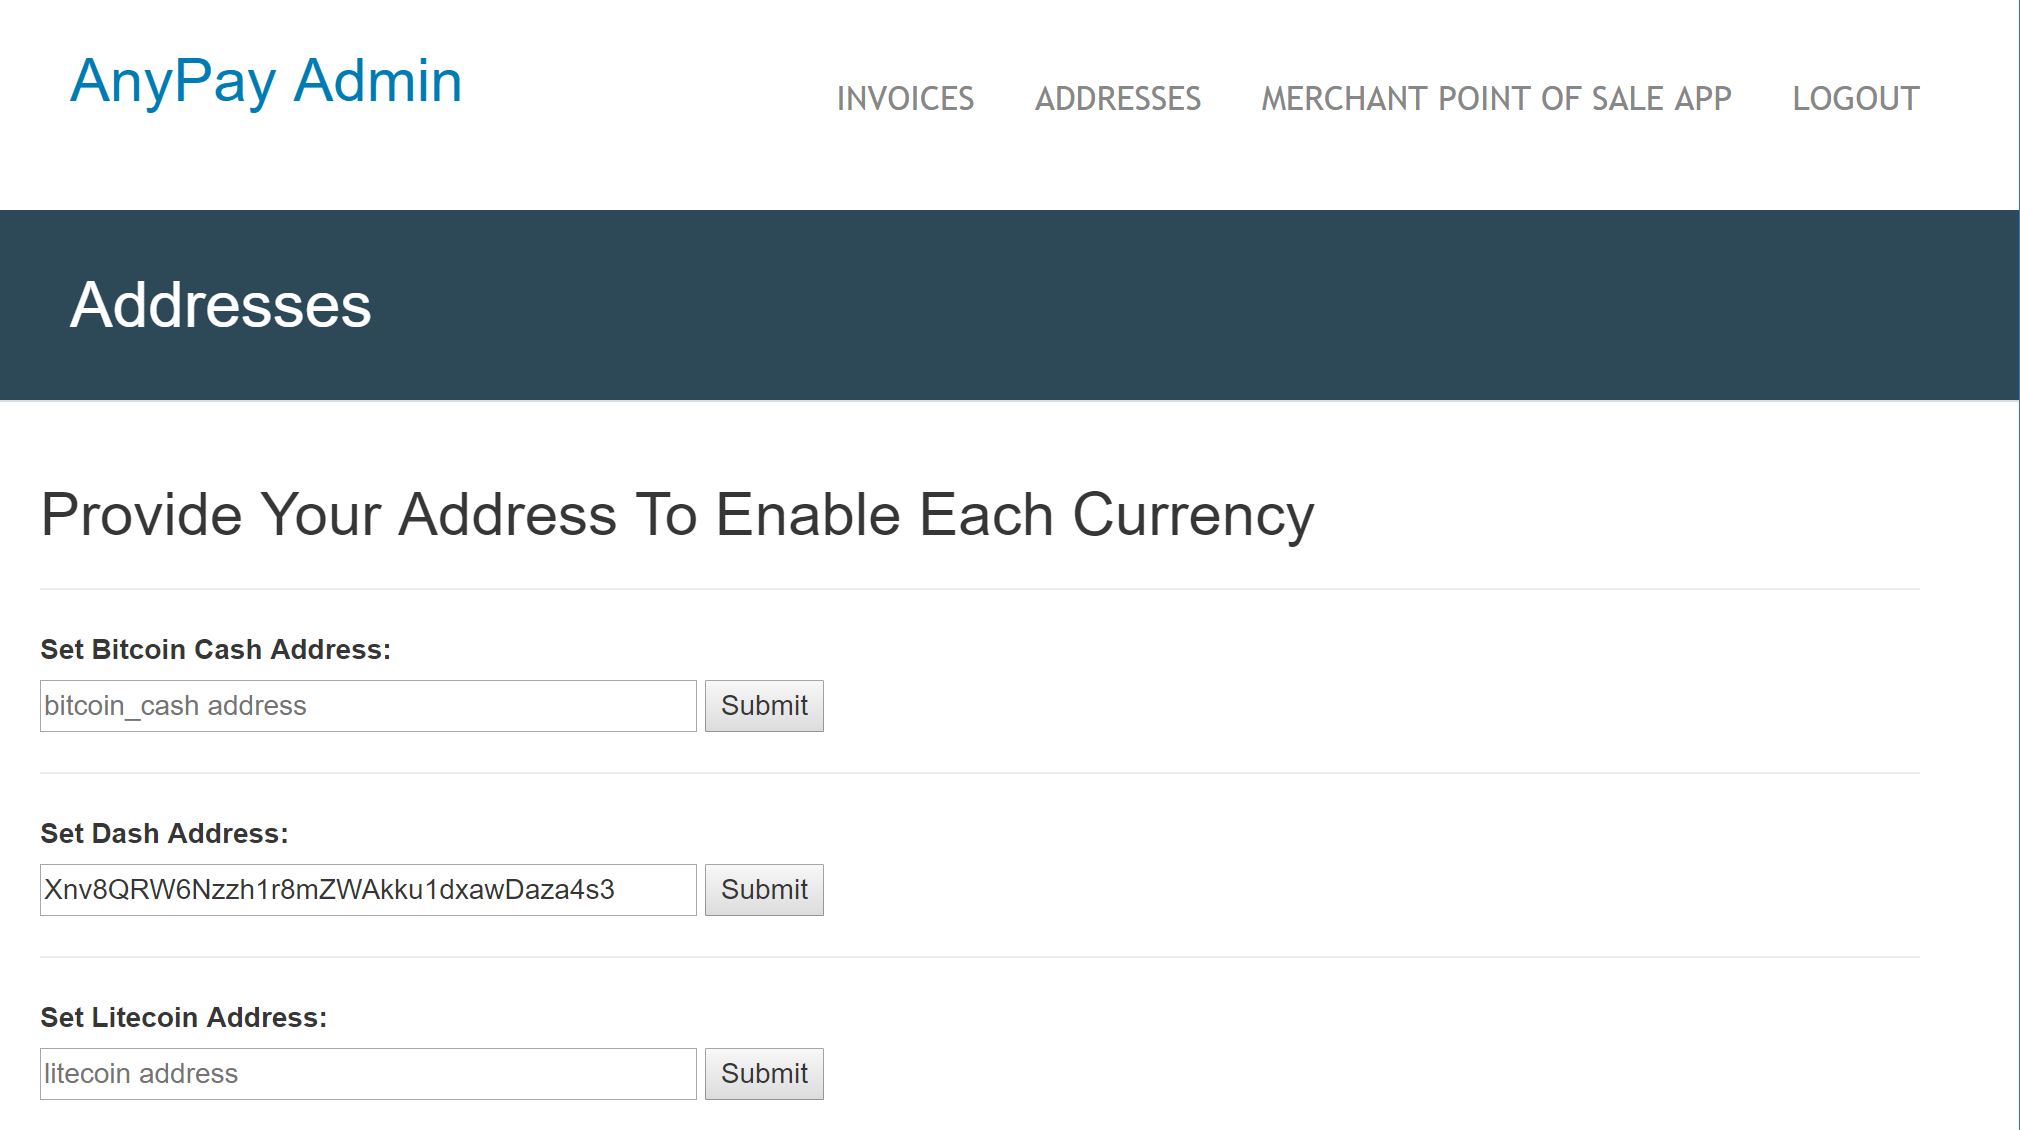
Setting up Anypay
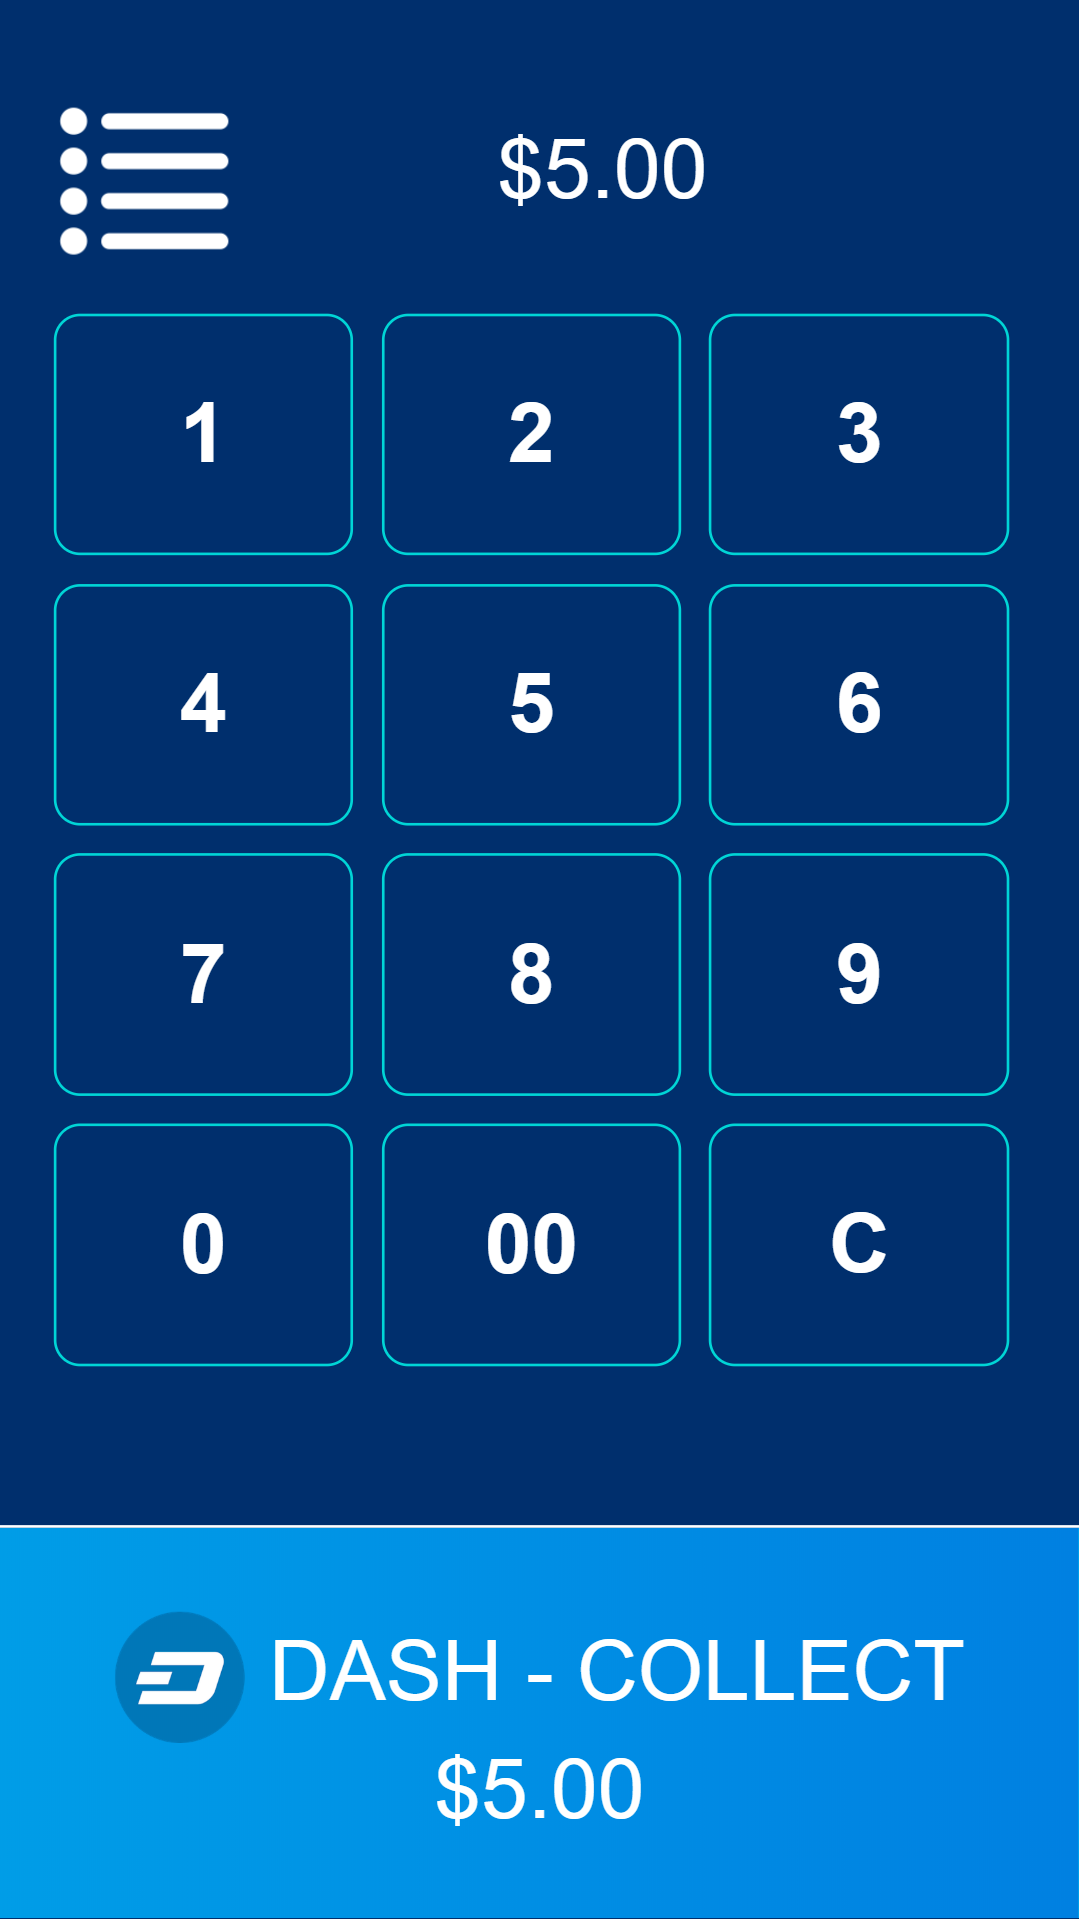
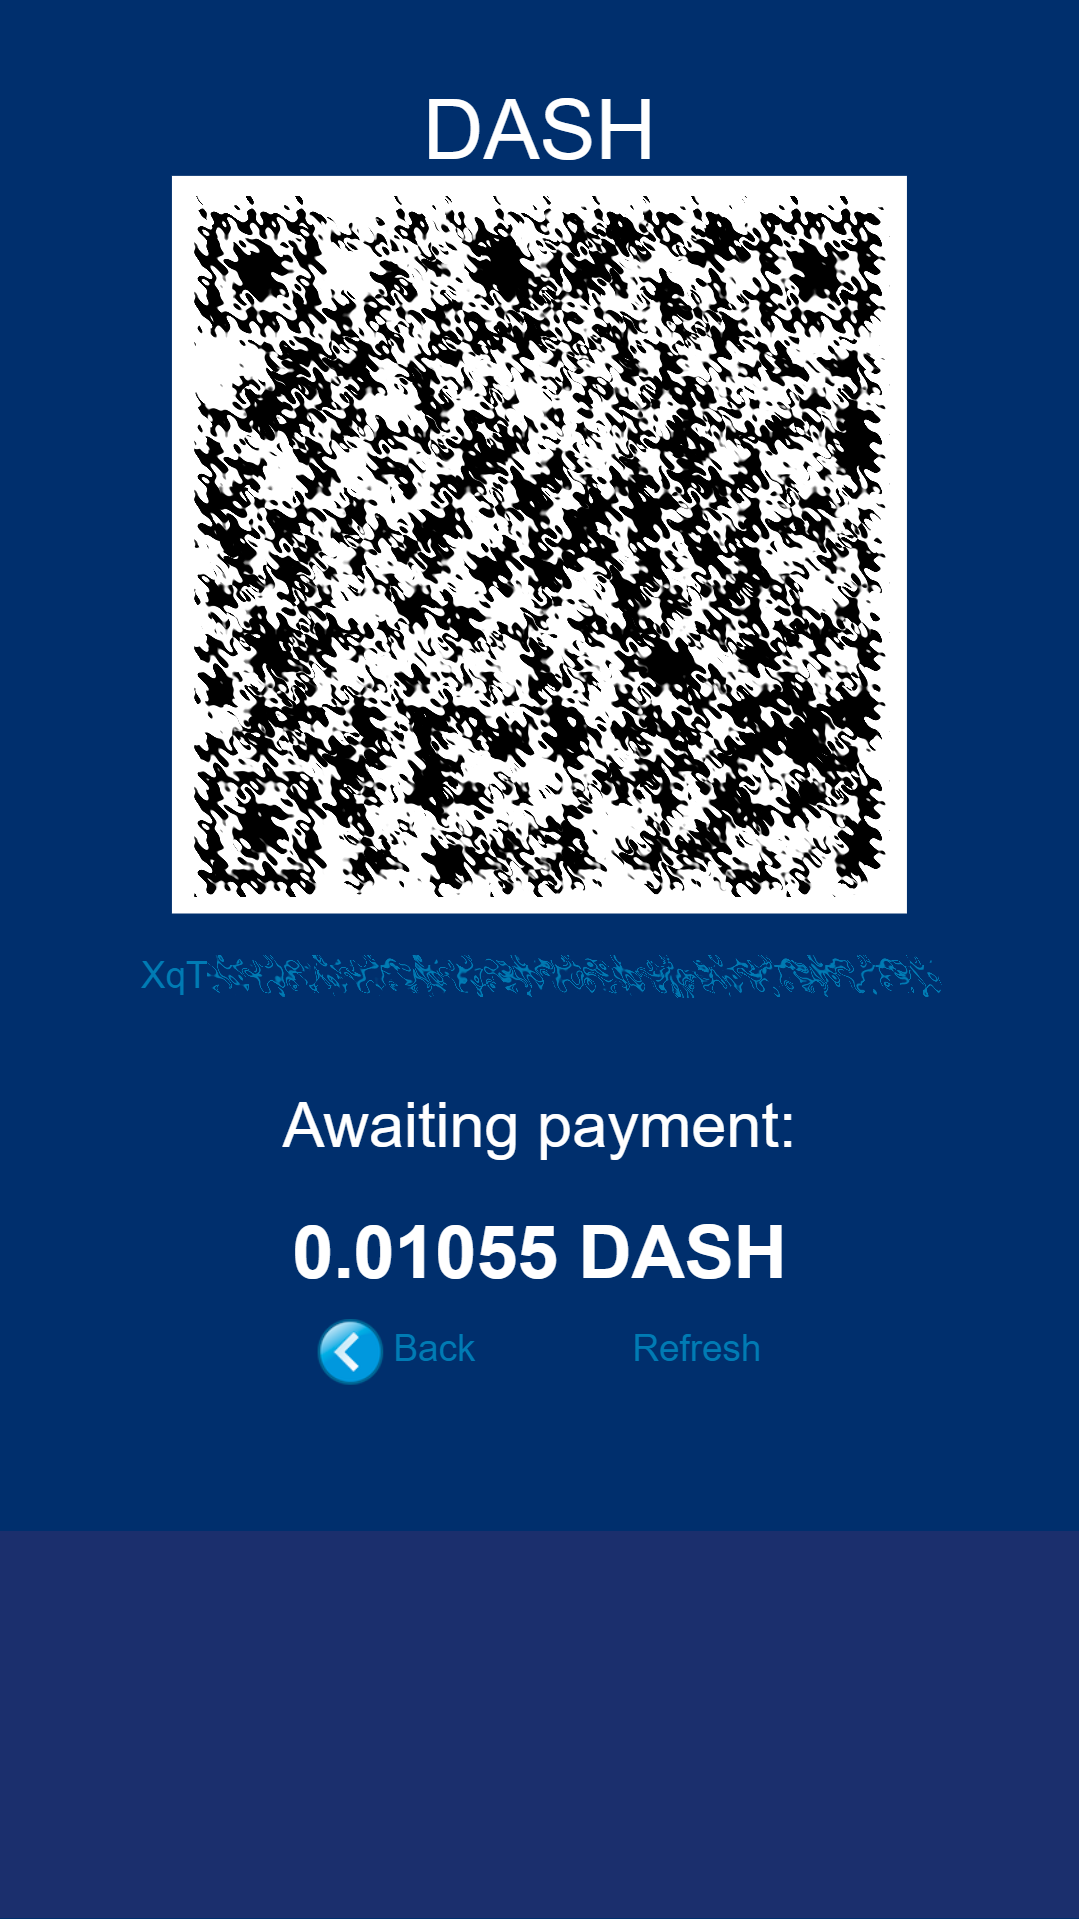
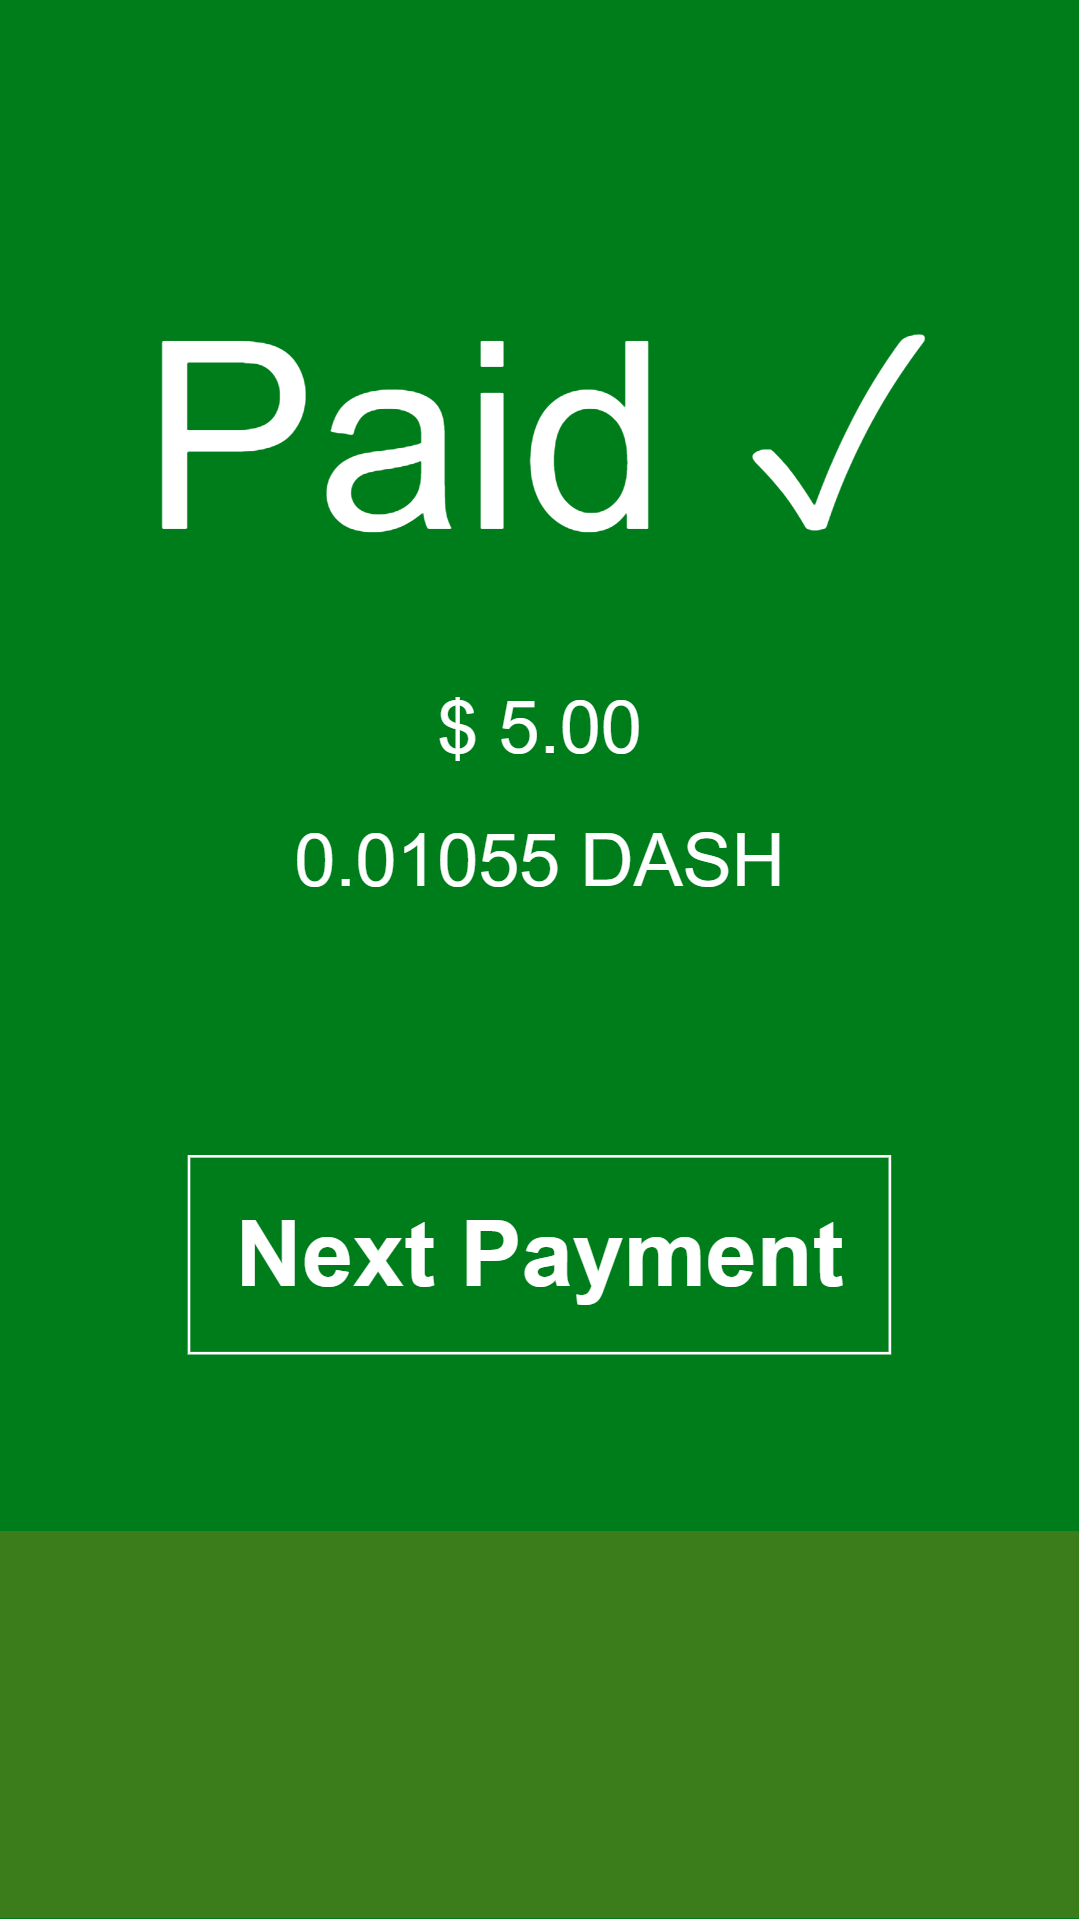
Once this has been set up, you can begin processing payments immediately. Simply log in to https://pos.anypay.global or tap Merchant Point of Sale App in the admin area using your device. A keypad will appear. Enter the invoice amount in USD or DASH and press the COLLECT button at the bottom of the screen. The app will generate a QR code for your customer to scan. Once payment is complete, you will be able to create a new invoice by tapping Next Payment, or view the status of your invoices by tapping the menu button in the top left corner of the keypad, or checking the Invoices section of the administration backend. Withdrawals are processed to the address you specified shortly after payment is complete.
Point-of-Sale with Spark
Spark Payments allows you to quickly start accepting point-of-sale payments in Dash at a physical store. The system works as an app, and is available for Android, macOS, Windows and Linux, with an iOS progressive web app (PWA) in development.
The project is an external terminal application for processing Dash payments in brick and mortar stores. The merchant types the sale amount in their local currency (94 currencies supported), the application will generate a QR code sale for the proper amount of Dash for the customer to scan. Then the terminal will provide feedback on the status of the payment (received, timed out, partial, instantsend or regular), and if set up - fiat conversion through uphold.com. A guide on how to set up Spark with Uphold to convert payments to fiat currency is available in English and German.
To use Spark, open the app on your device. If this is the first time you are using the app, you will need to specify a Dash address to receive payments from the system, as well as your chosen fiat currency. You can change this information at any time from the menu. To generate a payment invoice, enter the amount in fiat currency. Spark will generate a QR code containing your specified address and the requested amount, denominated in Dash. The customer scans the QR code, and the app will display a visual indication when payment is complete.
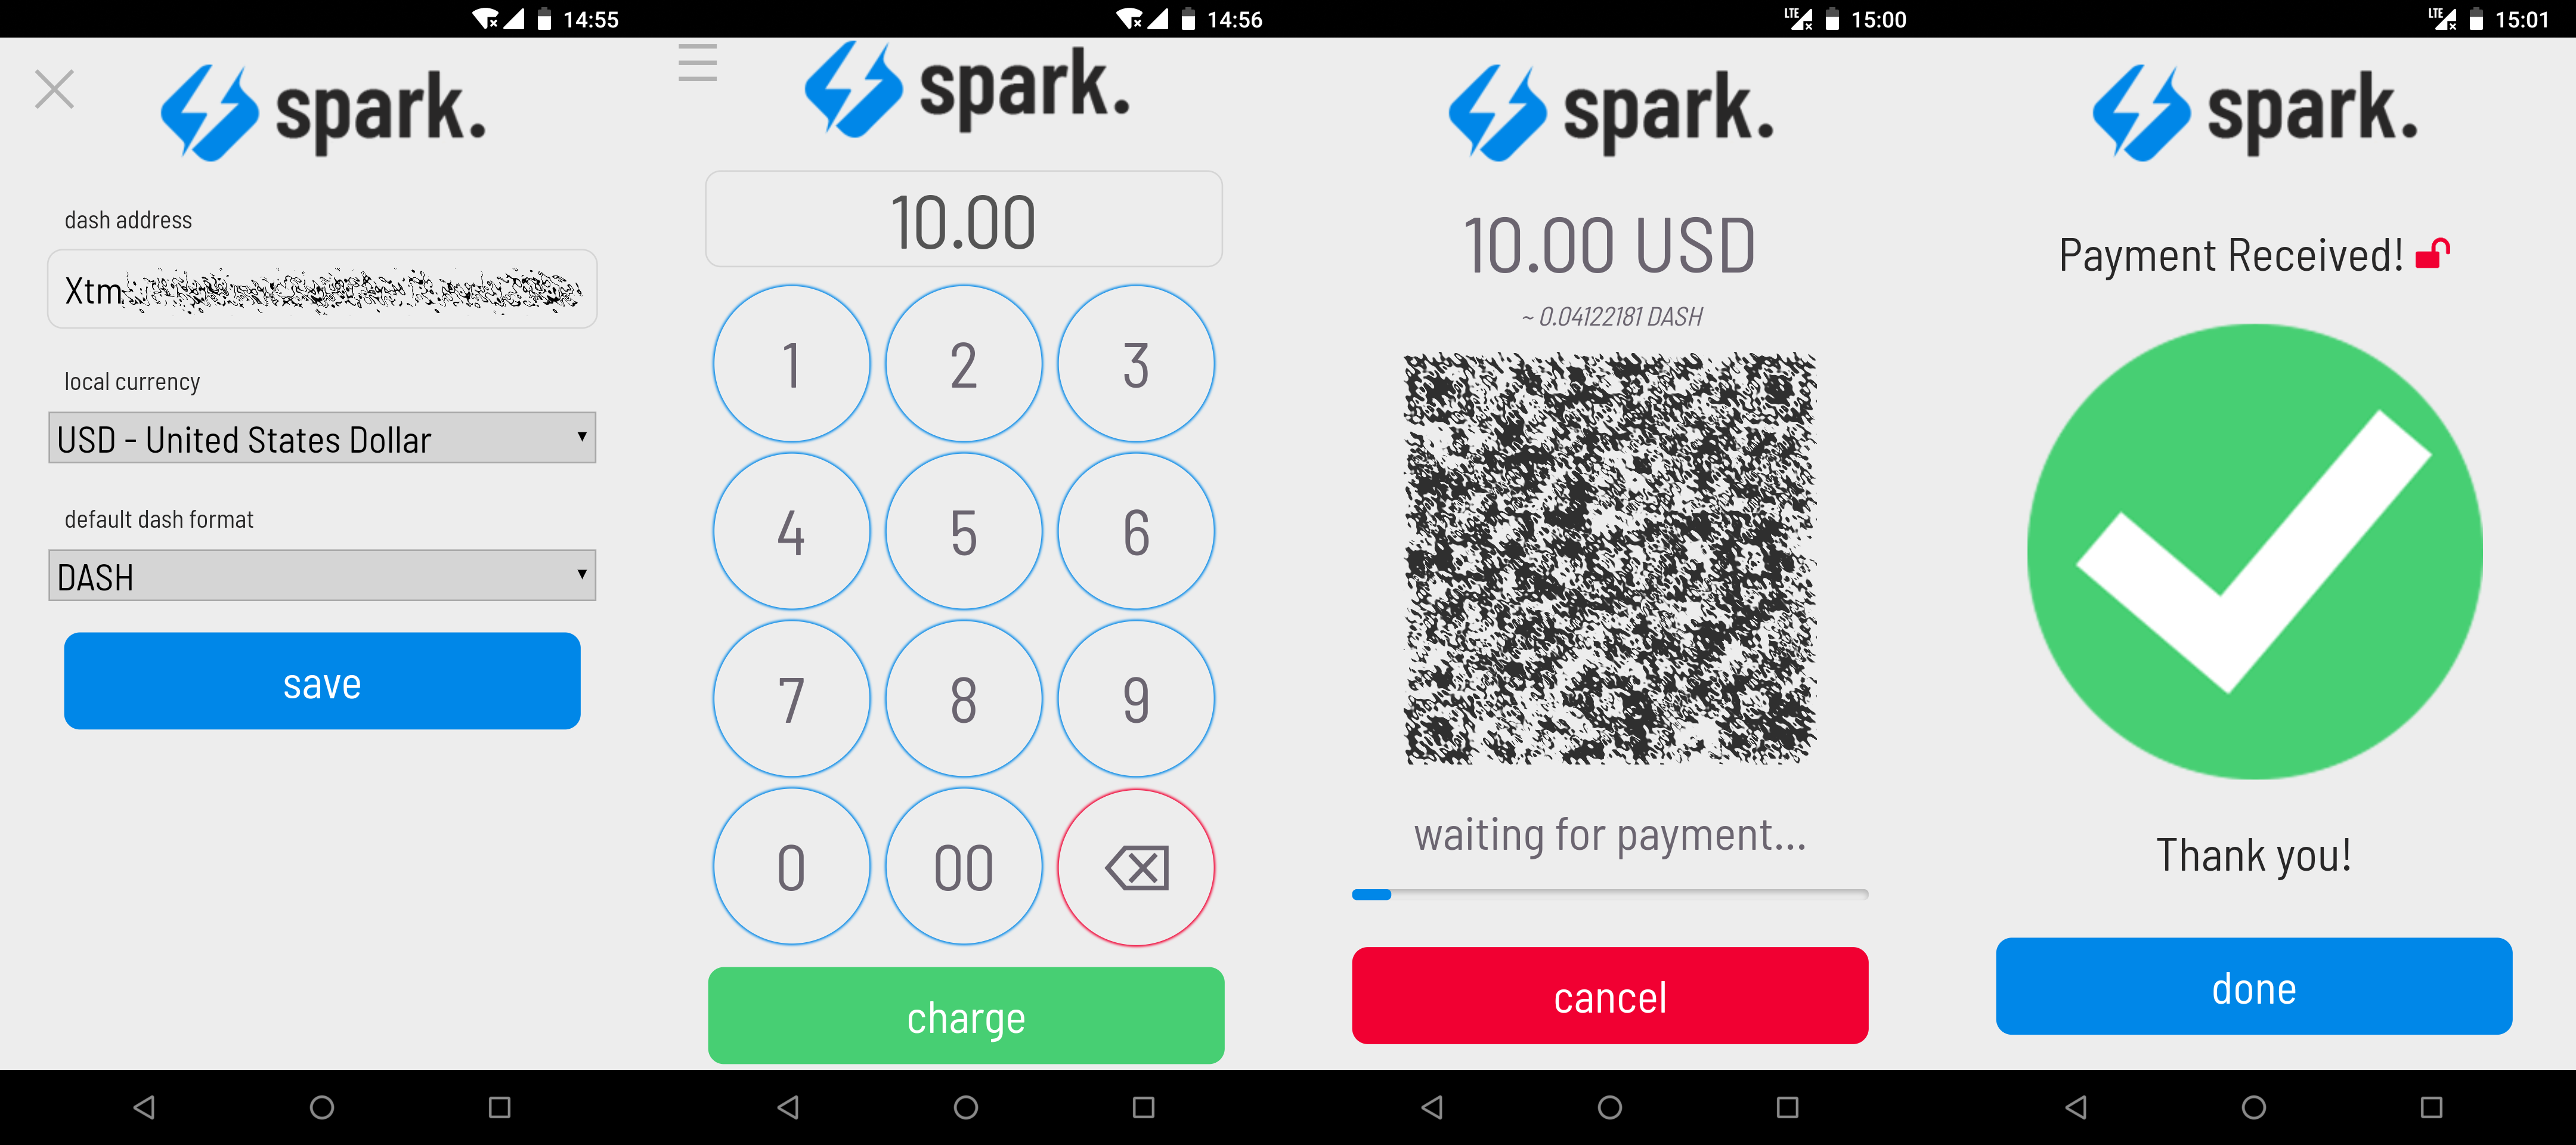
Configuring and receiving payment using Spark Payments
Payment systems like Anypay and Spark can be integrated with your existing terminal and/or accounting software (such as Square Register, by recording sales invoiced in Dash as an Other Payment Type in the system. This allows you to keep track of your Dash income as easily as if you were accepting cash.