Настройки мастерноды#
Настройка и запуск мастерноды подразумевают наличие базового понимания Linux и технологии блокчейн, а также способности внимательно следовать инструкциям. Этот процесс также требует регулярного обслуживания и тщательной защиты, особенно если вы не храните DASH на аппаратном кошельке. Во время настройки необходимо будет принять некоторые решения и дополнительные меры для повышения безопасности.
Если вы предпочитаете делегировать повседневную работу вашей мастерноды профессиональному оператору, то для этого существуют коммерческие сервисы хостинга мастернод. Используя такие сервисы хостинга, вы сохраняете полный контроль над залогом в 1000 DASH и выплачиваете согласованный процент от вашего вознаграждения оператору. Также можно делегировать представителю ваши ключи для голосования, для получения дополнительной информации смотрите документацию по управлению:.
Прежде чем начать#
В этом руководстве предполагается, что вы настраиваете одну мастерноду в основносети и делаете это впервые. Если вы обновляете мастерноду, то вместо этой смотрите информацию здесь. Вам понадобится:
1000 DASH
Кошелёк для хранения DASH, предпочтительно аппаратный кошелёк, хотя кошелёк Dash Core также поддерживается
Сервер Linux, предпочтительно виртуальный выделенный сервер (VPS)
Информацию о размещенных мастернодах см. в документации, приведенной ниже:
В данной документации описаны команды, которые вводятся в графическом интерфейсе Dash Core путем открытия консоли из команды Window > Console, но тот же результат может быть достигнут на мастерноде путем ввода тех же команд и добавления префикса ~/.dashcore/dash-cli к каждой команде.
Конфигурация сервера#
Правильная конфигурация сервера необходима для успешной работы мастерноды как с точки зрения безопасности, так и с точки зрения производительности. Подробную информацию о подготовке сервера к размещению masternode см. на странице Конфигурация сервера.
Отправьте залог#
Для работы мастерноды требуется адрес Dash с одним неизрасходованным выходом (UTXO) равным 1000 DASH. После его отправки необходимо извлечь различные ключи, касающиеся транзакции, для последующего внесения в конфигурационный файл и регистрационной транзакции в качестве доказательства для записи конфигурации в блокчейн, чтобы эвонода могла быть включена в детерминированный список.
Мастернода может быть зарегистрирована как и с аппаратного кошелька или с официального кошелька Dash Core, либо кошелька Dash Electrum, но для повышения безопасности и защиты от взлома настоятельно рекомендуется использовать аппаратный кошелек. В данном руководстве описаны шаги для аппаратных кошельков и Dash Core.
Примечание
Подробности регистрации мастерноды в Dash Electrum можно найти на Electrum - Advanced Functions page.
Способ 1: Отправка из аппаратного кошелька#
Настройте свой Trezor с помощью кошелька Trezor по адресу https://wallet.trezor.io/ и отправьте тестовую транзакцию, чтобы убедиться в его работоспособности. Помощь в этом вопросе см. в в этом гайде - вы также можете (осторожно!) добавить парольную фразу к вашему Trezor для дополнительной защиты вашего залога. Создайте новый счет в кошельке Trezor, нажав Add account. Затем перейдите на вкладку Receive и отправьте на указанный адрес ровно 1000 DASH. Если вы создаете несколько мастернод, отправьте 1000 DASH на последовательные адреса в рамках одного нового счета. Вы увидите транзакцию, как только придет первое подтверждение, обычно в течение нескольких минут.
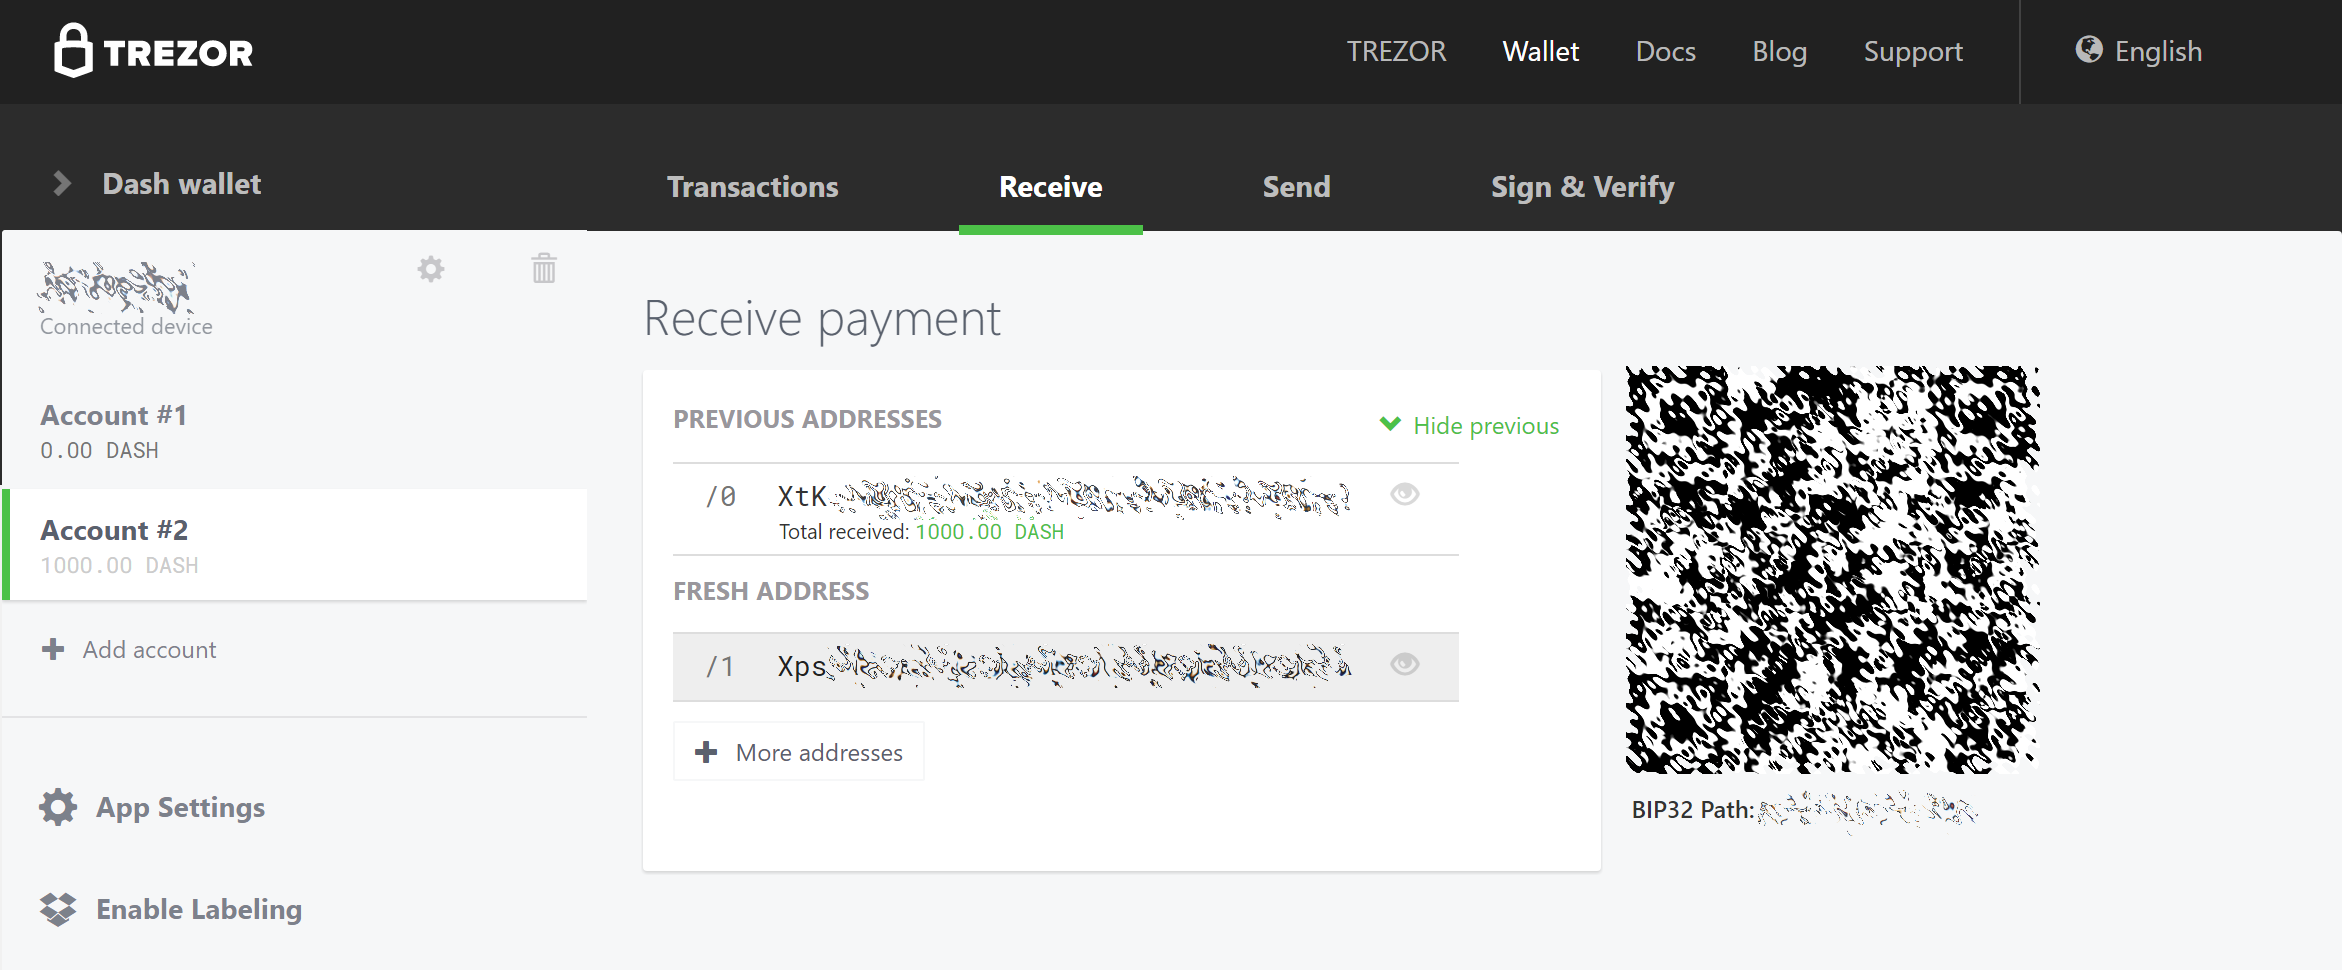
Wallet Receive tab showing successfully received collateral of 1000 DASH#
Когда транзакция появится, кликните на QR-код справа, чтобы увидеть транзакцию в блокчейне. Не закрывайте это окно, пока выполняете дальнейшие шаги, поскольку скоро нам понадобится подтвердить, что существует 15 подтверждений транзакции, как показано на скриншоте ниже.

Blockchain explorer showing 15 confirmations for collateral transfer#
Во время ожидания завершения 15 подтверждений, загрузите последнюю версию Dash Masternode Tool (DMT) со страницы релизов GitHub здесь. Распакуйте и запустите файл. Появится следующее окно.
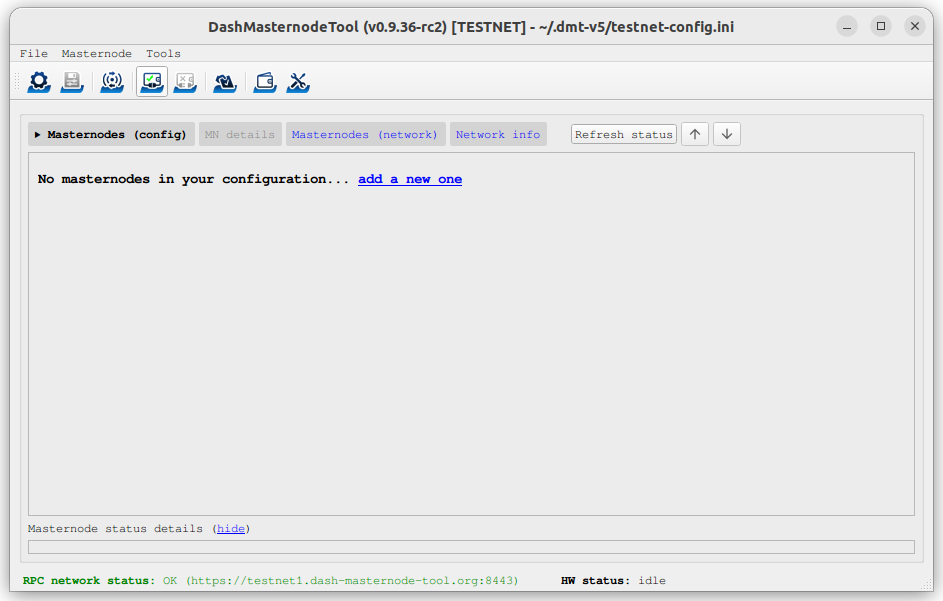
Экран запуска Dash Masternode Tool#
Click the third button from the left Check Dash Network Connection in the top left corner of the main window to verify that the connection is working. Then connect your Trezor device and click the next button Test Hardware Wallet Connection to verify the hardware wallet connection is working.
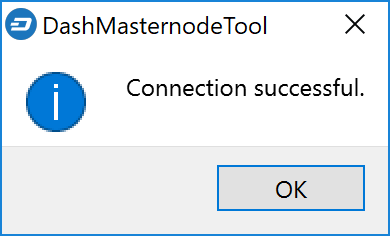
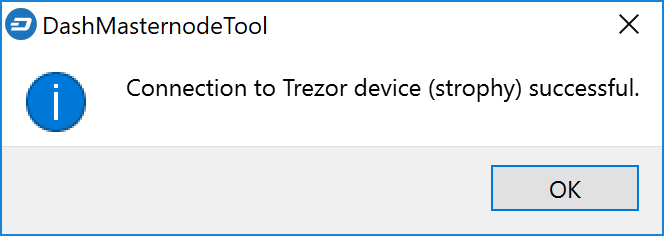
Подтверждения успешного соединения Dash Masternode Tool#
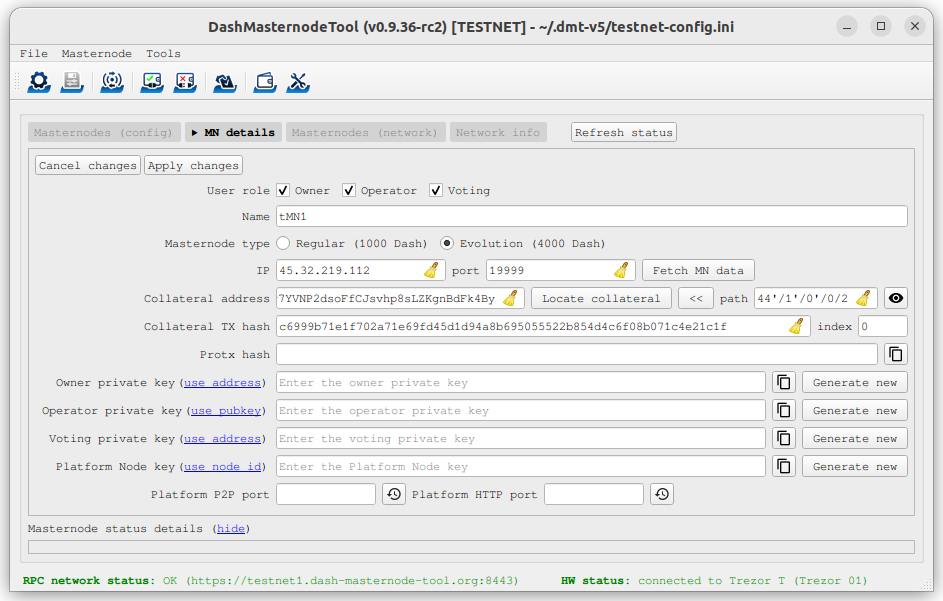
Теперь мы воспользуемся DMT для ввода основной информации о мастерноде2йце и извлечения идентификатора транзакции. Сначала нажмите кнопку add a new one или нажмите MN actions и выберите Add New Masternode Entry…. Выполните следующую последовательность действий, как показано на скриншоте:

Шаги настройки Dash Masternode Tool#
Кликните на кнопку New.
Введите имя вашей мастерноды. Имя хоста, которое вы указали для VPS выше, является хорошим вариантом.
Введите IP-адрес вашей ноды. Его вы получили от вашего VPS-провайдера во время настройки сервера. Затем введите номер TCP-порта, должен быть использован порт 9999.
Нажмите Locate collateral, чтобы просмотреть неиспользованные операции по финансированию залога, доступные на подключенном аппаратном кошельке. Выберите адрес, на который был отправлено обеспечение в 1000 Dash, и нажмите Apply. Поля Collateral address, path, Collateral TX hash и index заполнятся автоматически.
Dash Masternode Tool с конфигурацией ноды#
Оставьте DMT открытым и далее выполните следующий шаг: установка Dash Core на вашем VPS.
Способ 2: Отправка из кошелька Dash Core#
Откройте кошелёк Dash Core и дождитесь пока он синхронизируется с сетью. По завершении это должно выглядеть вот так:
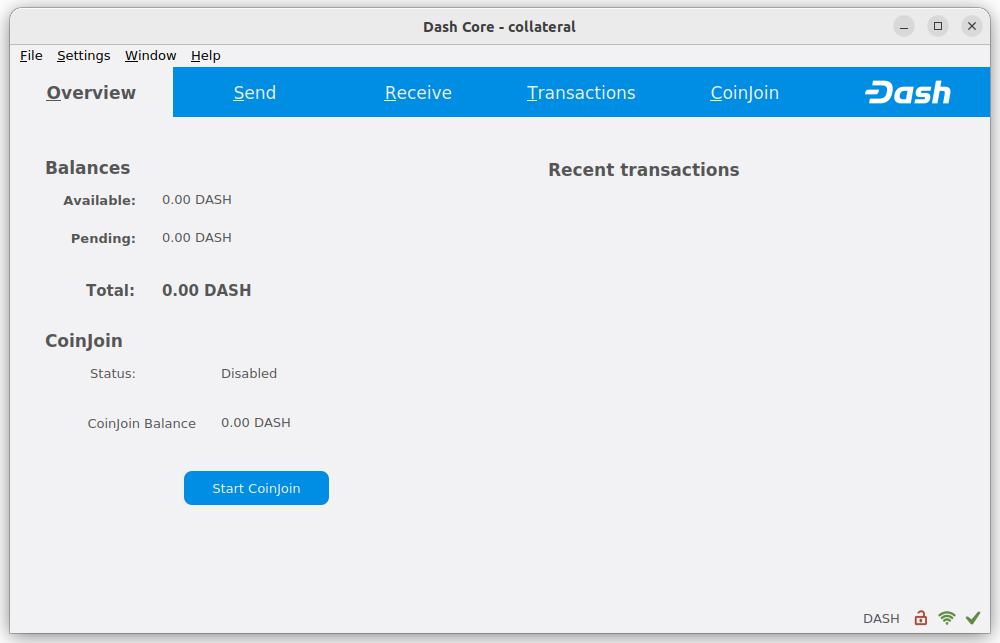
Полностью синхрониируйте кошелёк Dash Core#
Кликните Окно > Консоль, чтобы открыть консоль. Чтобы сгенерировать новый адрес для обеспечения, введите в консоль эту команду:
getnewaddress
yiFfzbwiN9oneftd7cEfr3kQLRwQ4kp7ue
Обратите внимание на адрес обеспечения, так как позже он нам понадобится. Следующим шагом является защита вашего кошелька (если вы до сих пор этого не сделали). Сначала зашифруйте кошелёк щёлкнув Настройки > Зашифровать кошелёк. Необходимо использовать новый и сильный пароль, который вы нигде не использовали ранее. Запишите свой пароль и сохраните его в безопасном месте, в противном случае доступ к кошельку окажется заблокированным навсегда и вы потеряете доступ к своим средствам. Следующим шагом сделайте резервную копию файла вашего кошелька выбрав Файл > Сделать резервную копию кошелька. Сохраните файл в безопасном месте, физически отдельном от вашего компьютера, так это будет единственный вариант доступа к ваши средствам, если с вашим компьютером что-то случится. Для получения более детальной информации по этим шагам смотрите здесь.
Теперь одиночной транзакцией отправьте сумму, точно равную 1000 DASH на адрес учётной записи, который вы сгенерировали во время выполнения предыдущего шага. Эти деньги можно отправить как с другого кошелька, так и со средств, которые находятся на вашем текущем кошельке. Когда транзакция будет совершена, найдите её по адресу в обозревателе блокчейна и наблюдайте за ней. Прежде чем вы сможете зарегестрировать мастерноду, понадобится 15 подтверждений этой транзакции, но настройку на этом этапе можно продолжать, перейдя на следующий шаг: генерацию ключа оператора мастерноды.
Blockchain explorer showing 15 confirmations for collateral transfer#
Установка Dash Core#
Dash Core это ПО, которое объединяет в себе кошелёк с графическим интерфейсом Dash Core и мастерноды Dash. Если графический интерфейс не отображается, то приложение запущено, как демон на VPS (dashd) и контролируется простым командным интерфейсом (dash-cli).
Снова откройте PuTTY или консоль и подключитесь, используя имя пользователя и пароль, которые вы только что создали для нового пользователя, не являющегося пользователем root. Для установки мастерноды Dash доступны следующие опции:
Ручная установка (этот гайд)
Ручная установка#
Для того, чтобы вручную загрузить и установить компоненты мастерноды Dash, посетите страницу релизов GitHub и скопируйте ссылку на последнюю версию x86_64-linux-gnu. Вернитесь в окно терминала и введите следующую команду, вставив адрес последней версии Dash Core, кликнув правой кнопкой мыши или нажав Ctrl + V:
cd /tmp
wget https://github.com/dashpay/dash/releases/download/v23.1.7/dashcore-23.1.7-x86_64-linux-gnu.tar.gz
Убедитесь в подлинности загруженного файла, сверив его подпись с открытым ключом, опубликованным командой разработчиков Dash Core. Все выпуски Dash начиная с v0.16.0 подписываются с помощью GPG следующим ключом:
Pasta, с ключом
5252 7BED ABE8 7984, верифицируемым на Keybase (`скачать<https://keybase.io/pasta/pgp_keys.asc>`__)
curl https://keybase.io/pasta/pgp_keys.asc | gpg --import
wget https://github.com/dashpay/dash/releases/download/v23.1.7/dashcore-23.1.7-x86_64-linux-gnu.tar.gz.asc
gpg --verify dashcore-23.1.7-x86_64-linux-gnu.tar.gz.asc
Создайте рабочую папку для Dash, извлеките туда архив и скопируйте необходимые файлы в эту папку:
mkdir ~/.dashcore
tar xfv dashcore-23.1.7-x86_64-linux-gnu.tar.gz
cp -f dashcore-23.1.7/bin/dashd ~/.dashcore/
cp -f dashcore-23.1.7/bin/dash-cli ~/.dashcore/
С помощью следующей команды создайте файл настроек:
nano ~/.dashcore/dash.conf
Появится окно редактора. Теперь нам нужно создать конфигурационный файл, в котором будут описаны некоторые параметры. Для начала, скопируйте и вставьте в него следующий текст, а затем замените параметры на те, которые удовлетвоярют вашей конфигурации:
#----
rpcuser=XXXXXXXXXXXXX
rpcpassword=XXXXXXXXXXXXXXXXXXXXXXXXXXXX
rpcallowip=127.0.0.1
#----
listen=1
server=1
daemon=1
#----
#masternodeblsprivkey=
externalip=XXX.XXX.XXX.XXX
#----
Замените все поля с XXXXXXX следующим образом:
rpcuser: введите любой набор цифр или букв, без специальных символовrpcpassword: введите любой набор цифр или букв, без специальных символовexternalip: это IP-адрес вашего VPS
Поле masternodeblsprivkey пока оставим закомментированным. Результат должен выглядеть примерно так:
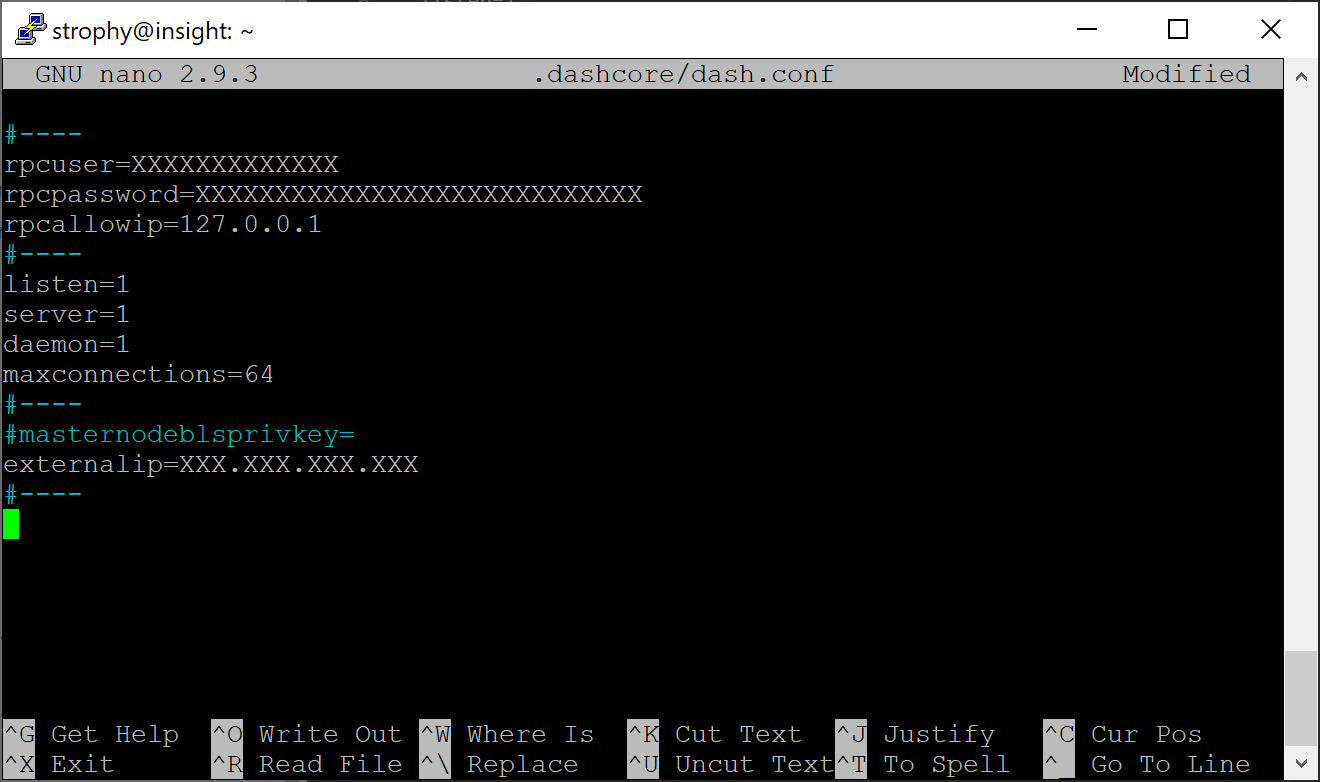
Ввод ключевых данных в dash.conf для мастерноды#
Нажмите Ctrl + X и закройте редактор, а затем нажмите Y и Enter, чтобы сохранить файл. Теперь вы можете запустить Dash в режиме мастерноды и начать синхронизацию с блокчейном:
~/.dashcore/dashd
На экране появится сообщение Запуск сервера Dash Core.
Добавьте dashd в crontab, чтобы он запускался каждую минуту для проверки вашей мастерноды:
crontab -e
В качестве редактора выберите nano и в конце файла введите следующую строку:
* * * * * pidof dashd || ~/.dashcore/dashd
Нажмите Enter, чтобы убедиться, что в конце файла есть пустая строка, затем нажмите Ctrl + X, чтобы закрыть редактор, а затем Y и Enter, чтобы сохранить файл. Теперь для залоговой транзакции, чтобы она считалась завершённой, следует дождаться 15 подтверждений сети, а также дождаться пока мастернода завершит процес синхронизации с блокчейном. Для мониторинга за процессом можно использовать следующие команды:
~/.dashcore/dash-cli mnsync status
По завершении синхронизации вы увидите следующий ответ:
{
  "AssetID": 999,
  "AssetName": "MASTERNODE_SYNC_FINISHED",
  "AssetStartTime": 1558596597,
  "Attempt": 0,
  "IsBlockchainSynced": true,
  "IsSynced": true,
  "IsFailed": false
}
Выполните следующий шаг, в котором необходимо создать транзакцию ProTx, она требуется для активации мастерноды.
Зарегистрируйте вашу мастерноду#
Три ключа, необходимые для различных ролей мастерноды, кратко описаны в разделе Концепты мастернод данной документации.
Способ 1: Регистрация из аппаратного кошелька#
Возвращайтесь назад в DMT и убедитесь, что все поля из предыдущего шага остались заполнены правильно. Кликните Generate new, чтобы сгенерировать три приватных ключа, которые необходимы для мастерноды:
Приватный ключ владельца
Приватный ключ оператора
Приватный ключ голосования
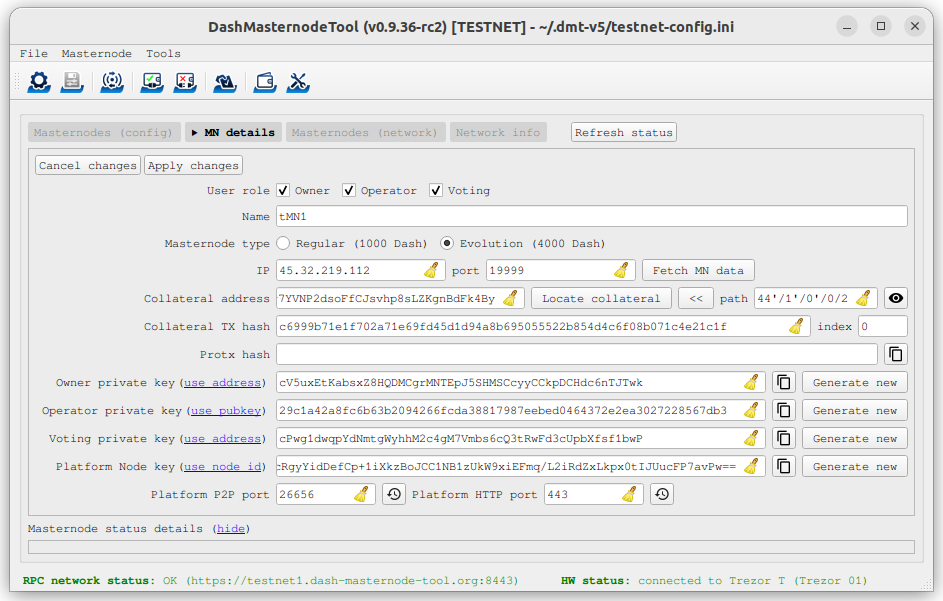
Dash Masternode Tool готов к регистрации новой мастерноды#
Затем нажмите кнопку Register masternode. По желанию укажите другой Payout address и/или Operator reward, затем нажмите Продолжить. Выберите Remote Dash RPC Node (автоматический метод). (Документацию по использованию собственного локального RPC-узла см. здесь <Bertrand256/dash-masternode-tool>`__) и подтвердите следующие два сообщения:

Запрашивающие подтверждение диалоги в Dash Masternode Tool для регистрации мастерноды#
Приватный BLS-ключ необходимо внести в файл dash.conf мастерноды. Это позволит мастерноде следить за блокчейном и выявлять в нём релевантные транзакции Pro*Tx, а также заставит ноду начать выполнять функции мастерноды, после того, как подписанная владельцем транзакция ProRegTx начнёт транслироваться в сеть, что мы только что сделали выше. Войдите в свою мастерноду и отредактируйте конфигурационный файл мастерноды, как показано ниже:
nano ~/.dashcore/dash.conf
При открытии существующей конфигурации мастерноды откроется редактор. В конце файла добавьте следующую строку(раскомментируйте), заменив ключ на приватный BLS-ключ, который был сгенерирован выше:
masternodeblsprivkey=24c1fa3c22c6ea6b1cc68a37be18acb51042b19465fe0a26301c8717bf939805
Нажмите клавишу Enter, чтобы убедиться, что в конце файла осталась пустая строка, затем нажмите Ctrl + X для закрытия редактора и Y и Enter для сохранения файла. Обратите внимание, что предоставление masternodeblsprivkey включает режим masternode, что автоматически приводит к установке параметров txindex=1, peerbloomfilters=1 и prune=0, необходимых для обеспечения работы мастерноды. Теперь нам необходимо перезапустить мастерноду, чтобы это изменение вступило в силу. Введите следующие команды, подождав несколько секунд между ними, чтобы дать Dash Core время на завершение работы:
~/.dashcore/dash-cli stop
sleep 15
~/.dashcore/dashd
На этом этапе вы можете наблюдать за своей мастернодой введя ~/.dashcore/dash-cli masternode status или используя функцию Get status в DMT. Конечный результат должен быть таким, как показано ниже:

Статус мастерноды dash-cli, который сообщает об успешно зарегистрированной мастерноде#
На этом этапе можно безопасно совершить выход из сервера, набрав exit. Поздравляем! Ваша мастернода теперь работает.
Способ 2: Регистрация в кошельке Dash Core#
Идентификация транзакции финансирования#
Если для совершения залоговой транзакции вы использовали адрес кошелька Dash Core, то теперь необходимо найти txid этой транзакции. Кликните Окно > Консоль и введите следующую команду:
masternode outputs
Консоль должна вернуть строку символов, аналогичную этой:
{
"16347a28f4e5edf39f4dceac60e2327931a25fdee1fb4b94b63eeacf0d5879e3-1",
}
Первая длинная строка - это хеш вашей транзакции, последние цифры в ней - это индекс обеспечения.
Генерация пары BLS-ключей#
Для работы мастерноды требуется пара открытый/закрытый ключ BLS. Закрытый ключ указывается на самой ноде и позволяет включить его в детерминированный список узлов после создания транзакции регистрации провайдера с соответствующим открытым ключом.
Если вы пользуетесь услугами хостинга, они могут предоставить вам свой открытый ключ, и вы можете пропустить этот шаг. Если вы размещаете свой собственную мастернод или согласились предоставить хостеру закрытый ключ BLS, можно сгенерировать пару открытый/закрытый ключ BLS в Dash Core, нажав Window > Tools и введя следующую команду:
bls generate

{
  "secret": "395555d67d884364f9e37e7e1b29536519b74af2e5ff7b62122e62c2fffab35e",
  "public": "99f20ed1538e28259ff80044982372519a2e6e4cdedb01c96f8f22e755b2b3124fbeebdf6de3587189cf44b3c6e7670e",
  "scheme": "legacy"
}
Эти ключи НЕ сохраняются в кошельке и должны храниться в безопасном месте, как и значение, предоставленное в одном из предыдущих шагов после выполнения masternode genkey команды.
Добавьте приватный ключ в конфигурацию вашей мастерноды#
Публичный ключ будет использоваться в следующих шагах. Приватный BLS-ключ необходимо внести в файл dash.conf мастерноды. Это позволит мастерноде следить за блокчейном и выявлять в нём релевантные транзакции Pro*Tx, а также заставит ноду начать выполнять функции мастерноды, после того, как подписанная владельцем транзакция ProRegTx начнёт транслироваться в сеть (последний шаг ниже). Войдите в учётную запись своей мастерноды, используя ssh или PuTTY и отредактируйте конфигурационный файл, как показано ниже:
nano ~/.dashcore/dash.conf
При открытии существующей конфигурации мастерноды откроется редактор. В конце файла добавьте следующую строку (раскомментируйте), заменив ключ на приватный BLS-ключ, который был сгенерирован выше:
masternodeblsprivkey=395555d67d884364f9e37e7e1b29536519b74af2e5ff7b62122e62c2fffab35e
Нажмите клавишу Enter, чтобы убедиться, что в конце файла осталась пустая строка, затем нажмите Ctrl + X для закрытия редактора и Y и Enter для сохранения файла. Обратите внимание, что предоставление masternodeblsprivkey включает режим masternode, что автоматически приводит к установке параметров txindex=1, peerbloomfilters=1 и prune=0, необходимых для обеспечения работы мастерноды. Теперь нам необходимо перезапустить мастерноду, чтобы это изменение вступило в силу. Введите следующие команды, подождав несколько секунд между ними, чтобы дать Dash Core время на завершение работы:
~/.dashcore/dash-cli stop
sleep 15
~/.dashcore/dashd
Теперь мы подготовим транзакцию, используемую для регистрации мастерноды в сети.
Подготовка транзакции ProRegTx#
Пара BLS-ключей для оператора уже была сгенерирована выше, а закрытый ключ был введен на мастер-узле. Открытый ключ используется в данной транзакции в качестве operatorPubKey.
Во-первых, нам необходимо получить из кошелька новый, неиспользуемый адрес, который будет служить адресом ключа владельца (ownerKeyAddr). Это не то же самое, что адрес обеспечения, на котором хранится 1000 Dash. Сгенерируйте новый адрес следующим образом:
getnewaddress

yfgxFhqrdDG15ZWKJAN6dQvn6dZdgBPAip
Этот адрес также может быть использован в качестве адреса ключа голосования (votingKeyAddr). В качестве альтернативы можно указать адрес, предоставленный Вам выбранным Вами делегатом голосования, или просто сгенерировать новый адрес ключа голосования следующим образом:
getnewaddress

yfRaZN8c3Erpqj9iKnmQ9QDBeUuRhWV3Mg
Затем либо сгенерируйте, либо выберите из существующих второй адрес для получения платежей владельца мастерноды (payoutAddress). Также возможно использовать адрес внешнего кошелька:
getnewaddress

yjZVt49WsQd6XSrPVAUGXtJccxviH9ZQpN
При желании можно сгенерировать и пополнить другой адрес в качестве источника комиссии за транзакцию (feeSourceAddress). Если выбран внешний адрес выплаты, то необходимо указать адрес источника комиссии.
Либо адрес выплаты, либо адрес источника комиссии должны иметь достаточный баланс для оплаты комиссии за транзакцию, иначе транзакция register_prepare завершится неудачей.
Приватные ключи владельца и адреса источника оплаты комиссии должны присутствовать в кошельке, отправляющем транзакцию в сеть. Если ваш кошелёк защищён паролем, то для выполнения указанных команд его необходимо разблокировать. Разблокируйте свой кошелёк на 5 минут:
walletpassphrase yourSecretPassword 300
Сейчас мы подготовим неподписанную специальную ProRegTx-транзакцию, использовав команду protx register_prepare. Эта команда имеет следующий синтаксис:
protx register_prepare collateralHash collateralIndex coreP2PAddrs ownerKeyAddr
  operatorPubKey votingKeyAddr operatorReward payoutAddress (feeSourceAddress)
Предупреждение
Previously, protx register_prepare_legacy could be used to register a masternode with a legacy
scheme BLS key. The legacy commands were deprecated as of Dash Core v23.0, so it is now recommended
to generate a new basic scheme BLS key instead. This can be done by following the Generate a
BLS key pair instructions.
Откройте текстовый редактор, например Блокнот и подготовьте эту команду. Замените каждый аргумент команды следующим образом:
Примечание
As of Dash Core v23.0, the coreP2PAddrs field accepts backwards-compatible input.
collateralHash: txid транзакции залогового финансирования на 1000 DASHcollateralIndex: Индекс выхода транзакции финансирования на 1000 DASHcoreP2PAddrs: Array of masternode address(es), in the formatx.x.x.x:yyyyownerKeyAddr: Сгенерированный выше новый адрес Dash для владельца/голосованияoperatorPubKey: Публичный BLS-ключ, сгенерированный выше (или предоставленный хостинг-сервисом)votingKeyAddr: Новый адрес Dash, сгенерированный выше или адрес делегата, используемый для голосования по предложениямoperatorReward: Процент награды за блок, который выделен оператору в качестве оплатыpayoutAddress: Новый или существующий адрес Dash для получения платежей от владельца мастернодыfeeSourceAddress: (Необязательный) адрес, используемый для финансирования комиссий ProTx. Если не указан, то будет использоватьсяpayoutAddress.
Обратите внимание, что оператор несёт ответственность за указание адреса, на который будет начисляться его собственная награда в отдельной транзакции update_service в случае, если вы укажете отличную от нуля награду operatorReward. Владелец залогового подтверждения не указывает адрес для выплаты оператору.
Пример (удалите разрывы строк при копировании):
protx register_prepare
  16347a28f4e5edf39f4dceac60e2327931a25fdee1fb4b94b63eeacf0d5879e3
  1
  '["45.76.230.239:19999"]'
  yfgxFhqrdDG15ZWKJAN6dQvn6dZdgBPAip
  99f20ed1538e28259ff80044982372519a2e6e4cdedb01c96f8f22e755b2b3124fbeebdf6de3587189cf44b3c6e7670e
  yfRaZN8c3Erpqj9iKnmQ9QDBeUuRhWV3Mg
  0
  yjZVt49WsQd6XSrPVAUGXtJccxviH9ZQpN
  yR83WsikBaBaNusTnHZf28kAcL8oVmp1TE
На выходе:
{
  "tx": "030001000175c9d23c2710798ef0788e6a4d609460586a20e91a15f2097f56fc6e007c4f8e0000000000feffffff01a1949800000000001976a91434b09363474b14d02739a327fe76e6ea12deecad88ac00000000d1010000000000e379580dcfea3eb6944bfbe1de5fa2317932e260acce4d9ff3ede5f4287a34160100000000000000000000000000ffff2d4ce6ef4e1fd47babdb9092489c82426623299dde76b9c72d9799f20ed1538e28259ff80044982372519a2e6e4cdedb01c96f8f22e755b2b3124fbeebdf6de3587189cf44b3c6e7670ed1935246865dce1accce6c8691c8466bd67ebf1200001976a914fef33f56f709ba6b08d073932f925afedaa3700488acfdb281e134504145b5f8c7bd7b47fd241f3b7ea1f97ebf382249f601a0187f5300",
  "collateralAddress": "yjSPYvgUiAQ9AFj5tKFA8thFLoLBUxQERb",
  "signMessage": "yjZVt49WsQd6XSrPVAUGXtJccxviH9ZQpN|0|yfgxFhqrdDG15ZWKJAN6dQvn6dZdgBPAip|yfRaZN8c3Erpqj9iKnmQ9QDBeUuRhWV3Mg|ad5f82257bd00a5a1cb5da1a44a6eb8899cf096d3748d68b8ea6d6b10046a28e"
}
Теперь используем поля collateralAddress и signMessage для подписания транзакции и поле выхода tx для отправления транзакции.
Подпишите транзакцию ProRegTx#
Теперь подпишем содержимое поля signMessage используя приватный ключ для залогового адреса, указанный в collateralAddress. Обратите внимание, что для выполнения этого шага не требуется интернет-соединение, что значит, что для подписи сообщения кошелёк может оставаться отключённым от интернета в состоянии холодного хранилища. В этом примере мы снова используем Dash Core, но в равной степени возможно использовать функцию подписи аппаратного кошелька. Команда имеет следующий синтаксис:
signmessage collateralAddress signMessage
Пример:
signmessage yjSPYvgUiAQ9AFj5tKFA8thFLoLBUxQERb yjZVt49WsQd6XSrPVAUGXtJccxviH9ZQpN|0|yfgxFhqrdDG15ZWKJAN6dQvn6dZdgBPAip|yfRaZN8c3Erpqj9iKnmQ9QDBeUuRhWV3Mg|ad5f82257bd00a5a1cb5da1a44a6eb8899cf096d3748d68b8ea6d6b10046a28e
На выходе:
II8JvEBMj6I3Ws8wqxh0bXVds6Ny+7h5HAQhqmd5r/0lWBCpsxMJHJT3KBcZ23oUZtsa6gjgISf+a8GzJg1BfEg=
Подтвердите подписанное сообщение#
Теперь мы отправим в блокчейн специальную транзакцию ProRegTx для регистрации мастерноды. Эта команда должна быть отправлена с кошелька Dash Core, имеющего баланс на feeSourceAddress или payoutAddress, поскольку в этом случае взимается стандартная комиссия за транзакцию. Команда имеет следующий синтаксис:
protx register_submit tx sig
Где:
tx: Сериализованная транзакция, ранее возвращённая в поле выходаtxизprotx register_preparesig: Сообщение, подписанное залоговым ключом с помощью командыsignmessage
Пример:
protx register_submit 030001000175c9d23c2710798ef0788e6a4d609460586a20e91a15f2097f56fc6e007c4f8e0000000000feffffff01a1949800000000001976a91434b09363474b14d02739a327fe76e6ea12deecad88ac00000000d1010000000000e379580dcfea3eb6944bfbe1de5fa2317932e260acce4d9ff3ede5f4287a34160100000000000000000000000000ffff2d4ce6ef4e1fd47babdb9092489c82426623299dde76b9c72d9799f20ed1538e28259ff80044982372519a2e6e4cdedb01c96f8f22e755b2b3124fbeebdf6de3587189cf44b3c6e7670ed1935246865dce1accce6c8691c8466bd67ebf1200001976a914fef33f56f709ba6b08d073932f925afedaa3700488acfdb281e134504145b5f8c7bd7b47fd241f3b7ea1f97ebf382249f601a0187f5300 II8JvEBMj6I3Ws8wqxh0bXVds6Ny+7h5HAQhqmd5r/0lWBCpsxMJHJT3KBcZ23oUZtsa6gjgISf+a8GzJg1BfEg=
На выходе:
aba8c22f8992d78fd4ff0c94cb19a5c30e62e7587ee43d5285296a4e6e5af062
Теперь ваша мастернода зарегистрирована и появится в списке детерминированных мастернод после того, как транзакция будет добыта в блок. Просмотреть этот список можно на вкладке Masternodes -> DIP3 Masternodes кошелька Dash Core или в консоли с помощью команды protx list valid, где txid финальной транзакции protx register_submit идентифицирует ваш masternode.
В этот момент вы можете вернуться в окно терминала и проконтролировать состояние своей ноды, введя ~/.dashcore/dash-cli masternode status или воспользовавшись функцией Get status в DMT.
На этом этапе можно безопасно совершить выход из сервера, набрав exit. Поздравляем! Ваша мастернода теперь работает.
Способ 3: Регистрация в кошельке Dash Electrum#
Dash Electrum поддерживает регистрацию и управление мастернодами. Подробности можно найти на странице Electrum - Advanced Functions page. В сочетании с функциями Electrum multisig обеспечение мастернод может храниться в кошельке с мультподписью, что повышает гибкость системы безопасности.
Предупреждение
Всегда соблюдайте осторожность при использовании многосиговых учетных записей и проверяйте, что каждая мнемоника резервируется соответствующим образом. См. эту страницу для документации Dash Electrum, демонстрирующей настройку masternode с использованием multisig-залога.