Server configuration#
Cài đặt một masternode cần một mức độ hiểu biết cơ bản về Linux và công nghệ blockchain, cũng như khả năng làm theo các hướng dẫn một cách chính xác. Nó cũng cần phải thường xuyên bảo trì và bảo mật một cách cẩn thận, đặc biệt là nếu bạn không giữ Dash trong một ví phần cứng. Cần phải ra một số quyết định trong quá trình thực hiện, và một số bước bổ sung để tăng cường tính bảo mật.
Commercial masternode hosting services are available if you prefer to delegate day-to-day operation of your masternode to a professional operator. When using these hosting services, you retain full control of the masternode collateral and pay an agreed percentage of your reward to the operator.
Cài đặt VPS của bạn#
A VPS, more commonly known as a cloud server, is fully functional installation of an operating system (usually Linux) operating within a virtual machine. The virtual machine allows the VPS provider to run multiple systems on one physical server, making it more efficient and much cheaper than having a single operating system running on the "bare metal" of each server.
A VPS is ideal for hosting a Dash masternode because they typically offer guaranteed uptime, redundancy in the case of hardware failure and a static IP address that is required to ensure you remain in the masternode payment queue. While running a masternode from home on a desktop computer is technically possible, it will most likely not work reliably because most ISPs allocate dynamic IP addresses to home users.
Chú ý
Disabling IPv6 is highly recommended to prevent communication issues that have been observed when running nodes on some VPS providers. We recommend turning it off through the VPS provider's setup wizard during initial server creation.
Before beginning, take a few minutes to review the masternode and evonode hardware requirements which may help you decide which VPS provider best suits your needs. We will use Vultr hosting as an example of a VPS, although DigitalOcean, Amazon EC2, Google Cloud, Choopa and OVH are also popular choices. First create an account and add credit. Then go to the Servers menu item on the left and click + to add a new server. Select a location for your new server on the following screen:
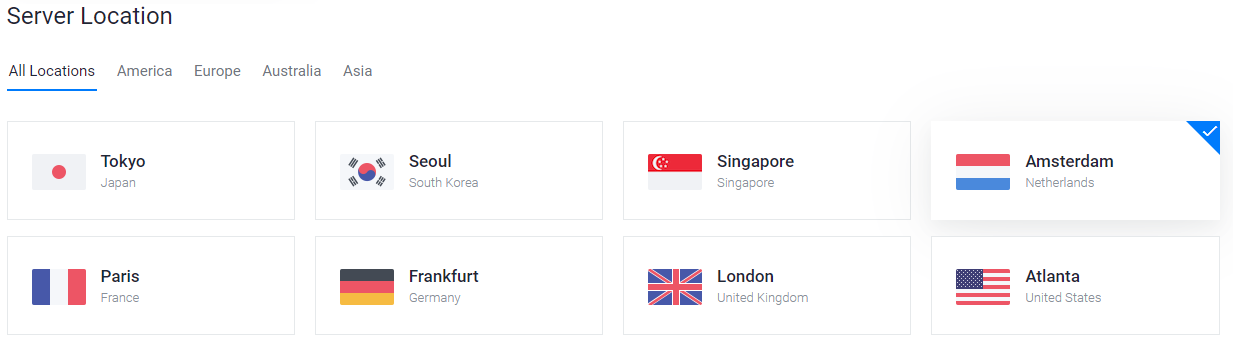
Màn hình chọn địa điểm cho máy chủ trên Vultr#
Select Ubuntu 24.04 x64 as the server type. We use this LTS release of Ubuntu instead of the latest version because LTS releases are supported with security updates for 5 years, instead of the usual 9 months.
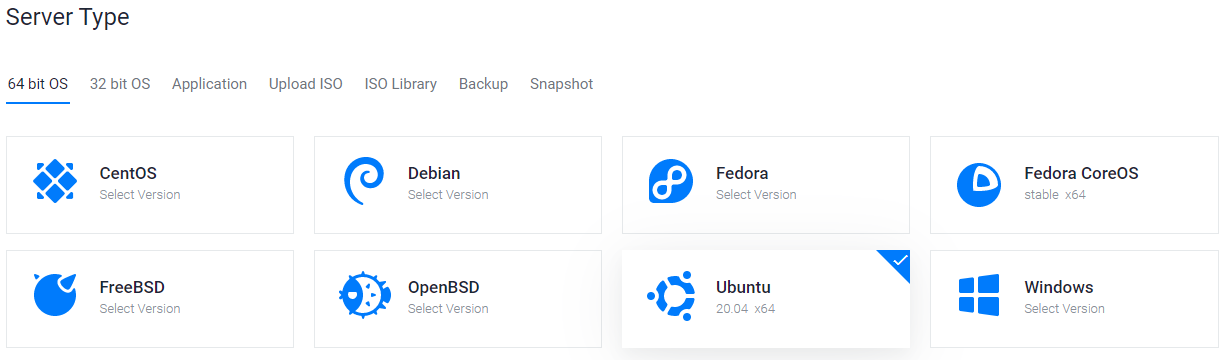
Màn hình chọn kiểu máy chủ trên Vultr#
Select a server size according to the hardware requirements for you masternode or evonode:
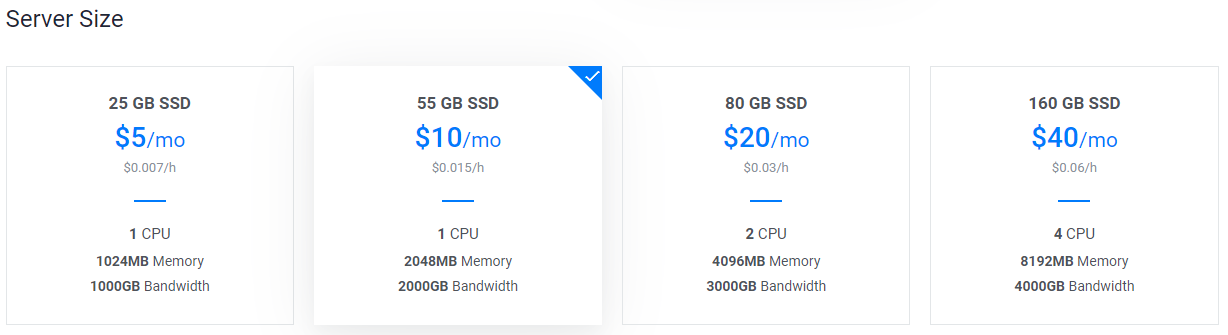
Màn hình lựa chọn kích thước máy chủ trên Vultr#
Nhập tên máy chủ và nhãn cho máy chủ của bạn. Trong ví dụ này thì chúng tôi sử dụng dashmn1 làm tên cho máy chủ.

Tên máy chủ và màn hình lựa chọn nhãn trên Vultr#
Vultr sẽ cài đặt máy chủ cho bạn. Quá trình này sẽ mất vài phút.

Màn hình cài đặt máy chủ ở Vultr#
Bấm vào Manage khi việc cài đặt được hoàn tất và bạn nên ghi lại địa chỉ IP, tên người dùng và mật khẩu.
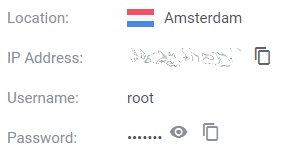
Màn hình quản lý máy chủ của Vultr#
Cài đặt hệ điều hành của bạn#
We will begin by connecting to your newly provisioned server. On Windows, we
will first download an app called PuTTY to connect to the server. Go to the
PuTTY download page and select
the appropriate MSI installer for your system. On Mac or Linux you can ssh
directly from the terminal - simply type ssh root@<server_ip> and enter your
password when prompted.
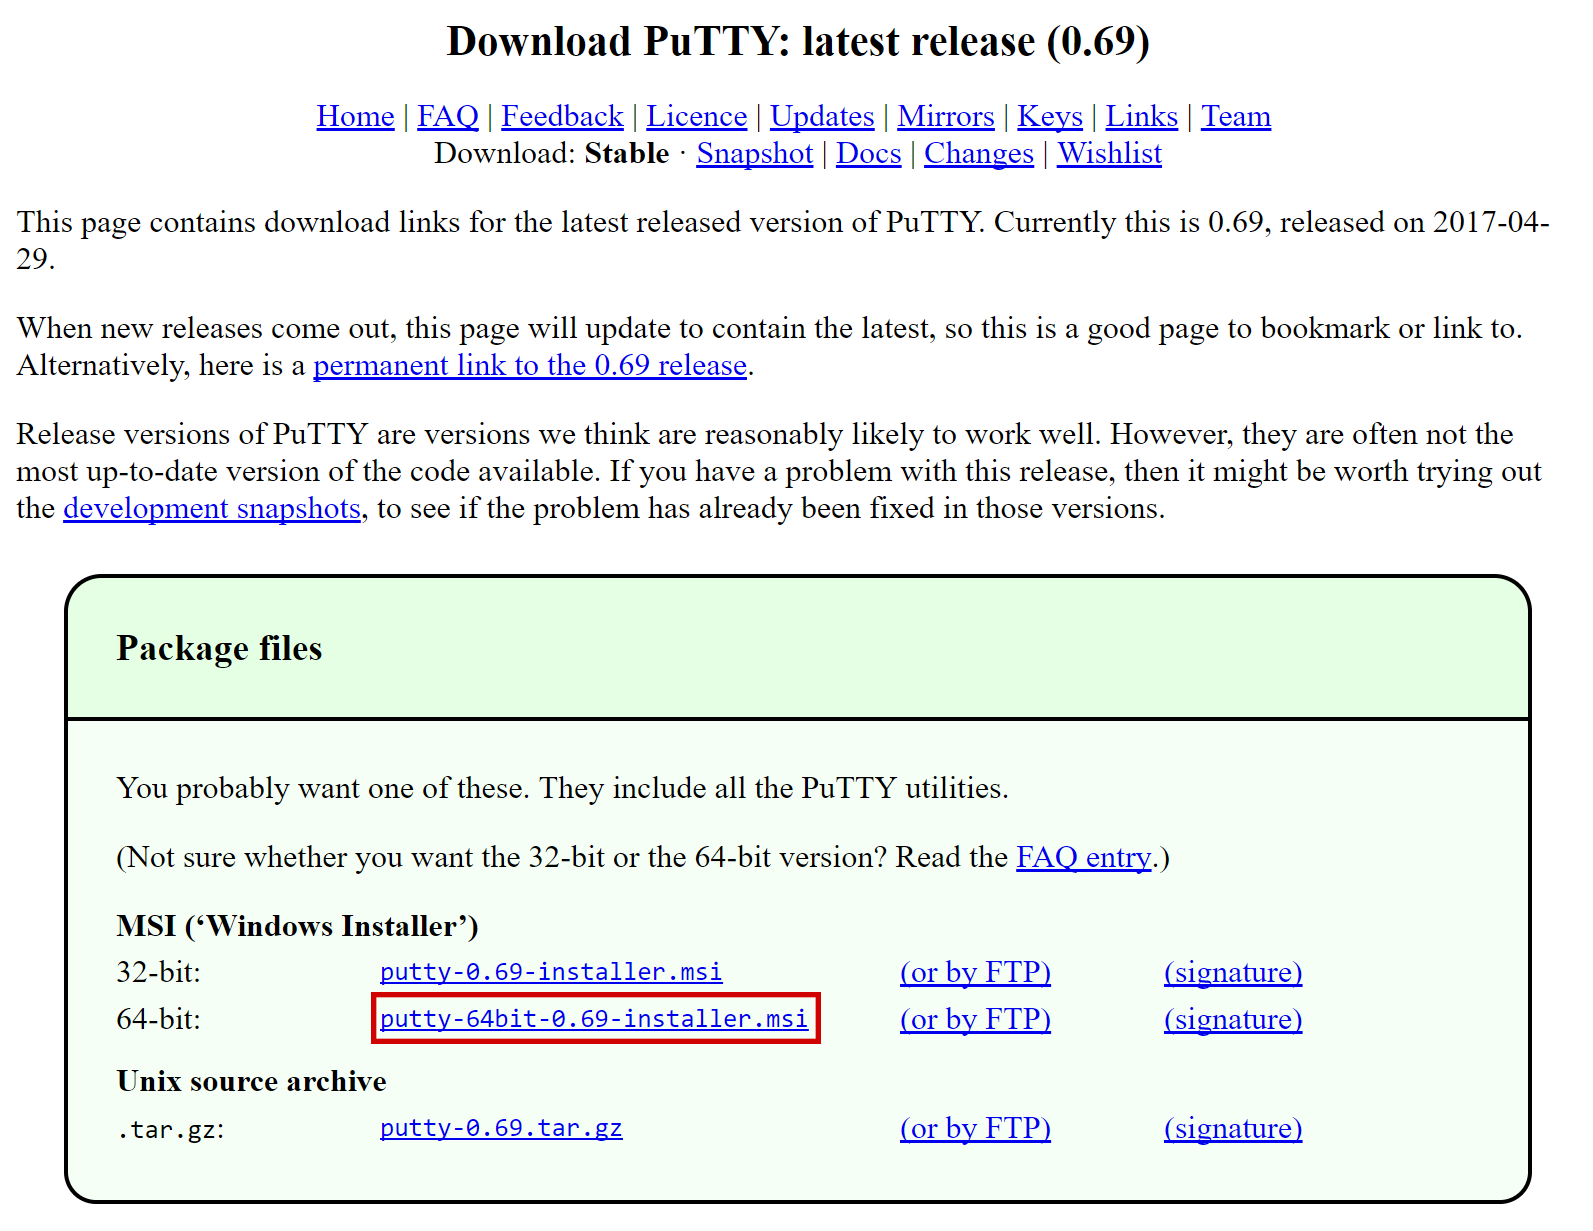
Trang tải PuTTY#
Double-click the downloaded file to install PuTTY, then run the app from your Start menu. Enter the IP address of the server in the Host Name field and click Open. You may see a certificate warning, since this is the first time you are connecting to this server. You can safely click Yes to trust this server in the future.
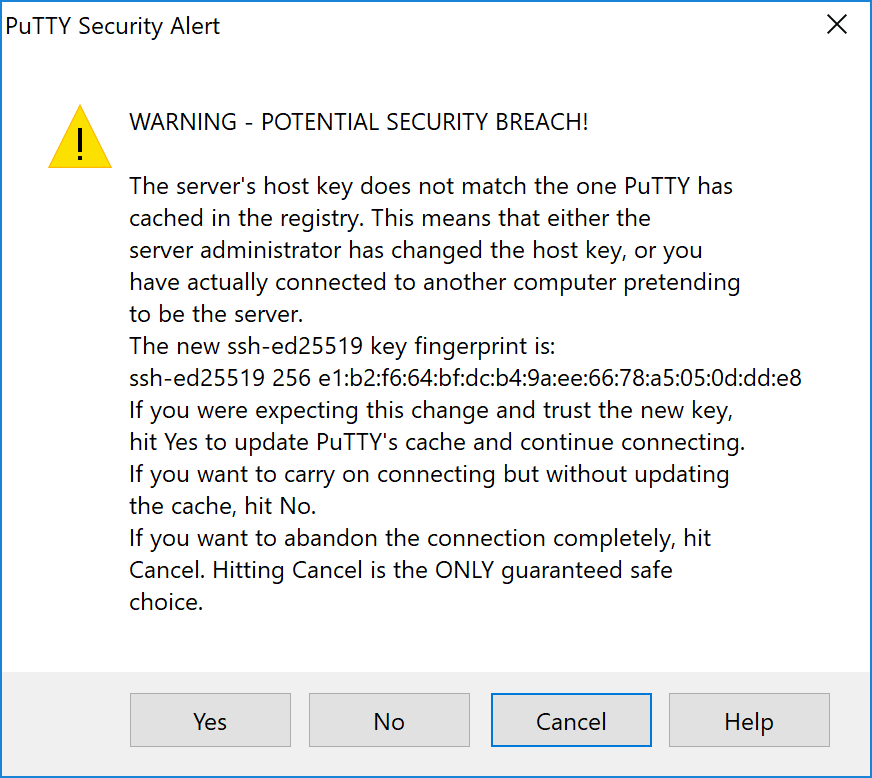
Cảnh báo an ninh của PuTTY khi kết nối với một máy chủ mới#
Bây giờ bạn đã kết nối với máy chủ của mình và sẽ nhìn thấy một cửa sổ làm việc. Bắt đầu bằng việc đăng nhập vào máy chủ của bạn với tên người dùng là root và mật khẩu được cung cấp bởi nhà cung cấp dịch vụ lưu trữ của bạn.
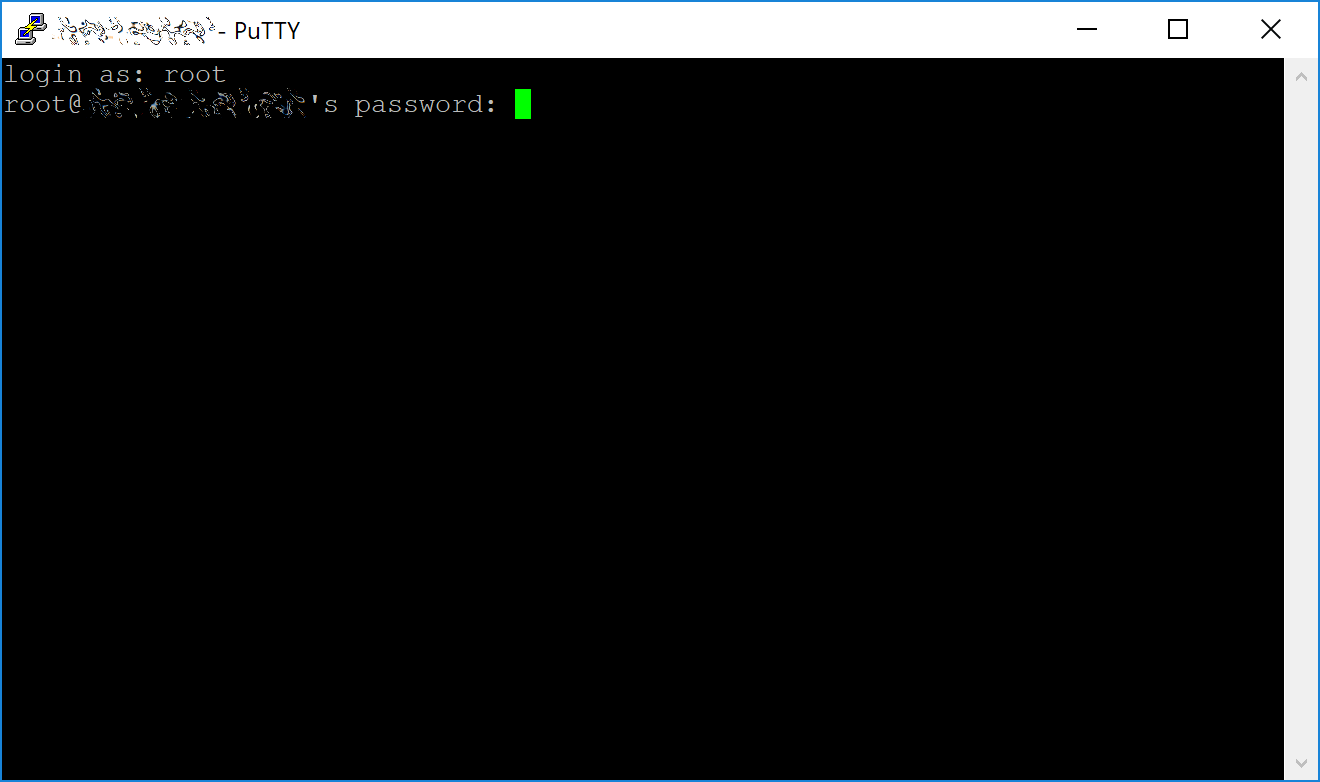
Yêu cầu mật khẩu khi bạn kết nối với máy chủ ảo - còn gọi là "VPS" trong lần đầu tiên#
Set up users#
You should immediately change the root password and store it in a safe place for security. You can copy and paste any of the following commands by selecting them in your browser, pressing Ctrl + C, then switching to the PuTTY window and right-clicking in the window. The text will paste at the current cursor location:
passwd root
Nhập và nhập lại một khẩu mới (tốt nhất đủ dài và được sinh một cách ngẫu hiên). Tiếp đó chúng ta sẽ tạo một người dùng mới bằng câu lệnh sau, thay <username> với một tên người dùng mà bạn chọn:
adduser <username>
Bạn sẽ được nhắc nhập mật khẩu. Nhập và xác nhận lại một mật khẩu mới (khác với mật khẩu root) và lưu nó ở một nơi an toàn. Bạn cũng sẽ được nhắc về thông tin cho người dùng, nhưng cứ để nó trống. Một khi người dùng được tạo, chúng ta sẽ đưa nó vào trong nhóm sudo và họ có thể thực hiện các câu lệnh như là root:
usermod -aG sudo <username>
Update the system#
Bây giờ, trong khi vẫn là root, chúng ta sẽ cập nhật hệ thống từ hệ thống quản lý ứng dụng của Ubuntu:
apt update
apt upgrade
The system will show a list of upgradable packages. Press Y and Enter to install the packages.
Disable IPv6#
We recommend turning off IPv6 to avoid potential communication issues. If you cannot do this through your VPS provider's server configuration settings, use the following steps to disable it through the operating system.
Check if IPv6 is enabled:
ip a | grep inet6
If multiple inet6 entries are returned, open sysctrl.conf:
sudo nano /etc/sysctl.conf
Add the following lines at the end of the file, then press Ctrl + X to close the editor, then Y and Enter save the file.:
net.ipv6.conf.all.disable_ipv6 = 1
net.ipv6.conf.default.disable_ipv6 = 1
net.ipv6.conf.lo.disable_ipv6 = 1
Load the changes:
sudo sysctl -p
Finally, check if IPv6 was successfully disabled. No entries should be returned when you run the command this time:
ip a | grep inet6
Configure the firewall#
We will now install a firewall (and some other packages we will use later):
apt install ufw python3 virtualenv git unzip pv
(bấm Y và Enter để xác nhận)
Choose the appropriate firewall configuration below based on which network and masternode type your masternode will support:
ufw limit ssh/tcp
ufw allow 9999/tcp
ufw logging on
ufw enable
ufw limit ssh/tcp
ufw allow 443/tcp
ufw allow 9999/tcp
ufw allow 26656/tcp
# Uncomment the following line if using automatic certificate renewal (Let's Encrypt, ZeroSSL, etc.)
# ufw allow 80/tcp
ufw logging on
ufw enable
ufw limit ssh/tcp
ufw allow 1443/tcp
ufw allow 19999/tcp
ufw allow 36656/tcp
ufw logging on
ufw enable
(bấm Y và Enter để xác nhận)
Enable swap#
Next, we will add swap memory, enable it, and set it to be enabled on subsequent reboots:
fallocate -l 4G /swapfile
chmod 600 /swapfile
mkswap /swapfile
swapon /swapfile
nano /etc/fstab
Thêm dòng sau đây và ở cuối của file (bấm phím tab để phân cách mỗi từ/số), sau đó bấm tổ hợp phím Ctrl + X để đóng trình soạn thảo. sau đó Y và Enter để lưu file.
/swapfile none swap sw 0 0
Restrict remote access#
Cuối cùng, để ngăn chặn việc dò mật khẩu, chúng ta sẽ cài fail2ban và tắt quyền truy cập ssh với root. Những bước sau là tuy chọn, nhưng rất khuyến khích. Bắt đầu với fail2ban nhé:
apt install fail2ban
Tạo một file cấu hình mới:
nano /etc/fail2ban/jail.local
And paste in the following configuration:
[sshd]
enabled = true
port = 22
filter = sshd
logpath = /var/log/auth.log
maxretry = 3
Then press Ctrl + X to close the editor, then Y and Enter save the file. Restart and enable the fail2ban service:
systemctl restart fail2ban
systemctl enable fail2ban
Tiếp theo, mở file cấu hình SSH để tắt quyền đăng nhập của root qua SSH:
nano /etc/ssh/sshd_config
Locate the line that reads PermitRootLogin yes and set it to
PermitRootLogin no. Directly below this, add a line which reads AllowUsers
<username>, replacing <username> with the username you selected above.
Then press Ctrl + X to close the editor, then Y and Enter save the
file.
Optionally install or update AppArmor (try this step if you are having problems related to AppArmor):
sudo apt install apparmor
Reboot#
Now, reboot the server to apply any necessary kernel updates:
reboot now
Your SSH client (e.g. PuTTY) will disconnect when the server reboots.
Ghi chú
While this setup includes basic steps to protect your server against attacks, much more can be done. In particular, authenticating with a public key instead of a username/password combination. Enabling automatic security updates is advisable. More tips are available here.