Sending and receiving
Your Dash Core Wallet is associated with a number of unique addresses that can be used to send and receive Dash. Each address holds its own balance, and the sum of all your balances is what appears on the Overview tab. When you send Dash, your wallet will automatically transfer funds from as many of your addresses as necessary to the destination address, which is controlled by another Dash user and associated with their wallet. You can control which addresses you use using the Coin Control feature.
When you confirm a transaction, Dash Core will enter the transaction in a block, which will then be added to the blockchain for other clients to confirm. A transaction is generally considered confirmed once six blocks have been added after the block containing your transaction, although masternode and mining payments are only released after 101 blocks. Note that a different process is used for InstantSend and CoinJoin transactions.
Dash addresses are 34 characters long and begin with an uppercase X.
Sending Dash
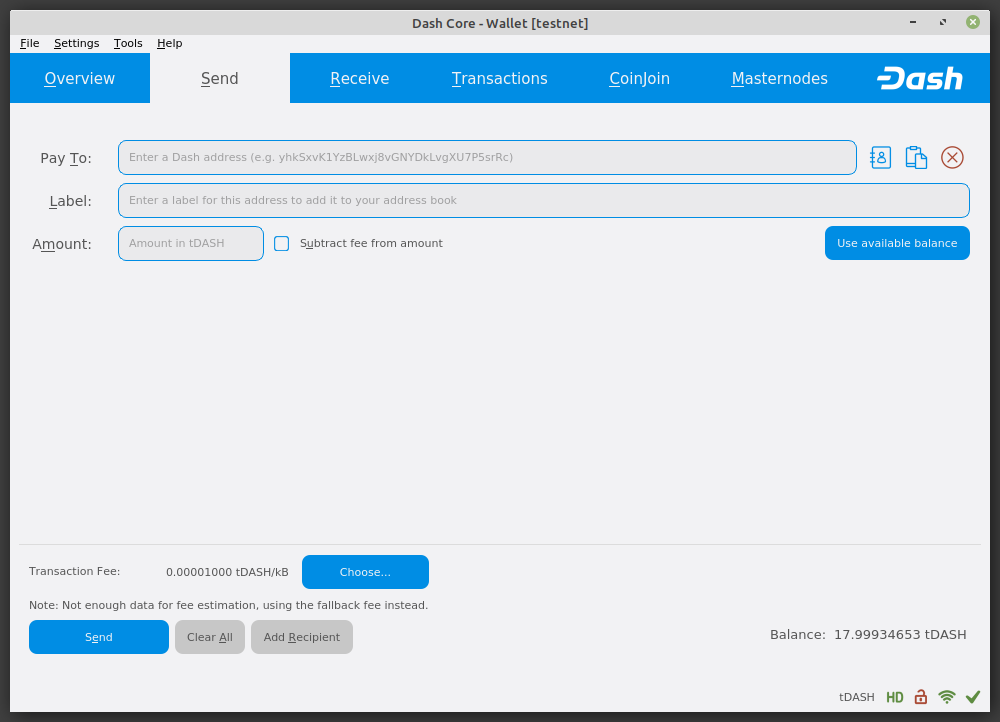
You can use Dash Core to send Dash from your balance to another user. The receiving user will provide you with a Dash address to which you should send the funds. Click the Send tab in the tab bar and enter the destination address in the Pay To field.
The Dash Core Send tab
You can also use the three icons  to the right of the Pay
To field to select a previously used address, paste an address from
the clipboard, or clear the current address. If this is a new address,
you can enter a name for the address in the Label field to help
identify it again later. Finally, enter the amount of Dash you want to
transfer in the Amount field.
to the right of the Pay
To field to select a previously used address, paste an address from
the clipboard, or clear the current address. If this is a new address,
you can enter a name for the address in the Label field to help
identify it again later. Finally, enter the amount of Dash you want to
transfer in the Amount field.
The other options relate to fees. You can choose if you want to pay the network fee in addition to the amount sent, or subtract it from the amount sent. You can also increase your fee to encourage nodes on the network to prioritize your transaction.
Let’s try an example. Say you have received an invoice which you now want to pay with Dash. The writer of the invoice has included a Dash address, which can be seen in the following window beginning with Xpa. The invoice is for 2.45 Dash, which you fill in the Amount field.
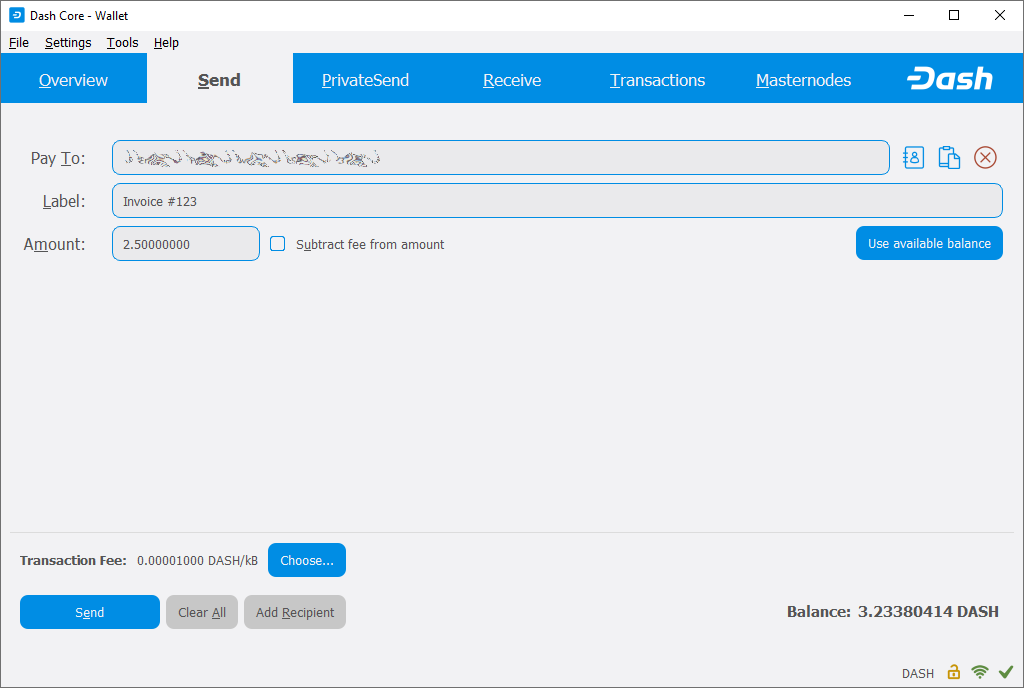
The Send tab filled out for a transaction
Once you have entered the destination address and the amount, click the Send button. If you have encrypted your wallet, you will now be required to enter your password to unlock the wallet.

Entering the password to unlock the wallet
Finally, you are given one final confirmation and chance to cancel your send transaction before Dash Core processes the transaction on the blockchain.

Final confirmation window
If you respond with Yes, your transaction will be processed. Your operating system may display a notification, and the transaction will appear on the Transactions tab, where you can monitor its progress.
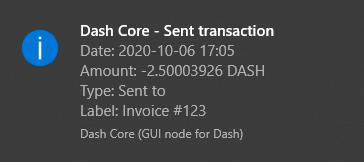
The Windows 10 sent transaction confirmation notification
Note that the amount of the transaction increased by .00003926 Dash. This is the transaction fee. In the next section, we will see what this procedure looks like from the receiving side.
Receiving Dash
To receive Dash, you must first create a receiving address to give to the sending party. To do this, click File > Receiving addresses. The Receiving addresses window appears.
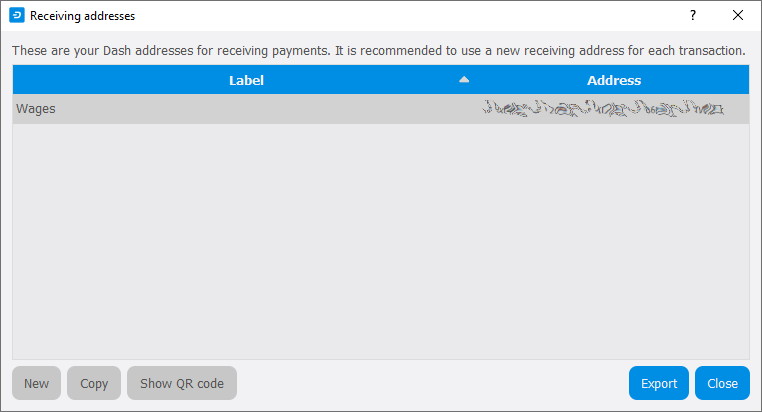
The Receiving addresses window
Either copy an existing address by clicking on the address and then the Copy button, or create a new address by clicking the New button. You can also edit an existing address by right clicking and selecting Edit address from the context menu. Give this address to the person who will send you Dash. Your wallet does not need to be open to receive funds, but if it is, you can watch the transaction arrive in real time. This is because your wallet constantly watches for new blocks on the blockchain when it is open, and will recognize a new transaction involving your receiving address when it occurs.
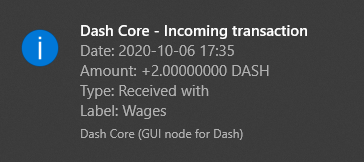
The Windows 10 received transaction confirmation notification
Once you have been paid, you can see the balance both on the Overview tab and on the Transactions tab.
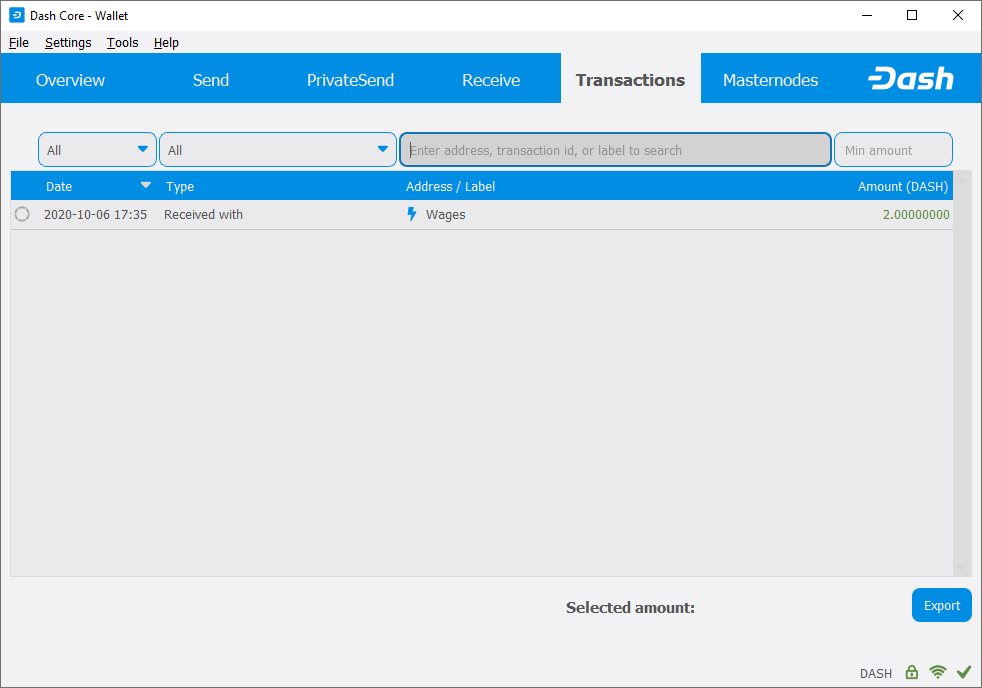
The received transaction