Testnet Setup#
Setting up a masternode with support for evo services requires a basic understanding of Linux and blockchain technology, as well as an ability to follow instructions closely. It also requires regular maintenance and careful security, particularly if you are not storing your Dash on a hardware wallet. There are some decisions to be made along the way, and optional extra steps to take for increased security.
Commercial masternode hosting services are available if you prefer to delegate day-to-day operation of your masternode to a professional operator. When using these hosting services, you retain full control of the 1000 DASH collateral and pay an agreed percentage of your reward to the operator. It is also possible to delegate your voting keys to a representative, see the governance documentation for more information.
Antes de comenzar#
This guide assumes you are setting up a single testnet masternode for the first time. If you are updating a masternode, see here instead. You will need:
1000 Dash
Una billetera para guardar tus Dash, preferiblemente una billetera de hardware, aunque la billetera Dash Core también es compatible
Un servidor Linux, preferiblemente un Servidor Privado Virtual (VPS)
For information about hosted masternodes, see the documentation listed below:
This documentation describes the commands as if they were entered in the
Dash Core GUI by opening the console from Window > Console, but the
same result can be achieved on a masternode by entering the same
commands and adding the prefix ~/.dashcore/dash-cli to each command.
Server configuration#
Proper server configuration is essential to successful masternode operation for both security and performance reasons. Refer to the Server configuration page for details on preparing your server to host a masternode.
Enviar garantía#
A Dash address with a single unspent transaction output (UTXO) of exactly 1000 DASH is required to operate a masternode. Once it has been sent, various keys regarding the transaction must be extracted for later entry in a configuration file and registration transaction as proof to write the configuration to the blockchain so the masternode can be included in the deterministic list. A masternode can be registered from a hardware wallet or the official Dash Core wallet, although a hardware wallet is highly recommended to enhance security and protect yourself against hacking. This guide will describe the steps for both hardware wallets and Dash Core.
Option 1: Holding collateral in a hardware wallet#
Set up your Trezor using the Trezor wallet at https://wallet.trezor.io/ and send a test transaction to verify that it is working properly. For help on this, see this guide - you may also choose to (carefully!) add a passphrase to your Trezor to further protect your collateral. Create a new account in your Trezor wallet by clicking Add account. Then click the Receive tab and send exactly 1000 DASH to the address displayed. If you are setting up multiple masternodes, send 1000 DASH to consecutive addresses within the same new account. You should see the transaction as soon as the first confirmation arrives, usually within a few minutes.
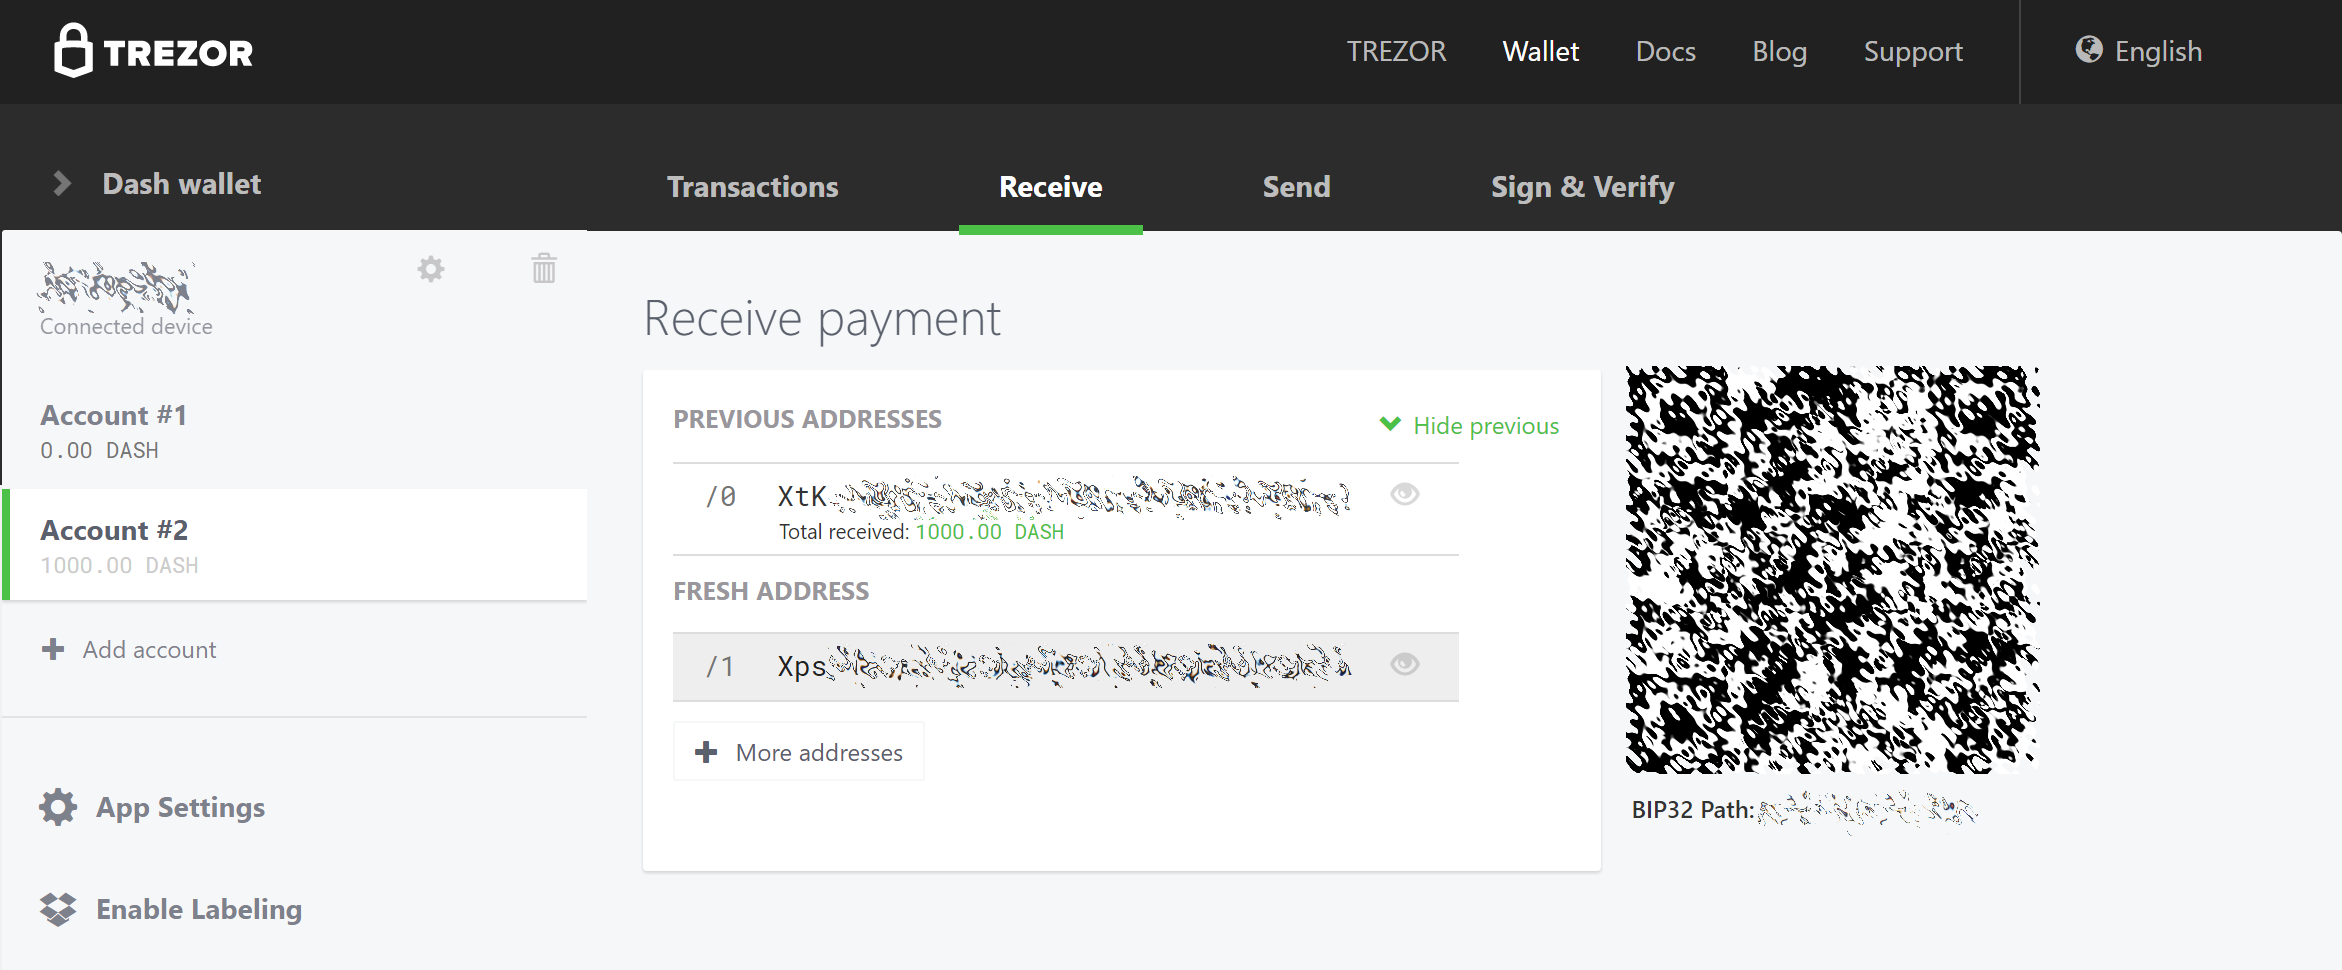
Pestaña de recepción en la billetera Trezor que muestra la garantía de 1000 DASH recibida con éxito#
Una vez que aparece la transacción, haz click en el código QR a la derecha para ver la transacción en la cadena de bloques. Manten esta ventana abierta mientras completamos los siguientes pasos, ya que pronto necesitaremos confirmar que existen 15 confirmaciones, como se muestra en la siguiente captura de pantalla.
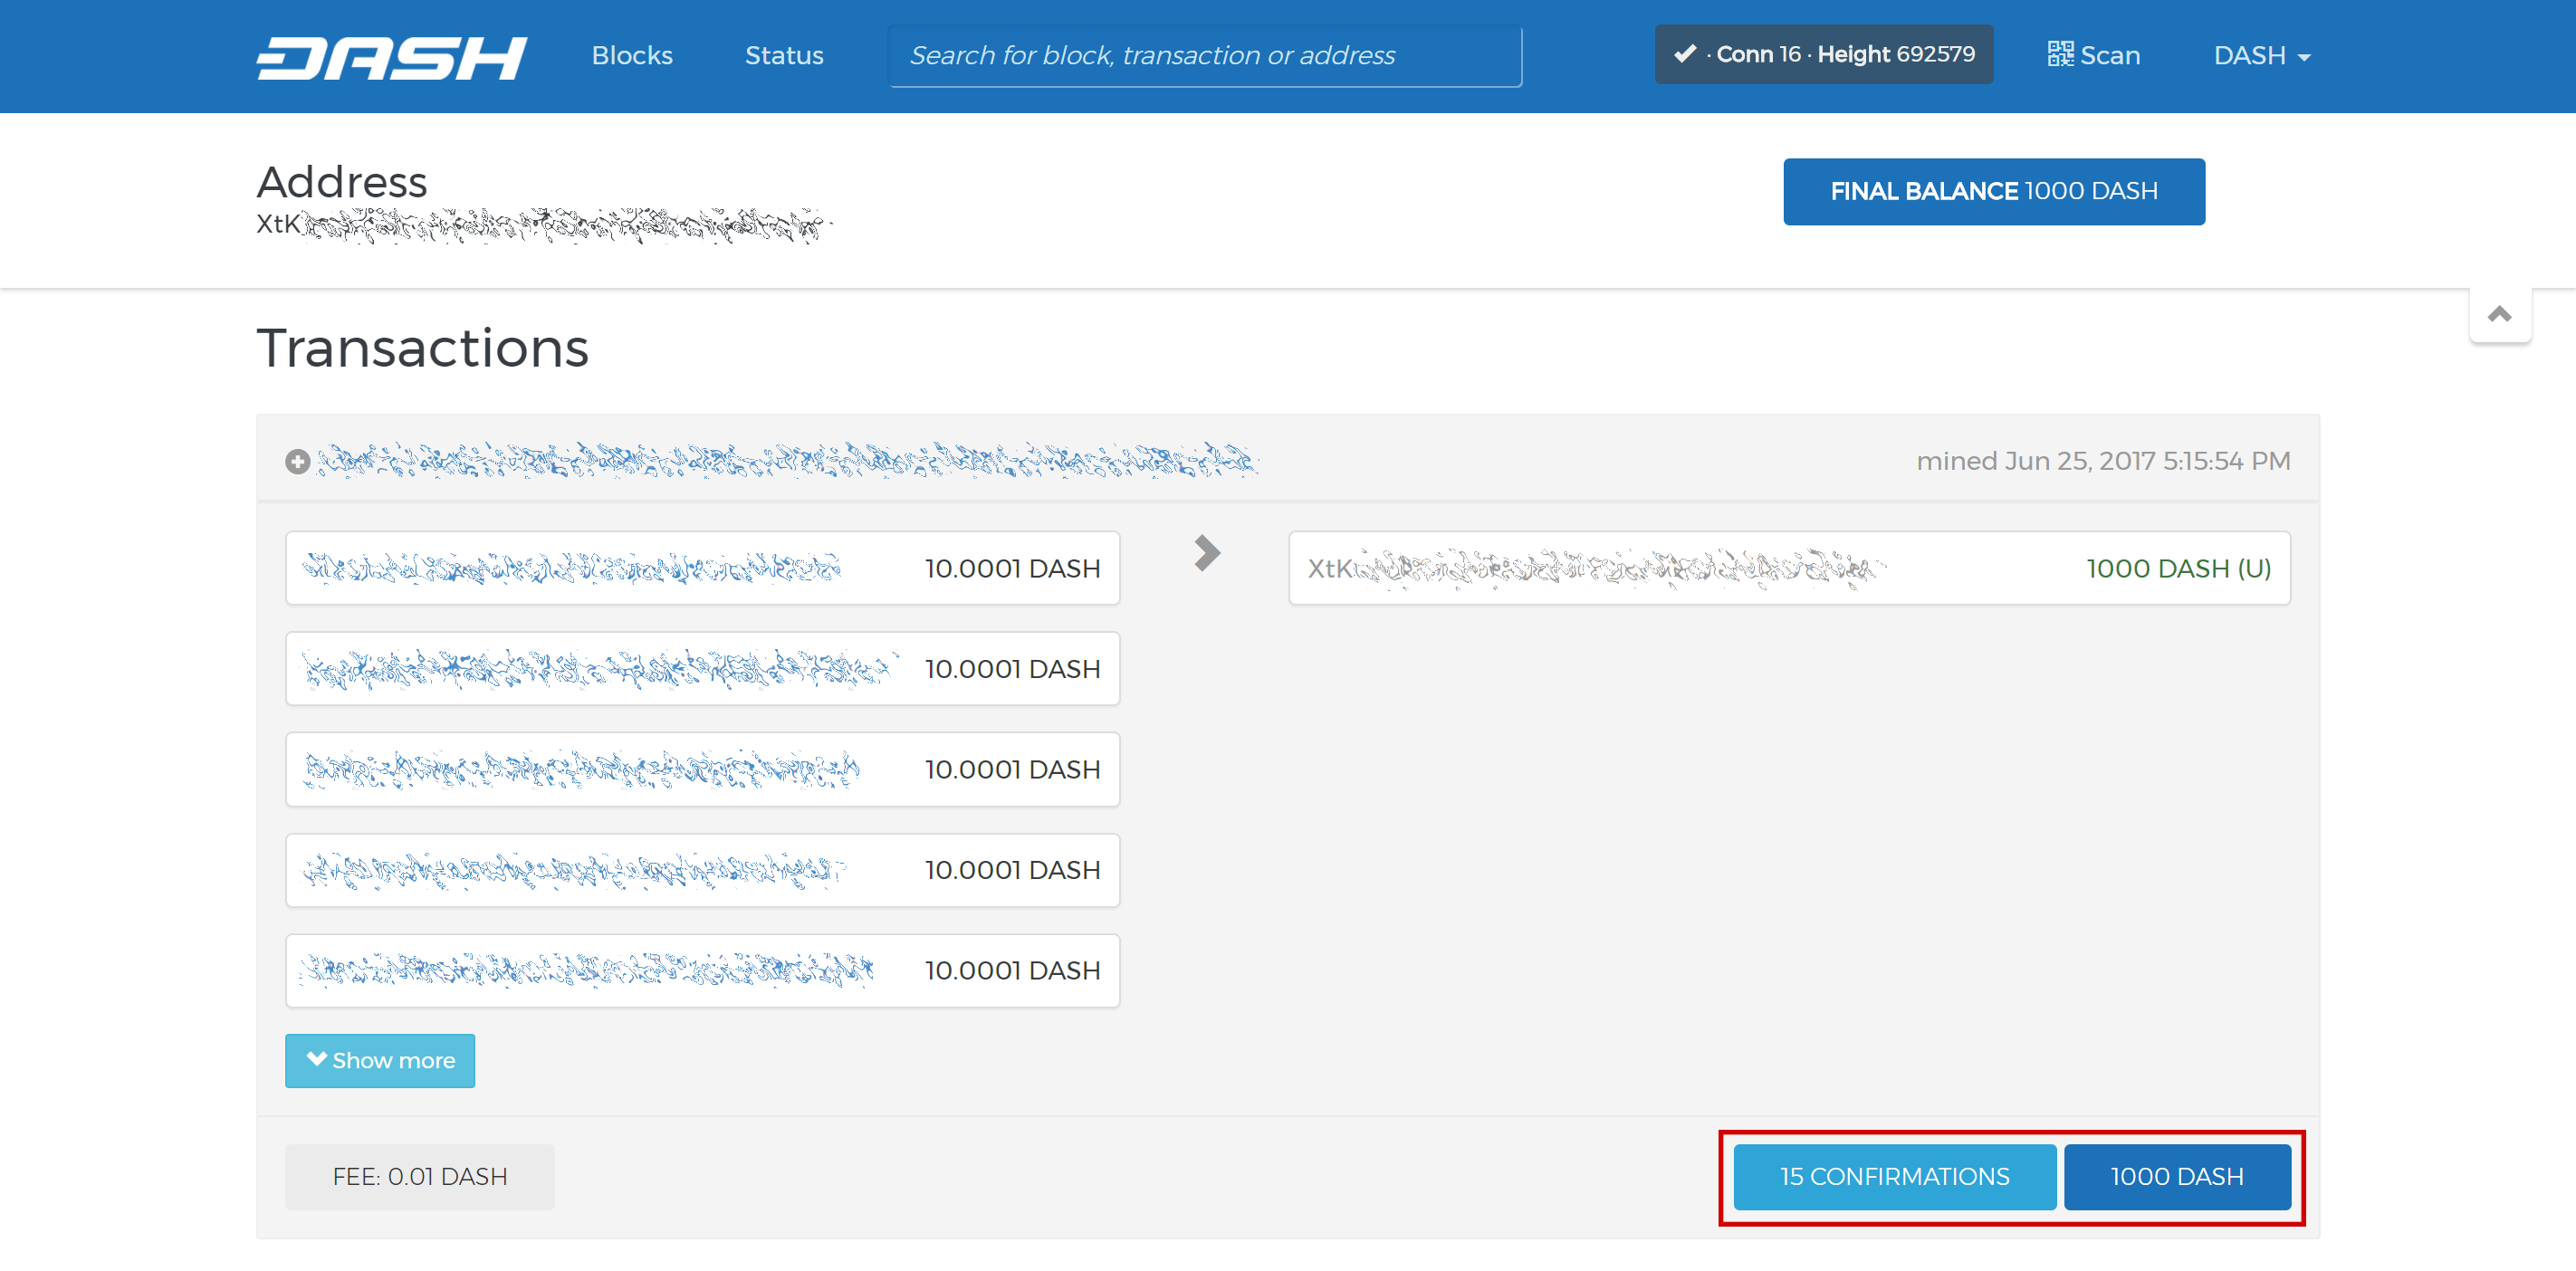
El explorador Trezor de la cadena de bloques muestra 15 confirmaciones para la transferencia de garantías#
Mientras esperamos 15 confirmaciones, descarga la última versión de la herramienta Dash Masternode (DMT) desde la página de lanzamientos de GitHub aquí. Descomprime y ejecuta el archivo. La siguiente ventana aparecerá.
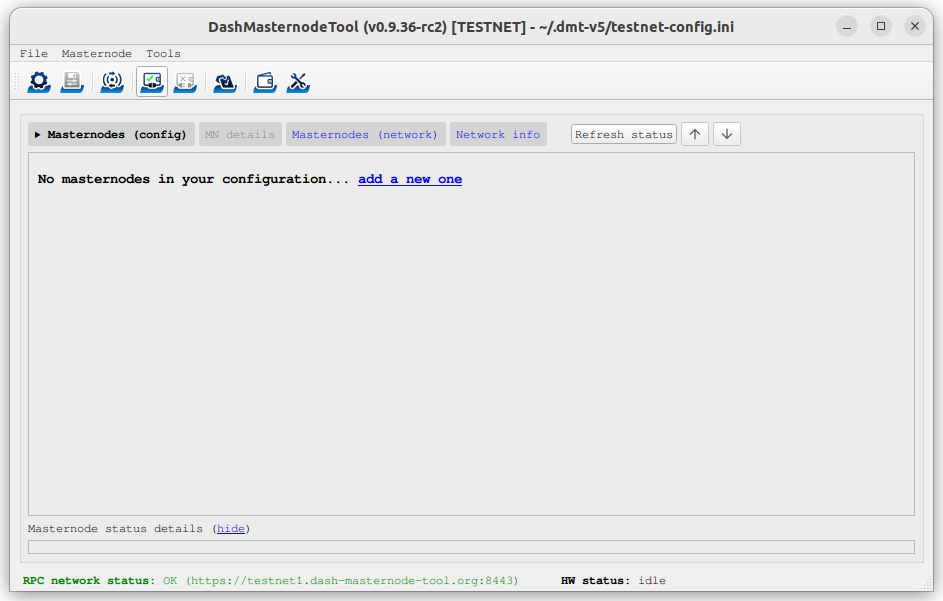
Pantalla de inicio de la herramienta Dash Masternode#
Click the third button from the left Check Dash Network Connection in the top left corner of the main window to verify that the connection is working. Then connect your Trezor device and click the next button Test Hardware Wallet Connection to verify the Trezor connection is working.
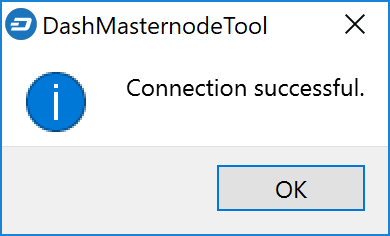
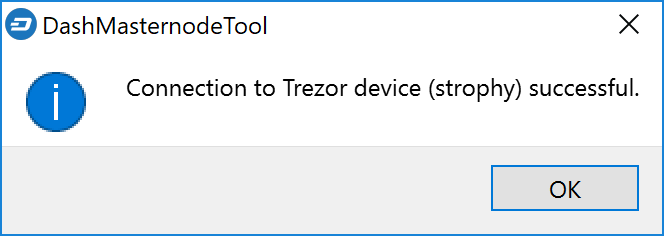
Herramienta Dash Masternode confirmaciones exitosas de conexión#
We will now use DMT to enter some basic information about the masternode and extract the transaction ID. Carry out the following sequence of steps as shown in this screenshot:
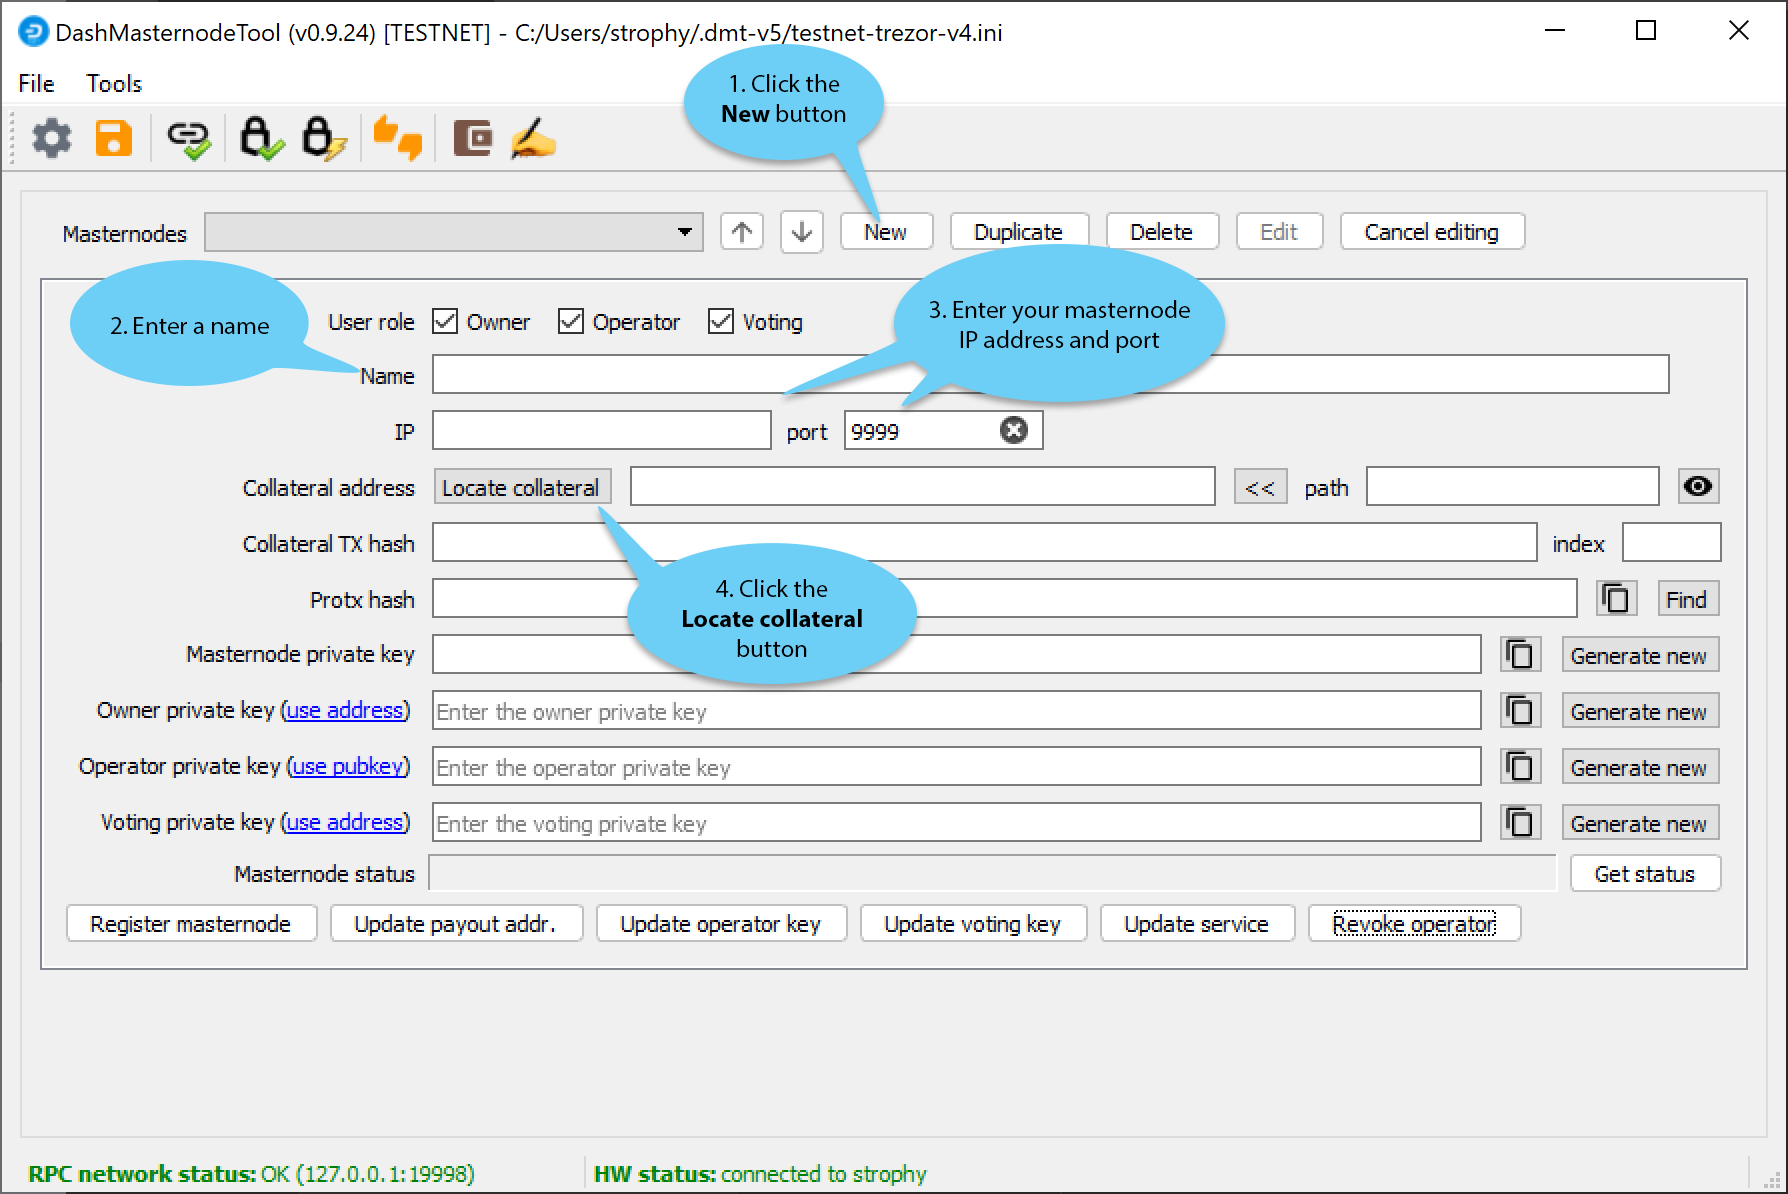
Pasos de configuración de la Herramienta Dash Masternode#
Haz clic en el nuevo botón.
Ingresa un nombre para tu masternode. El nombre del servidor que especifica para tu VPS es una buena opción.
Enter the IP address of your masternode. This was given to you by the VPS provider when you set up the server. Then enter the TCP port number. This should be 19999.
Click Locate collateral to view unused collateral funding transactions available on the connected hardware wallet. Select the address to which you sent 1000 Dash and click Apply. The Collateral address, path, Collateral TX hash and index fields should be filled automatically.
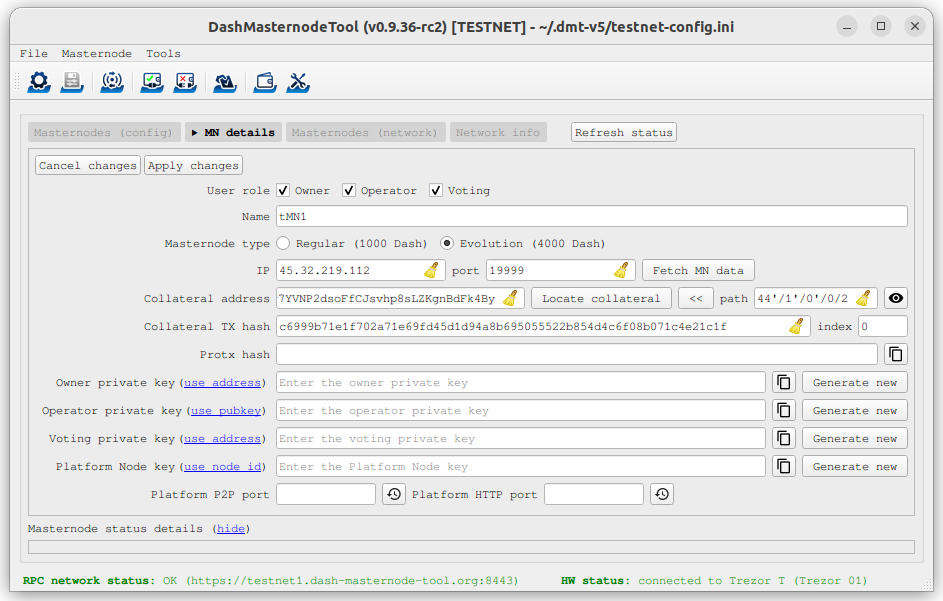
Dash Masternode Tool with masternode configuration#
Leave DMT open and continue with the next step: installing Dash Core on your VPS.
Option 2: Holding collateral in Dash Core wallet#
Abre la billetera Dash Core y espera a que se sincronice con la red. Debería verse así esto cuando esté lista:

Billetera Dash Core totalmente sincronizada#
Click Window > Console to open the console. Type the following command into the console to generate a new Dash address for the collateral:
getnewaddress
yiFfzbwiN9oneftd7cEfr3kQLRwQ4kp7ue
Take note of the collateral address, since we will need it later. The next step is to secure your wallet (if you have not already done so). First, encrypt the wallet by selecting Settings > Encrypt wallet. You should use a strong, new password that you have never used somewhere else. Take note of your password and store it somewhere safe or you will be permanently locked out of your wallet and lose access to your funds. Next, back up your wallet file by selecting File > Backup Wallet. Save the file to a secure location physically separate to your computer, since this will be the only way you can access our funds if anything happens to your computer. For more details on these steps, see here.
Now send exactly 1000 DASH in a single transaction to the new address you generated in the previous step. This may be sent from another wallet, or from funds already held in your current wallet. Once the transaction is complete, view the transaction in a blockchain explorer by searching for the address. You will need 15 confirmations before you can register the masternode, but you can continue with the next step at this point already: generating your masternode operator key.

El explorador Trezor de la cadena de bloques muestra 15 confirmaciones para la transferencia de garantías#
Masternode Installation#
The following tools are available for installing a Dash masternode:
Dash Masternode Zeus (does not yet support platform services)
dashmate installation#
dashmate replaces the dashman masternode installer by
moocowmoo. dashmate is based on Docker technology and
features an interactive setup command and the ability to manage multiple
node configs and multiple networks. It handles the installation of Dash
Core and Tenderdash, as well as all dependencies and supporting
services. Full dashmate documentation is available here.
Advertencia
Installation as root user is not supported or recommended.
Open PuTTY or a console again and connect using the username and password you just created for your new, non-root user. Begin by installing dashmate dependencies:
curl -fsSL https://get.docker.com -o get-docker.sh && sh ./get-docker.sh
sudo usermod -aG docker $USER
newgrp docker
curl -o- https://raw.githubusercontent.com/nvm-sh/nvm/v0.39.1/install.sh | bash
source ~/.bashrc
nvm install 16
Install dashmate:
npm install -g dashmate
Run the interactive setup wizard:
dashmate setup
You will be prompted to select a network, node type, IP address and BLS private key. Enter this information or accept the detected/generated defaults. Start your node as follows:
dashmate start
You can manage your masternode status, configuration, and running state entirely from within dashmate. See the documentation here or use the built-in help system to learn more:
dashmate --helpdashmate <command> --help
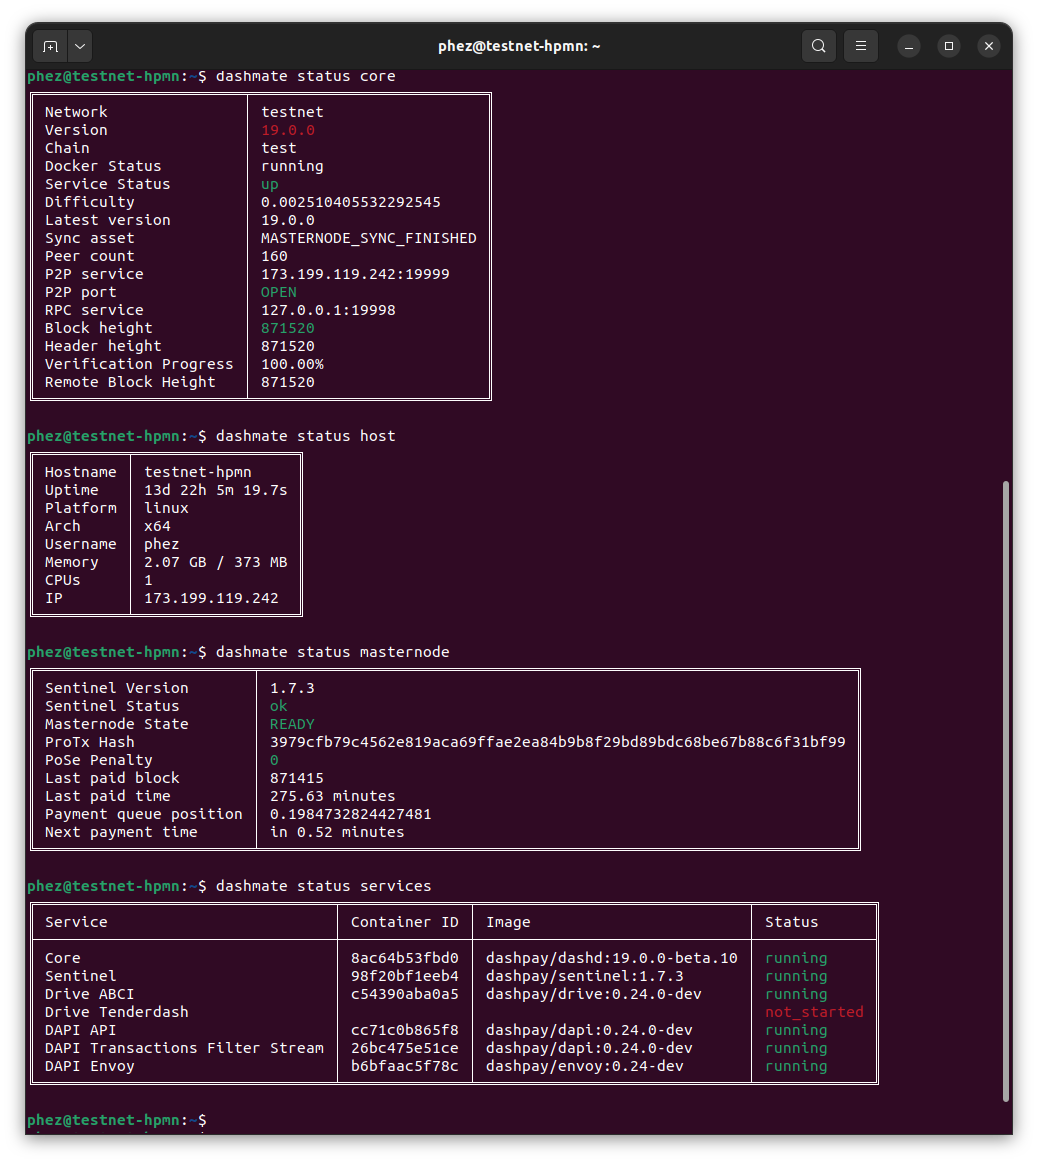
dashmate displaying a range of status output#
You can check the status of your masternode using the various dashmate
status commands as follows:
- dashmate status
- dashmate status core
- dashmate status host
- dashmate status masternode
- dashmate status platform
- dashmate status services
Continue with the Registration step to setup the collateral, keys and construct the ProTx transaction required to enable your masternode.
Masternode Update#
You can use dashmate to update minor versions of the software on
your masternode as follows:
dashmate stop
dashmate update
dashmate start
Adding the following git and npm commands optionally also
ensures you are using the latest stable version of dashmate:
dashmate stop
npm update -g dashmate
dashmate update
dashmate start
Adding the following command will drop all data from Dash Platform (necessary if Platform has been wiped) and restart with the latest version:
dashmate stop
npm update -g dashmate
dashmate reset --platform-only
dashmate update
dashmate start
Masternode registration#
The three keys required for the different masternode roles are described briefly under Masternode Concepts in this documentation.
Option 1: Registering from a hardware wallet#
Go back to DMT and ensure that all fields from the previous step are still filled out correctly. Click Generate new for the three private keys required for a masternode:
Llave privada del dueño
Operator private key (generate new or use private key generated by dashmate)
Llave privada votando
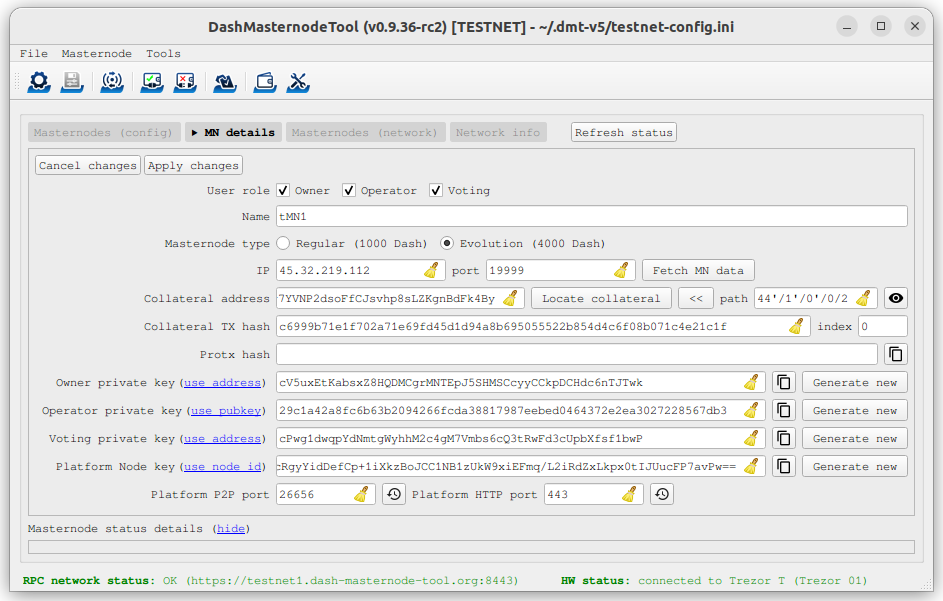
Dash Masternode Tool ready to register a new masternode#
Then click Register masternode. Optionally specify a different Payout address and/or Operator reward, then click Continue. Select Remote Dash RPC Node (automatic method). (See here for documentation on using your own local RPC node.) and confirm the following two messages:

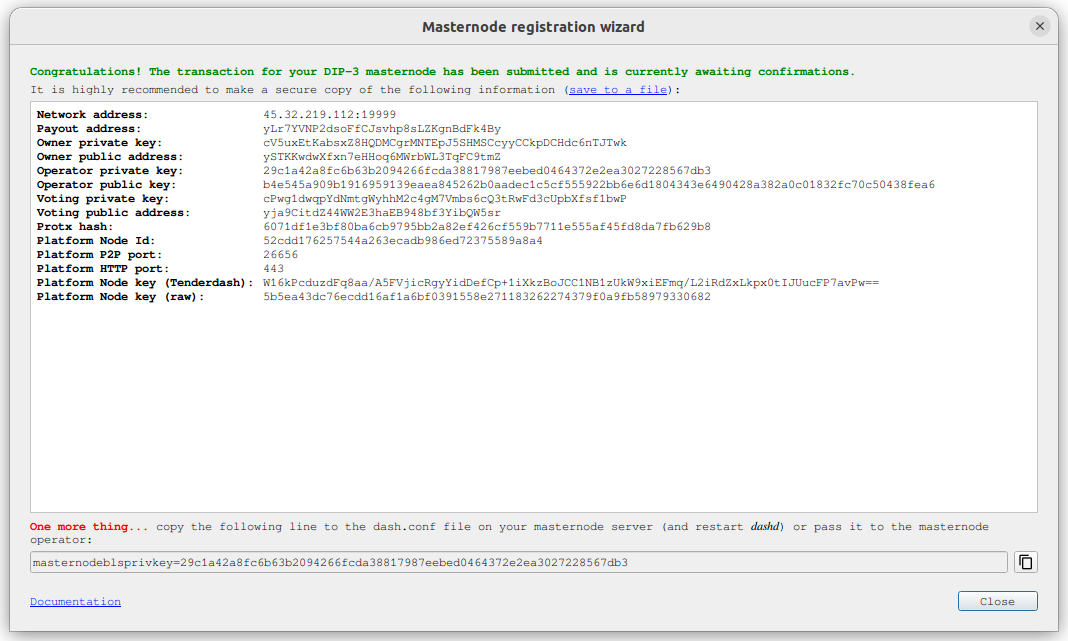
Dash Masternode Tool confirmation dialogs to register a masternode#
The public key will be used in following steps. The private key must be
entered in the configuration on the masternode. This allows the
masternode to watch the blockchain for relevant Pro*Tx transactions, and
will cause it to start serving as a masternode when the signed ProRegTx
is broadcast by the owner (final step below). If you are using the BLS
key generated by dashmate setup, this information is already configured
for your masternode. If you generated your own BLS key pair, edit the
dashmate configuration as follows:
dashmate config set core.masternode.operator.privateKey <bls_private_key>
dashmate restart
At this point you can go back to your terminal window and monitor your
masternode by entering dashmate status or using the Get status
function in DMT.
You can now safely log out of your server by typing exit.
Congratulations! Your masternode is now running.
Option 2: Registering from Dash Core wallet#
Identifica la transacción de financiamiento#
If you used an address in Dash Core wallet for your collateral transaction, you now need to find the txid of the transaction. Click Window > Console and enter the following command:
masternode outputs
This should return a string of characters similar to the following:
{
"16347a28f4e5edf39f4dceac60e2327931a25fdee1fb4b94b63eeacf0d5879e3-1",
}
The first long string is your collateralHash, while the last number
is the collateralIndex.
Genera un par de llaves BLS#
A public/private BLS key pair is required to operate a masternode. The private key is specified on the masternode itself, and allows it to be included in the deterministic masternode list once a provider registration transaction with the corresponding public key has been created.
If you are using a hosting service, they may provide you with their
public key, and you can skip this step. If you are hosting your own
masternode or have agreed to provide your host with the BLS private key,
you can use the BLS key generated by the dashmate setup command.
Alternatively, you can generate a BLS public/private keypair in Dash
Core by clicking Window > Console and entering the following
command:
bls generate

{
  "secret": "395555d67d884364f9e37e7e1b29536519b74af2e5ff7b62122e62c2fffab35e",
  "public": "99f20ed1538e28259ff80044982372519a2e6e4cdedb01c96f8f22e755b2b3124fbeebdf6de3587189cf44b3c6e7670e",
  "scheme": "legacy"
}
These keys are NOT stored by the wallet or dashmate and must be kept
secure, similar to the value provided in the past by the masternode
genkey command.
Agrega la llave privada para la configuración de masternodes#
The public key will be used in following steps. The private key must be
entered in the dash.conf file on the masternode. This allows the
masternode to watch the blockchain for relevant Pro*Tx transactions, and
will cause it to start serving as a masternode when the signed ProRegTx
is broadcast by the owner (final step below). If you are using the BLS
key generated by dashmate setup, this information is already
configured for your masternode. If you generated your own BLS key pair,
edit the dashmate configuration as follows:
dashmate config set core.masternode.operator.privateKey <bls_private_key>
dashmate restart
We will now prepare the transaction used to register the masternode on the network.
Prepara una transacción de ProRegTx#
A pair of BLS keys for the operator were already generated above, and
the private key was entered on the masternode. The public key is used in
this transaction as the operatorPubKey.
First, we need to get a new, unused address from the wallet to serve as
the owner key address (ownerKeyAddr). This is not the same as
the collateral address holding 1000 Dash. Generate a new address as
follows:
getnewaddress

yfgxFhqrdDG15ZWKJAN6dQvn6dZdgBPAip
This address can also be used as the voting key address
(votingKeyAddr). Alternatively, you can specify an address provided
to you by your chosen voting delegate, or simply generate a new voting
key address as follows:
getnewaddress

yfRaZN8c3Erpqj9iKnmQ9QDBeUuRhWV3Mg
Then either generate or choose an existing address to receive the
owner’s masternode payouts (payoutAddress). It is also possible
to use an address external to the wallet:
getnewaddress

yjZVt49WsQd6XSrPVAUGXtJccxviH9ZQpN
You can also optionally generate and fund another address as the
transaction fee source (feeSourceAddress). If you selected an
external payout address, you must specify a fee source address.
Either the payout address or fee source address must have enough balance
to pay the transaction fee, or the register_prepare transaction will
fail.
The private keys to the owner and fee source addresses must exist in the wallet submitting the transaction to the network. If your wallet is protected by a password, it must now be unlocked to perform the following commands. Unlock your wallet for 5 minutes:
walletpassphrase yourSecretPassword 300
We will now prepare an unsigned ProRegTx special transaction using the
protx register_prepare command. This command has the following
syntax:
protx register_prepare collateralHash collateralIndex ipAndPort ownerKeyAddr
  operatorPubKey votingKeyAddr operatorReward payoutAddress (feeSourceAddress)
Advertencia
After v19 hard fork activation, protx register_prepare_legacy must
be used if a legacy scheme BLS key is being used to register a masternode.
It’s recommended to instead generate a new basic scheme BLS key where
possible. This can be done by following the
Generate a BLS key pair instructions.
Abre un editor de texto tal como un bloq de notas para preparar este comando. Reemplaza cada argumento para los comandos siguientes:
collateralHash: The txid of the 1000 Dash collateral funding transactioncollateralIndex: The output index of the 1000 Dash funding transactionipAndPort: Masternode IP address and port, in the formatx.x.x.x:yyyyownerKeyAddr: The new Dash address generated above for the owner/voting addressoperatorPubKey: The BLS public key generated above (or provided by your hosting service)votingKeyAddr: The new Dash address generated above, or the address of a delegate, used for proposal votingoperatorReward: The percentage of the block reward allocated to the operator as paymentpayoutAddress: A new or existing Dash address to receive the owner’s masternode rewardsfeeSourceAddress: An (optional) address used to fund ProTx fee.payoutAddresswill be used if not specified.
Note that the operator is responsible for specifying their own
reward address in a separate update_service
transaction if you specify a non-zero operatorReward. The owner of
the masternode collateral does not specify the operator’s payout
address.
Ejemplo (elimina salto de lineas de copiado):
protx register_prepare
  16347a28f4e5edf39f4dceac60e2327931a25fdee1fb4b94b63eeacf0d5879e3
  1
  45.76.230.239:19999
  yfgxFhqrdDG15ZWKJAN6dQvn6dZdgBPAip
  99f20ed1538e28259ff80044982372519a2e6e4cdedb01c96f8f22e755b2b3124fbeebdf6de3587189cf44b3c6e7670e
  yfRaZN8c3Erpqj9iKnmQ9QDBeUuRhWV3Mg
  0
  yjZVt49WsQd6XSrPVAUGXtJccxviH9ZQpN
  yR83WsikBaBaNusTnHZf28kAcL8oVmp1TE
Salida:
{
  "tx": "030001000175c9d23c2710798ef0788e6a4d609460586a20e91a15f2097f56fc6e007c4f8e0000000000feffffff01a1949800000000001976a91434b09363474b14d02739a327fe76e6ea12deecad88ac00000000d1010000000000e379580dcfea3eb6944bfbe1de5fa2317932e260acce4d9ff3ede5f4287a34160100000000000000000000000000ffff2d4ce6ef4e1fd47babdb9092489c82426623299dde76b9c72d9799f20ed1538e28259ff80044982372519a2e6e4cdedb01c96f8f22e755b2b3124fbeebdf6de3587189cf44b3c6e7670ed1935246865dce1accce6c8691c8466bd67ebf1200001976a914fef33f56f709ba6b08d073932f925afedaa3700488acfdb281e134504145b5f8c7bd7b47fd241f3b7ea1f97ebf382249f601a0187f5300",
  "collateralAddress": "yjSPYvgUiAQ9AFj5tKFA8thFLoLBUxQERb",
  "signMessage": "yjZVt49WsQd6XSrPVAUGXtJccxviH9ZQpN|0|yfgxFhqrdDG15ZWKJAN6dQvn6dZdgBPAip|yfRaZN8c3Erpqj9iKnmQ9QDBeUuRhWV3Mg|ad5f82257bd00a5a1cb5da1a44a6eb8899cf096d3748d68b8ea6d6b10046a28e"
}
Next we will use the collateralAddress and signMessage fields to
sign the transaction, and the output of the tx field to submit the
transaction.
Firma la transacción ProRegTx#
We will now sign the content of the signMessage field using the
private key for the collateral address as specified in
collateralAddress. Note that no internet connection is required for
this step, meaning that the wallet can remain disconnected from the
internet in cold storage to sign the message. In this example we will
again use Dash Core, but it is equally possible to use the signing
function of a hardware wallet. The command takes the following syntax:
signmessage collateralAddress signMessage
Ejemplo:
signmessage yjSPYvgUiAQ9AFj5tKFA8thFLoLBUxQERb yjZVt49WsQd6XSrPVAUGXtJccxviH9ZQpN|0|yfgxFhqrdDG15ZWKJAN6dQvn6dZdgBPAip|yfRaZN8c3Erpqj9iKnmQ9QDBeUuRhWV3Mg|ad5f82257bd00a5a1cb5da1a44a6eb8899cf096d3748d68b8ea6d6b10046a28e
Salida:
II8JvEBMj6I3Ws8wqxh0bXVds6Ny+7h5HAQhqmd5r/0lWBCpsxMJHJT3KBcZ23oUZtsa6gjgISf+a8GzJg1BfEg=
Ingresa el mensaje firmado#
We will now submit the ProRegTx special transaction to the blockchain to
register the masternode. This command must be sent from a Dash Core
wallet holding a balance on either the feeSourceAddress or
payoutAddress, since a standard transaction fee is involved. The
command takes the following syntax:
protx register_submit tx sig
Donde:
tx: The serialized transaction previously returned in thetxoutput field from theprotx register_preparecommandsig: The message signed with the collateral key from thesignmessagecommand
Ejemplo:
protx register_submit 030001000175c9d23c2710798ef0788e6a4d609460586a20e91a15f2097f56fc6e007c4f8e0000000000feffffff01a1949800000000001976a91434b09363474b14d02739a327fe76e6ea12deecad88ac00000000d1010000000000e379580dcfea3eb6944bfbe1de5fa2317932e260acce4d9ff3ede5f4287a34160100000000000000000000000000ffff2d4ce6ef4e1fd47babdb9092489c82426623299dde76b9c72d9799f20ed1538e28259ff80044982372519a2e6e4cdedb01c96f8f22e755b2b3124fbeebdf6de3587189cf44b3c6e7670ed1935246865dce1accce6c8691c8466bd67ebf1200001976a914fef33f56f709ba6b08d073932f925afedaa3700488acfdb281e134504145b5f8c7bd7b47fd241f3b7ea1f97ebf382249f601a0187f5300 II8JvEBMj6I3Ws8wqxh0bXVds6Ny+7h5HAQhqmd5r/0lWBCpsxMJHJT3KBcZ23oUZtsa6gjgISf+a8GzJg1BfEg=
Salida:
aba8c22f8992d78fd4ff0c94cb19a5c30e62e7587ee43d5285296a4e6e5af062
Your masternode is now registered and will appear on the Deterministic
Masternode List after the transaction is mined to a block. You can view
this list on the Masternodes -> DIP3 Masternodes tab of the Dash
Core wallet, or in the console using the command protx list valid,
where the txid of the final protx register_submit transaction
identifies your masternode.
At this point you can go back to your terminal window and monitor your
masternode by entering dashmate status or using the Get status
function in DMT.
Manual installation#
The manual installation guide is currently a work in progress.
This guide describes how to manually download and install the components
of your Dash masternode under Ubuntu Linux 22.04 LTS «Jammy Jellyfish»
assuming you have a non-root user named dash. You will need to
manually adjust apt commands if using a different distro.
Core services#
Prepare your environment for installing keys through GPG:
sudo apt update
sudo apt install apt-transport-https
sudo mkdir -m 600 /root/.gnupg
Tor#
Tor is an internet relay system designed to preserve anonymity on the internet. Install Tor as follows:
wget -qO- https://deb.torproject.org/torproject.org/A3C4F0F979CAA22CDBA8F512EE8CBC9E886DDD89.asc | gpg --dearmor | sudo tee /usr/share/keyrings/tor-archive-keyring.gpg >/dev/null
echo "deb [signed-by=/usr/share/keyrings/tor-archive-keyring.gpg] https://deb.torproject.org/torproject.org $(lsb_release -cs) main" | sudo tee /etc/apt/sources.list.d/tor.list
sudo apt update
sudo apt install -y tor deb.torproject.org-keyring
Dash Core#
Dash Core is a fork of Bitcoin Core and is responsible for all consensus and communication relating to the base blockchain. Download Dash Core as follows:
cd /tmp
wget https://github.com/dashpay/dash/releases/download/v20.1.0/dashcore-20.1.0-$(uname -m)-linux-gnu.tar.gz
Verify the authenticity of your download by checking its detached signature against the public key published by the Dash Core development team. All releases of Dash are signed using GPG with the following key:
Pasta (pasta) with the key
5252 7BED ABE8 7984, verifiable here on Keybase
curl https://keybase.io/pasta/pgp_keys.asc | gpg --import
wget https://github.com/dashpay/dash/releases/download/v20.1.0/dashcore-20.1.0-$(uname -m)-linux-gnu.tar.gz.asc
gpg --verify dashcore-20.1.0-$(uname -m)-linux-gnu.tar.gz.asc
Extract the compressed archive and copy the necessary files to the directory:
tar xfv dashcore-20.1.0-$(uname -m)-linux-gnu.tar.gz
sudo install -t /usr/local/bin dashcore-20.1.0/bin/*
Create a working directory for Dash Core:
mkdir ~/.dashcore
Configure Dash Core:
cat << EOF | tee ~/.dashcore/dash.conf
#----
rpcuser=dashrpc
rpcpassword=password
rpcallowip=127.0.0.1
#----
listen=1
server=1
daemon=1
#----
txindex=1
addressindex=1
timestampindex=1
spentindex=1
#----
zmqpubrawtx=tcp://0.0.0.0:29998
zmqpubrawtxlock=tcp://0.0.0.0:29998
zmqpubhashblock=tcp://0.0.0.0:29998
zmqpubrawchainlock=tcp://0.0.0.0:29998
#----
#masternodeblsprivkey=
externalip=$(curl icanhazip.com)
#---- comment the following lines if you are not using Tor
proxy=127.0.0.1:9050
torcontrol=127.0.0.1:9051
#----
testnet=1

[test]
port=19999
rpcport=19998
bind=0.0.0.0
rpcbind=0.0.0.0
EOF
Optionally replace the rpcuser and rpcpassword fields with your
own values. Leave the masternodeblsprivkey field commented out for
now. Configure Dash Core to start as a service:
cat << EOF | sudo tee /etc/systemd/system/dashd.service
[Unit]
Description=Dash Core
After=syslog.target network-online.target

[Service]
Type=forking
User=dash
Group=dash
ExecStart=/usr/local/bin/dashd
TimeoutStartSec=10m
ExecStop=/usr/local/bin/dash-cli stop
SyslogIdentifier=dashd
TimeoutStopSec=120
RestartSec=120

[Install]
WantedBy=multi-user.target
EOF
Start Dash Core:
sudo systemctl daemon-reload
sudo systemctl enable dashd
sudo systemctl start dashd
Verify Dash Core is running:
sudo systemctl status dashd
Use the following command to monitor sync status:
dash-cli mnsync status
Cuando se completa la sincronización, deberías ver la siguiente respuesta:
{
  "AssetID": 999,
  "AssetName": "MASTERNODE_SYNC_FINISHED",
  "AssetStartTime": 1558596597,
  "Attempt": 0,
  "IsBlockchainSynced": true,
  "IsSynced": true,
  "IsFailed": false
}
Platform services#
Next, we will install the Dash Platform services. Start with installing JavaScript dependencies:
cd
curl -o- https://raw.githubusercontent.com/nvm-sh/nvm/v0.39.5/install.sh | bash
source ~/.bashrc
nvm install 20
npm install pm2 -g
Followed by Rust dependencies:
sudo apt install -y build-essential clang cmake curl g++ gcc gnupg2 libgmp-dev libpython3.10-dev libssl-dev libzmq3-dev lsb-release pkg-config
curl --proto '=https' --tlsv1.2 -sSf https://sh.rustup.rs | sh -s -- -y
source "$HOME/.cargo/env"
rustup toolchain install stable
rustup target add wasm32-unknown-unknown --toolchain stable
cargo install -f wasm-bindgen-cli@0.2.86
And Go dependencies:
cd /tmp
wget https://go.dev/dl/go1.19.11.linux-$(dpkg --print-architecture).tar.gz
sudo tar -C /usr/local -xzf go1.19.11.linux-$(dpkg --print-architecture).tar.gz
export PATH=$PATH:/usr/local/go/bin
Drive#
Drive is a replicated state machine for Dash Platform. Download Drive as follows:
git clone --depth 1 --branch master https://github.com/dashpay/platform/
cd platform
corepack enable
yarn install
yarn workspace @dashevo/rs-drive build
yarn workspace @dashevo/wasm-dpp build
yarn workspaces focus --production @dashevo/drive
cp packages/js-drive/.env.example packages/js-drive/.env
Configure Drive:
sed -i 's/^CORE_JSON_RPC_PASSWORD.*/CORE_JSON_RPC_PASSWORD=password/' packages/js-drive/.env
sed -i 's/^CORE_JSON_RPC_PORT.*/CORE_JSON_RPC_PORT=19998/' packages/js-drive/.env
sed -i 's/^CORE_JSON_RPC_USERNAME.*/CORE_JSON_RPC_USERNAME=dashrpc/' packages/js-drive/.env
sed -i 's/^INITIAL_CORE_CHAINLOCKED_HEIGHT.*/INITIAL_CORE_CHAINLOCKED_HEIGHT=854281/' packages/js-drive/.env
sed -i 's/^VALIDATOR_SET_LLMQ_TYPE.*/VALIDATOR_SET_LLMQ_TYPE=6/' packages/js-drive/.env
sed -i 's/^DASHPAY_MASTER_PUBLIC_KEY=.*/DASHPAY_MASTER_PUBLIC_KEY=02d4dcce3f0a8d2936ce26df4d255fd2835b629b73eea39d4b2778096b91e77946/' packages/js-drive/.env
sed -i 's/^DASHPAY_SECOND_PUBLIC_KEY=.*/DASHPAY_SECOND_PUBLIC_KEY=03699c8b4ebf1696c92e9ec605a02a38f6f9cec47d13fb584fdad779e936e20ccb/' packages/js-drive/.env
sed -i 's/^DPNS_MASTER_PUBLIC_KEY=.*/DPNS_MASTER_PUBLIC_KEY=02c8b4747b528cac5fddf7a6cc63702ee04ed7d1332904e08510343ea00dce546a/' packages/js-drive/.env
sed -i 's/^DPNS_SECOND_PUBLIC_KEY=.*/DPNS_SECOND_PUBLIC_KEY=0201ee28f84f5485390567e939c2b586010b63a69ec92cab535dc96a8c71913602/' packages/js-drive/.env
sed -i 's/^FEATURE_FLAGS_MASTER_PUBLIC_KEY=.*/FEATURE_FLAGS_MASTER_PUBLIC_KEY=029cf2232549de08c114c19763309cb067688e21e310ac07458b59c2c026be7234/' packages/js-drive/.env
sed -i 's/^FEATURE_FLAGS_SECOND_PUBLIC_KEY=.*/FEATURE_FLAGS_SECOND_PUBLIC_KEY=02a2abb50c03ae9f778f08a93849ba334a82e625153720dd5ef14e564b78b414e5/' packages/js-drive/.env
sed -i 's/^MASTERNODE_REWARD_SHARES_MASTER_PUBLIC_KEY=.*/MASTERNODE_REWARD_SHARES_MASTER_PUBLIC_KEY=0319d795c0795bc8678bd0e58cfc7a4ad75c8e1797537728e7e8de8b9acc2bae2b/' packages/js-drive/.env
sed -i 's/^MASTERNODE_REWARD_SHARES_SECOND_PUBLIC_KEY=.*/MASTERNODE_REWARD_SHARES_SECOND_PUBLIC_KEY=033756572938aaad752158b858ad38511c6edff4c79cf8462f70baa25fc6e8a616/' packages/js-drive/.env
sed -i 's/^WITHDRAWALS_MASTER_PUBLIC_KEY=.*/WITHDRAWALS_MASTER_PUBLIC_KEY=032f79d1d9d6e652599d3315d30306b1277fbf588e32e383aef0a59749547d47b7/' packages/js-drive/.env
sed -i 's/^WITHDRAWALS_SECOND_PUBLIC_KEY=.*/WITHDRAWALS_SECOND_PUBLIC_KEY=03eebbe3dc3721603a0b5a13441f214550ffa7d035b7dea9f1911de0f63ddac58d/' packages/js-drive/.env
Start Drive:
pm2 start yarn --name "drive" -- workspace @dashevo/drive abci
Verify Drive is running by checking for a time value under uptime:
pm2 list
Tenderdash#
Tenderdash is a fork of Tendermint and is the blockchain implementation used by Dash Platform. As binaries are not yet published, you will need to build from source. Build and install Tenderdash as follows:
cd
git clone --depth 1 --branch v0.11.3 https://github.com/dashpay/tenderdash
cd tenderdash
make install-bls
make build-linux
sudo install -t /usr/local/bin build/*
Initialize Tenderdash:
tenderdash init full
Several files will be generated in the ~/.tenderdash directory.
Modify the configuration with the following commands:
sed -i 's/\(^moniker.*\)/#\1/' ~/.tenderdash/config/config.toml
sed -i 's/^timeout_commit.*/timeout_commit = "500ms"/' ~/.tenderdash/config/config.toml
sed -i 's/^create_empty_blocks_interval.*/create_empty_blocks_interval = "3m"/' ~/.tenderdash/config/config.toml
sed -i 's/^namespace.*/namespace = "drive_tendermint"/' ~/.tenderdash/config/config.toml
sed -i 's/^bootstrap-peers.*/bootstrap-peers = "74907790a03b51ac062c8a1453dafd72a08668a3@35.92.167.154:36656,2006632eb20e670923d13d4f53abc24468eaad4d@52.12.116.10:36656"/' ~/.tenderdash/config/config.toml
sed -i 's/^core-rpc-host.*/core-rpc-host = "localhost:19998"/' ~/.tenderdash/config/config.toml
curl https://gist.githubusercontent.com/strophy/d8665f30aa7544785439e5973a98a1c5/raw/ab254ae5ff4e176daaf6a53c7448e527fe5800d2/genesis.json > ~/.tenderdash/config/genesis.json
Configure Tenderdash to start as a service:
cat << EOF | sudo tee /etc/systemd/system/tenderdash.service
[Unit]
Description=Tenderdash
After=syslog.target network-online.target

[Service]
User=dash
Group=dash
TimeoutStartSec=10m
TimeoutStopSec=120
RestartSec=120
ExecStart=/usr/local/bin/tenderdash node
SyslogIdentifier=tenderdash

[Install]
WantedBy=multi-user.target
EOF
Ensure Dash Core is fully synced and start Tenderdash:
sudo systemctl daemon-reload
sudo systemctl enable tenderdash
sudo systemctl start tenderdash
Verify Tenderdash is running:
sudo systemctl status tenderdash
DAPI#
DAPI provides masternode services over the JSON RPC and gRPC protocols. Start DAPI as follows:
cd ~/platform
yarn workspaces focus --production @dashevo/dapi
cp packages/dapi/.env.example packages/dapi/.env
Modify the configuration with the following commands:
sed -i 's/^API_JSON_RPC_PORT.*/API_JSON_RPC_PORT=3004/' packages/dapi/.env
sed -i 's/^API_GRPC_PORT.*/API_GRPC_PORT=3005/' packages/dapi/.env
sed -i 's/^TX_FILTER_STREAM_GRPC_PORT.*/TX_FILTER_STREAM_GRPC_PORT=3006/' packages/dapi/.env
sed -i 's/^DASHCORE_RPC_PORT.*/DASHCORE_RPC_PORT=19998/' packages/dapi/.env
sed -i 's/^DASHCORE_ZMQ_PORT.*/DASHCORE_ZMQ_PORT=29998/' packages/dapi/.env
sed -i 's/^DASHCORE_P2P_PORT.*/DASHCORE_P2P_PORT=19999/' packages/dapi/.env
Start DAPI:
pm2 start yarn --name "dapi" -- workspace @dashevo/dapi api
Start the transaction filter stream:
pm2 start yarn --name "dapi" -- workspace @dashevo/dapi core-streams
Envoy#
Envoy is a gRPC service proxy for cloud-native applications. As it is
responsible for TLS termination, you will need to obtain a TLS
certificate for your public IP address before configuring Envoy. You can
do this independently using a provider of your choice, or use ZeroSSL to
obtain a free certificate. Visit https://app.zerossl.com/certificate/new
and enter your public IP address, select HTTP File Upload as the
verification method and then download the auth file. Place the contents
of this file in the /var/www/html/.well-known/pki-validation/
directory with the original filename on your server and serve it using
nginx as follows:
sudo mkdir -p /var/www/html/.well-known/pki-validation/
sudo nano /var/www/html/.well-known/pki-validation/<your_auth_file_name>.txt
sudo apt install -y nginx
Click the link shown in Step 3 of the ZeroSSL interface and verify that
the contents of the auth file are displayed in your browser. Complete
validation in ZeroSSL and download the bundle file in .zip format.
Extract it on your local computer, and copy the contents of the
certificate.crt followed by ca_bundle.crt one after the other
into the bundle file at the following location on the remote node:
sudo nano /etc/ssl/bundle.crt
Then copy the contents of private.key into the following location on
the remote node:
sudo nano /etc/ssl/private.key
Remove nginx and the temporary auth file as follows:
sudo apt -y –purge autoremove nginx sudo rm -rf /var/www/html/.well-known
Install Envoy as follows:
cd /tmp
echo $(uname -m) | grep -q "aarch64" && envoy_arch="aarch_64" || envoy_arch="x86_64"
wget https://github.com/envoyproxy/envoy/releases/download/v1.23.10/envoy-1.23.10-linux-$envoy_arch
sudo install -T envoy-1.23.10-linux-$envoy_arch /usr/local/bin/envoy
Configure Envoy as follows:
sudo mkdir /etc/envoy
curl https://gist.githubusercontent.com/strophy/2716c203d88e77419152f6392623b844/raw/ce7aa360b544621c22587a09e0cf7190fd4a202e/envoy.yaml | sudo tee /etc/envoy/config.yaml
Configure Envoy to start as a service:
cat << EOF | sudo tee -a /etc/systemd/system/envoy.service
[Unit]
Description=Envoy
After=syslog.target network-online.target

[Service]
ExecStart=bash -c '/usr/local/bin/envoy --config-path /etc/envoy/config.yaml | tee'
Restart=always
RestartSec=5
KillMode=mixed
SyslogIdentifier=envoy

[Install]
WantedBy=multi-user.target
EOF
Start Envoy:
sudo systemctl daemon-reload
sudo systemctl enable envoy
sudo systemctl start envoy
Verify Envoy is running:
sudo systemctl status envoy
Finishing up#
Ensure services managed by pm2 start on reboot:
pm2 save
pm2 startup
Copy and paste the resulting command to ensure PM2 restarts processes on boot:
sudo env PATH=$PATH:/home/dash/.nvm/versions/node/v16.20.2/bin /home/dash/.nvm/versions/node/v16.20.2/lib/node_modules/pm2/bin/pm2 startup systemd -u dash --hp /home/dash
En este punto, puedes cerrar la sesión de tu servidor de manera segura escribiendo salir. ¡Felicitaciones! Tu masternode ahora se está ejecutando.
Developer installation#
Developers requiring a local masternode can get started quickly by starting dashmate and providing a private key containing collateral directly. Install dependencies if necessary (Docker, NodeJS, NPM, Github CLI). Windows, macOS and Linux are supported, the following example shows how to install dependencies under Ubuntu 20.04 LTS.:
curl -o- https://raw.githubusercontent.com/nvm-sh/nvm/v0.39.5/install.sh | bash
source ~/.bashrc
nvm install 20
curl -fsSL https://get.docker.com -o get-docker.sh && sh ./get-docker.sh
sudo usermod -aG docker $USER
newgrp docker
Generate a new Dash address for temporary use using this script or the
getnewaddress and dumpprivkey RPC commands in Dash Core in testnet mode. Go to
https://testnet-faucet.dash.org/ and request 1000+ tDash to your new
address using the promo code “masternode”. Then download and initialize
dashmate as follows:
npm install -g dashmate
If you are using Windows, you will need to change the path for two log files. Modify the example below with a log path of your choosing:
dashmate config set platform.drive.abci.log.prettyFile.path C:\Users\strophy\Documents\GitHub\dashmate\testnet-drive-pretty.log
dashmate config set platform.drive.abci.log.jsonFile.path C:\Users\strophy\Documents\GitHub\dashmate\testnet-drive-json.log
Register your masternode on the network as follows:
dashmate setup testnet masternode -p <funding-private-key>
Wait until sync and registration are complete. Then start the masternode:
dashmate start
Your masternode is now providing service on the following local ports:
Core P2P:     19999
Core RPC:     19998
Platform P2P: 26656
Platform RPC: 26657
DAPI:    3000
Note that platform sync will take some time after core sync is complete.
You can monitor progress with dashmate status platform or use dashmate
--help to view other commands.